


 [All photos by BUILD LLC]
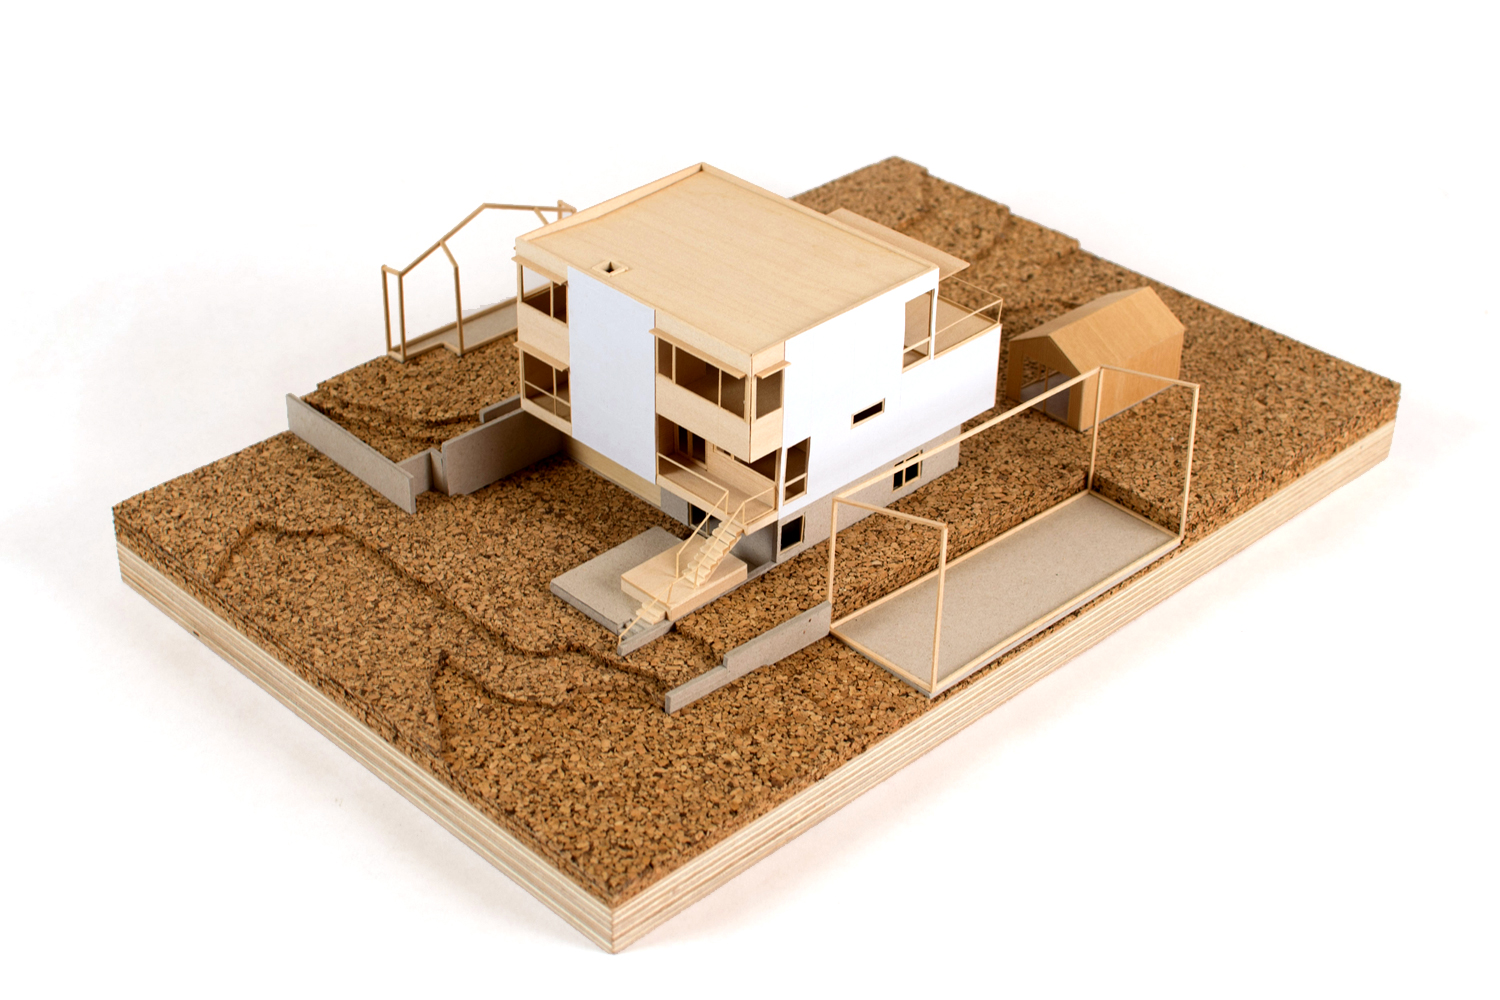
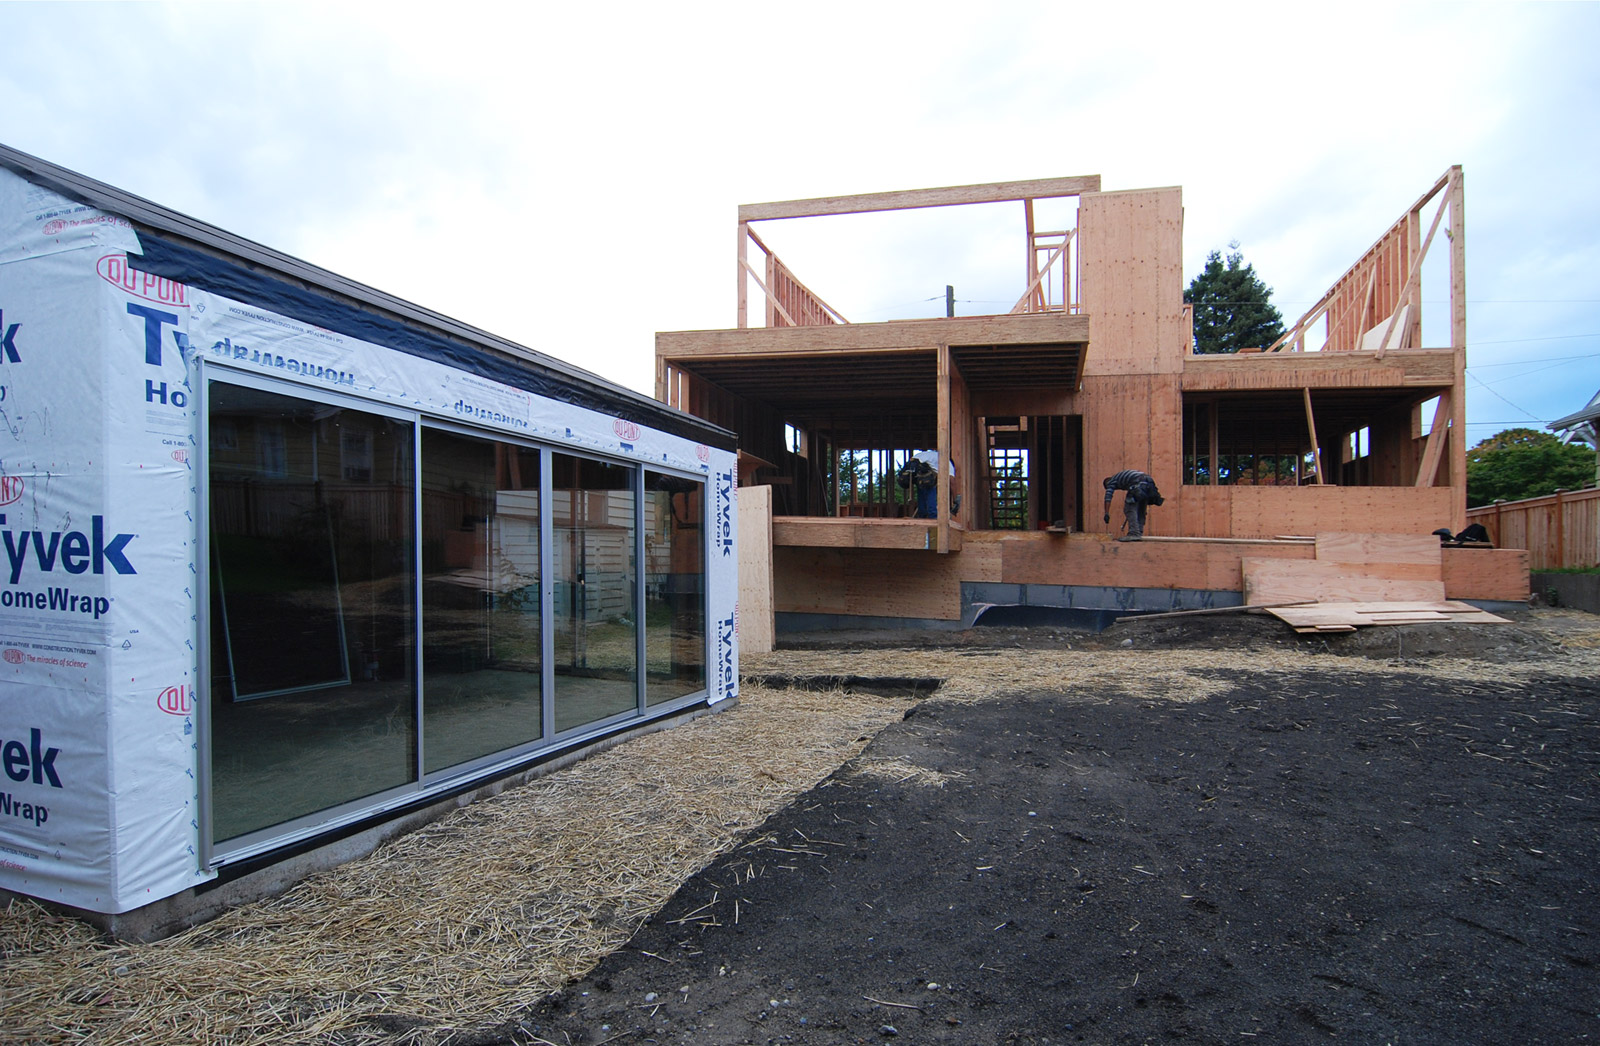
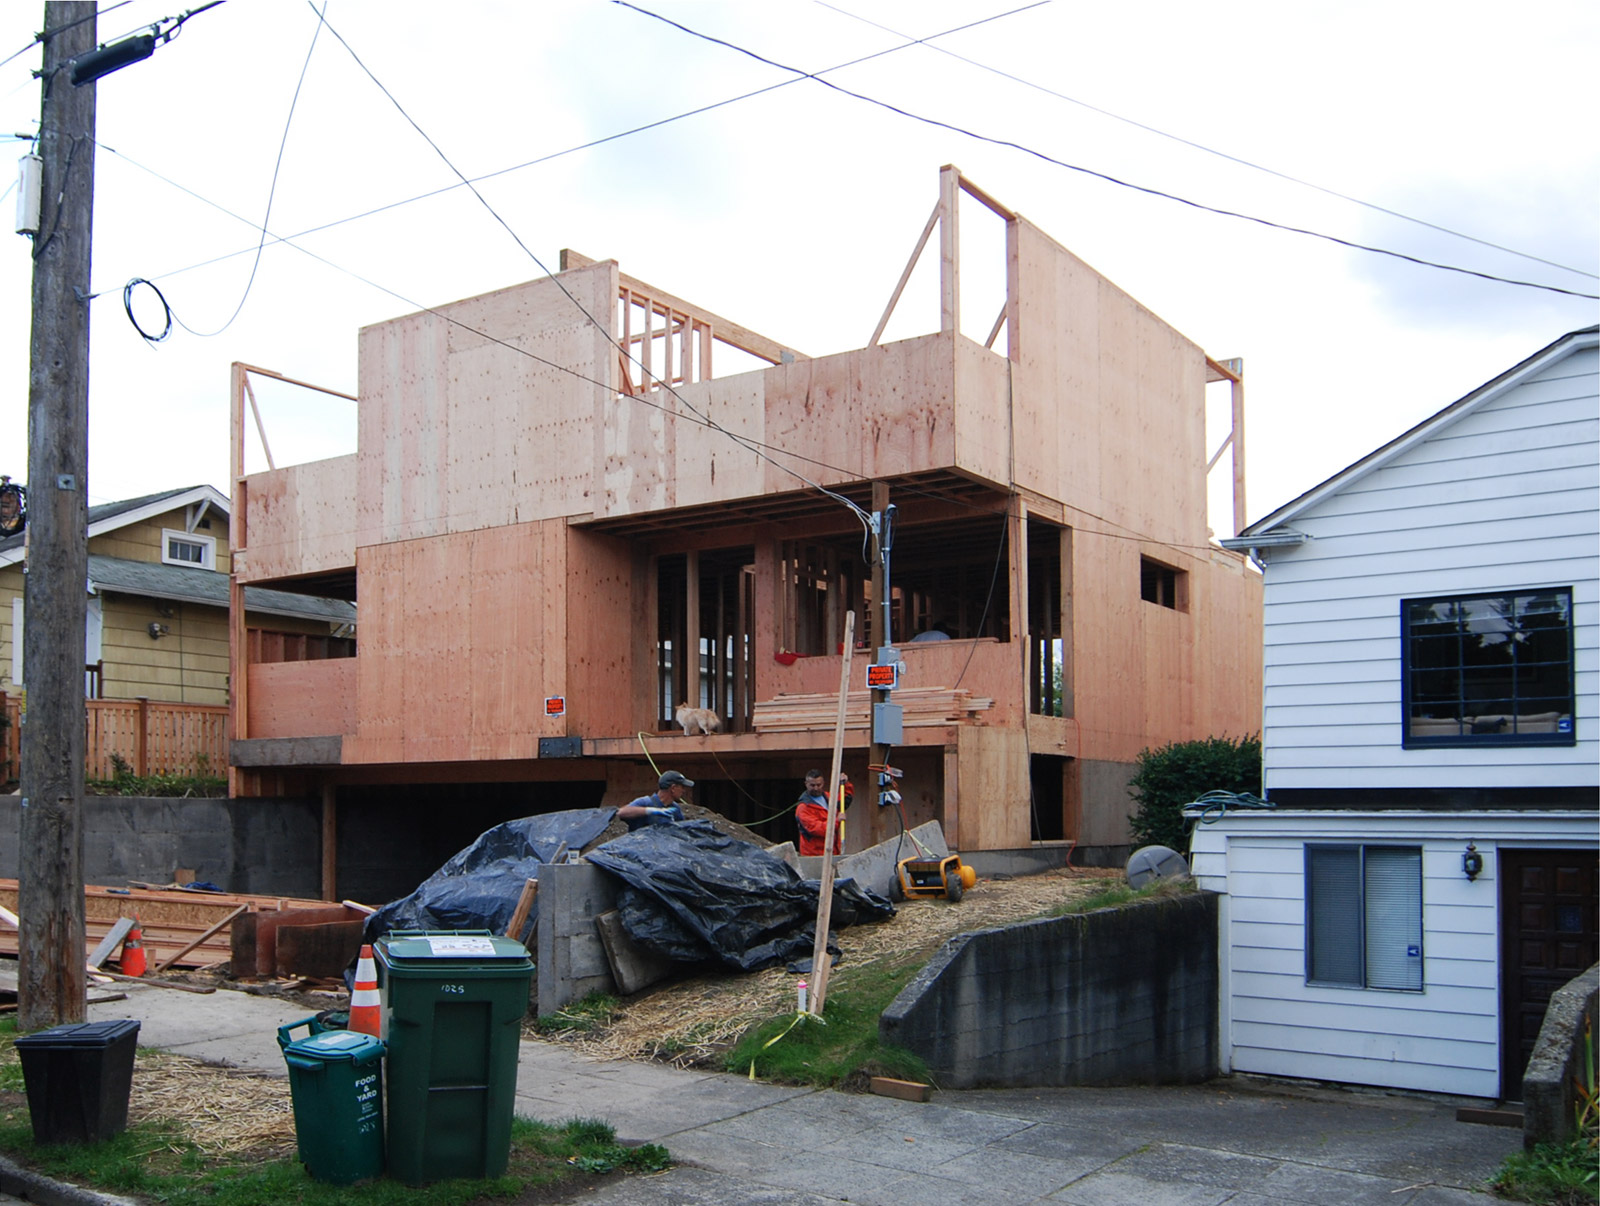
BUILD’s Case Study House 2014 (CSH2014) is now site secure and it’s an excellent time to cover the progress so far, along with what’s next. When a project is site secure, the utilities are installed, (power, water supply, sewer,) the drainage package is done, and the earthwork is complete. It’s a big milestone on a project because the messy part of the project is behind us (especially as we’re entering into the rainy season). We’ve cleared the part of the project that is most fraught with uncertainty, which can be made painfully real in added time and costs. Although we plan carefully, the phases of excavating/ trucking, utility work, and the ever increasing costs in concrete construction can really hammer a project budget. But, we’ve crossed over this difficult terrain relatively unscathed and the framing is nearly complete. Momentum is on our side.

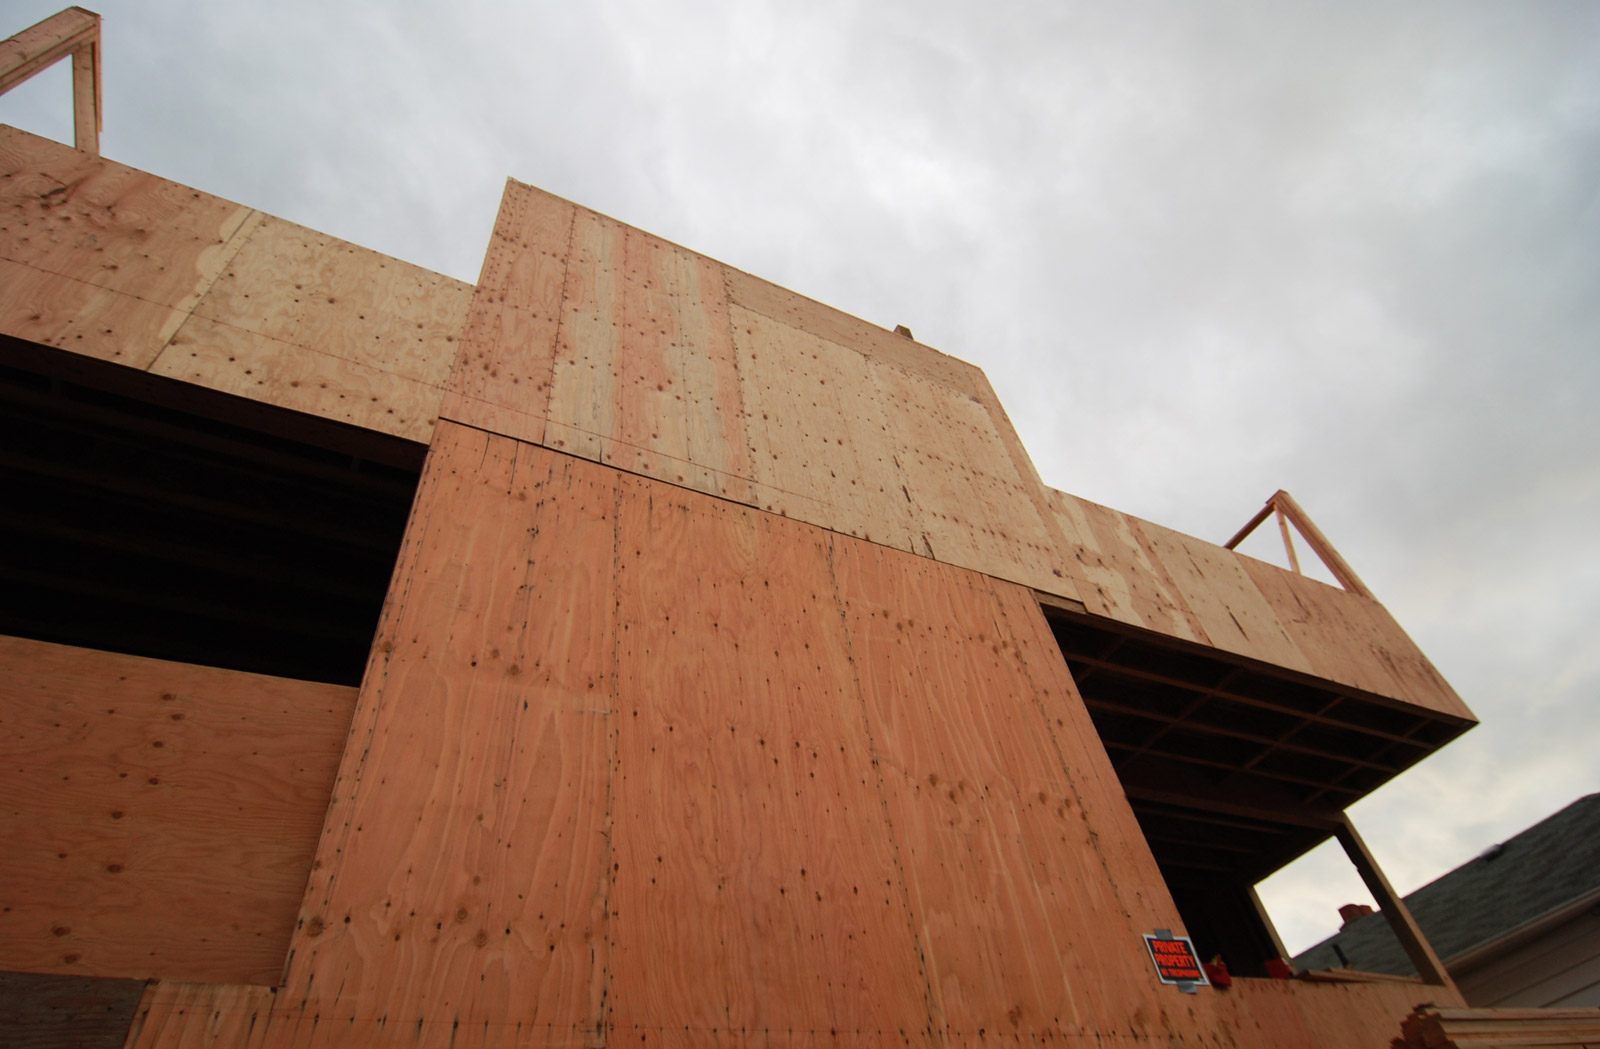
For those of you just tuning into our coverage on the CSH2014, we’ve designed up a highly machined appearance with a warm entry stoop projection. The envelope maximizes windows and transparency to get as much light as possible inside — we’re generally desperate for that sort of thing here in the gray Pacific Northwest. The traditional floor plan has been flipped so that the common areas are located on the top floor, with the more private bedrooms below, and the garage and rec room as a partial basement below that. While it may seem unconventional to use the top floor for living, kitchen, and dining room, we just couldn’t resist the natural light and views from this level. Additionally, a dumbwaiter has been integrated into the design to help move items like groceries from the garage to the kitchen. The inverted program also allows for a roof hatch and ship ladder to access a roof terrace which will supplement summer time drinks and meals with a sweeping view of the city and mountains (not to mention providing accessibility to maintain a green roof). These ideas, and a few others, are being researched and developed in the BUILD laboratory.

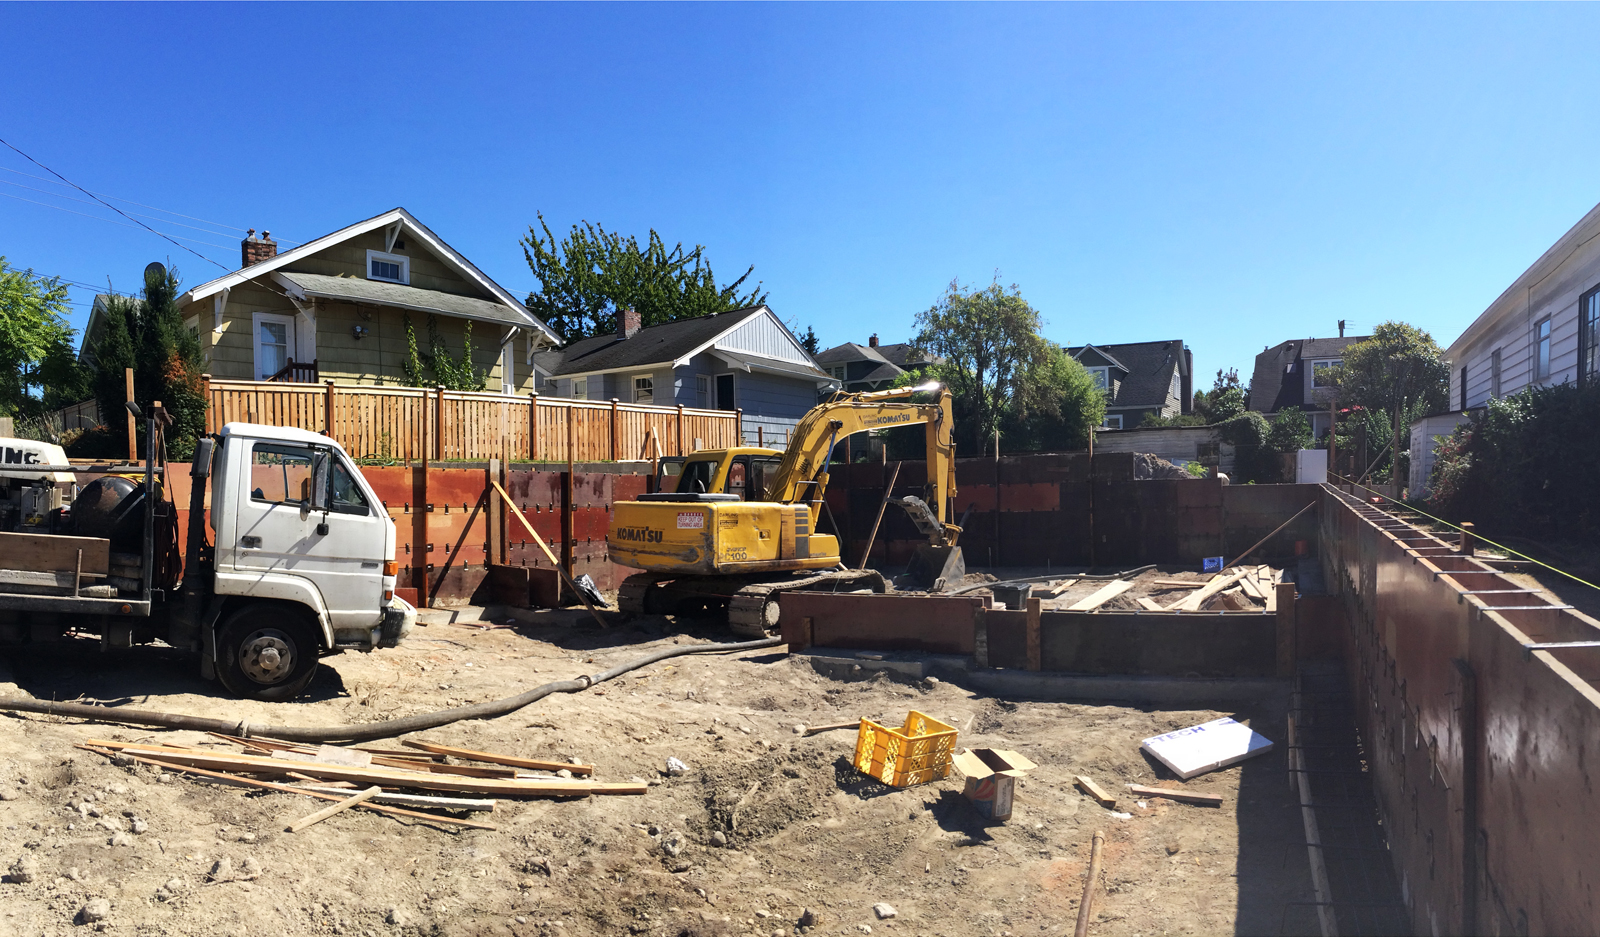
At this point in the project, a tremendous amount of work has been accomplished that, for better or worse, will all be invisible at the end of the project. This includes the demolition of the existing house, all of those new underground utilities, the excavation work for the new home, and the stockpiling of soil for future use. Because this work is unseen at completion, this is all the more reason to review some of these hidden details at this point in the project.
While today’s post covers the specifics of the CSH2014, these challenges and solutions are very typical on projects in and around the Pacific Northwest. Anyone who has built or remodeled a house can take comfort in the fact that all of this is behind them. The material is also a good primer for anyone looking to remodel or build. It’s the real grit of designing and building a home with the tips we’ve gathered from decades of experience.
SEWER LINE & CONNECTION
We uncovered the old sewer and previous sewer connection at the property line and, not surprisingly, the 104 year-old sewer line had some issues. Older sewers were typically constructed of clay pipe sections three to four feet in length and, while the connections overlapped, they weren’t typically sealed or outfitted with a gasket. This means that over time, those hard working tree roots will find a way in between the clay pipe joints. This sewer line was no exception, and three large root-balls from a nearby tree had grown into the line and needed to be drilled through. This process involves snaking the line with a drill to bore out the tree roots, then pressure jetting the line to push the debris out.
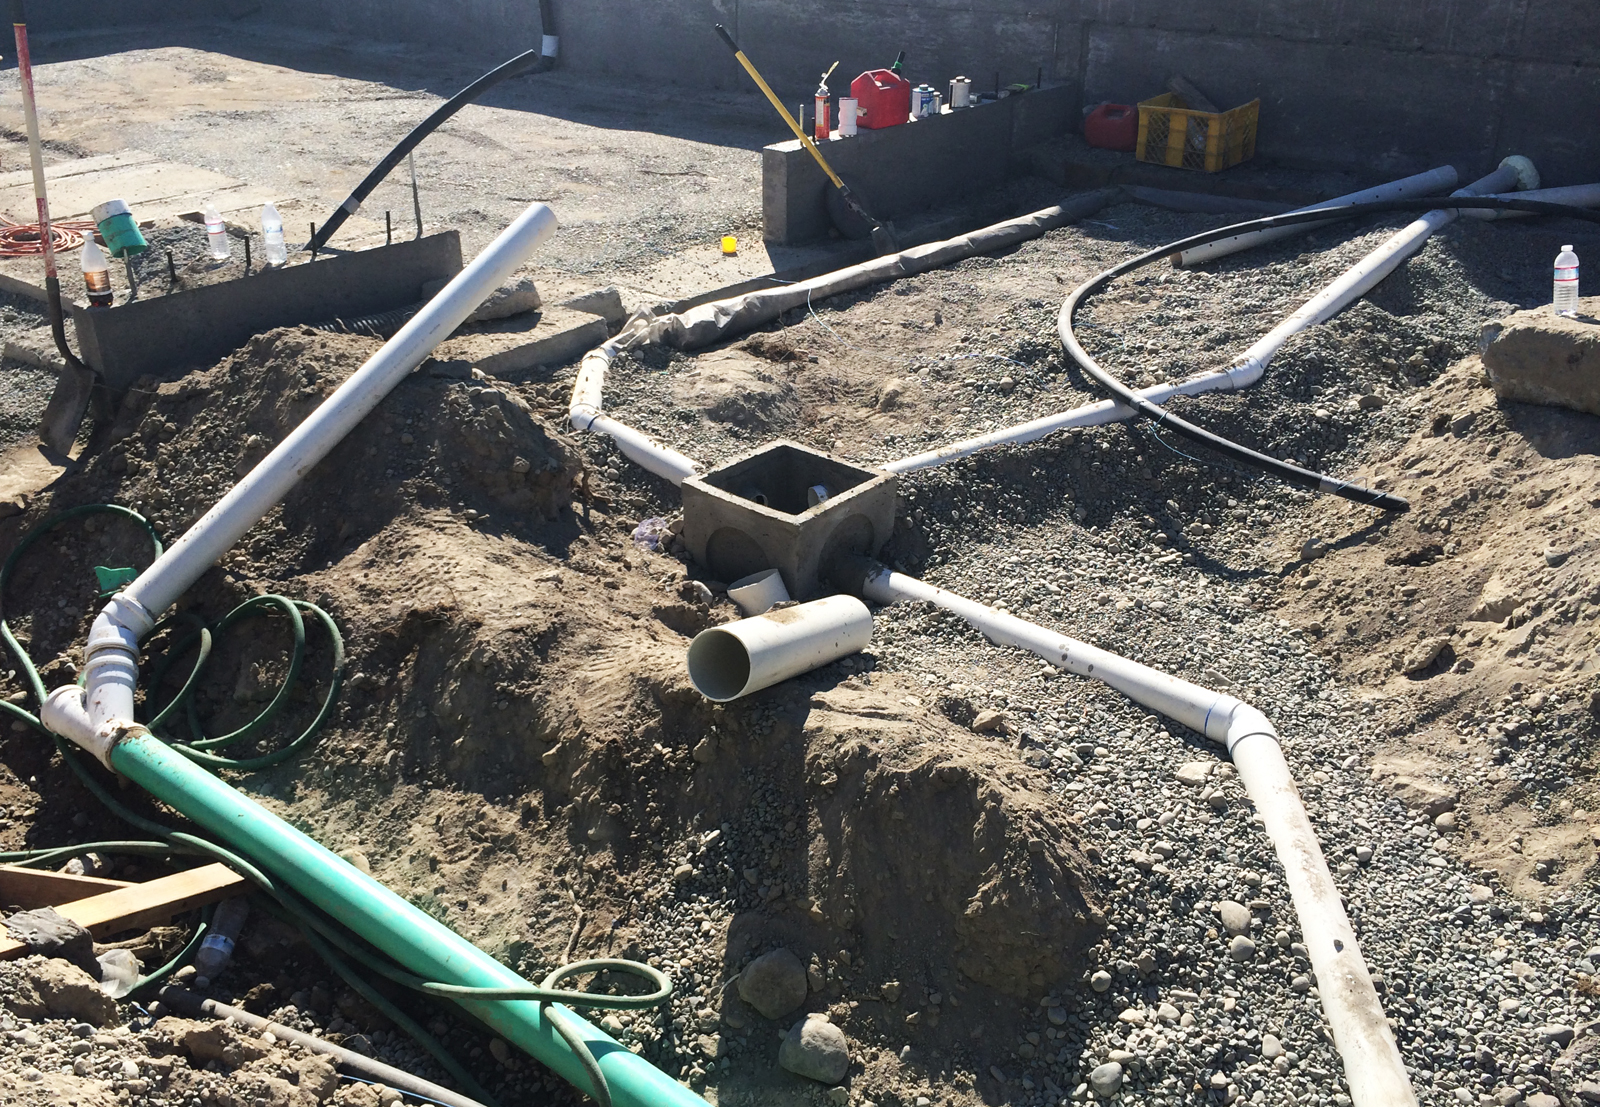
The sewer line presented another challenge in that a section clay pipe near the sewer main previously broke and settled a bit, creating an offset along the line. The sewer contractor performed a remote spot fix: a relatively new technology that uses a deep excavation cut to access the damaged area of the sewer without digging up the street. Using a camera and patch kit, a small section of sewer liner (like a sleeve) was snaked to the location of the break and expanded into place. This sleeve adhered to the old sewer line and set like an epoxy cast, all from the sewer location we had already exposed on site. Following the successful patch, a new liner was shot from the city sewer main to the sewer stub on-site. And just like that, we have a sewer that will be good for another 100 years.
With these repairs completed, we were ready to have the remaining sewer connection to the house hooked up and tested. The footing drains and downspout drains (installed after the foundation and waterproofing work) could then be routed to a catch basin and connected to the sewer.
SUPPLY LINES
A new water line was installed from the existing meter along a route near the sewer connection. Prep work and conduit for the new gas service could then be installed. Finally, conduit for the future electrical line would be ready for install and cover. With all this work, there are numerous inspections by the building department. And under recent changes to the building code, a host of new drainage and Green Stormwater Infrastructure (GSI) inspections are required for managing stormwater on-site. Given the amount of moving parts (inspections and the like), getting to the point of being able to backfill the site and focus on the construction of the house feels like a long journey successfully navigated.
FOUNDATION AND FRAMING
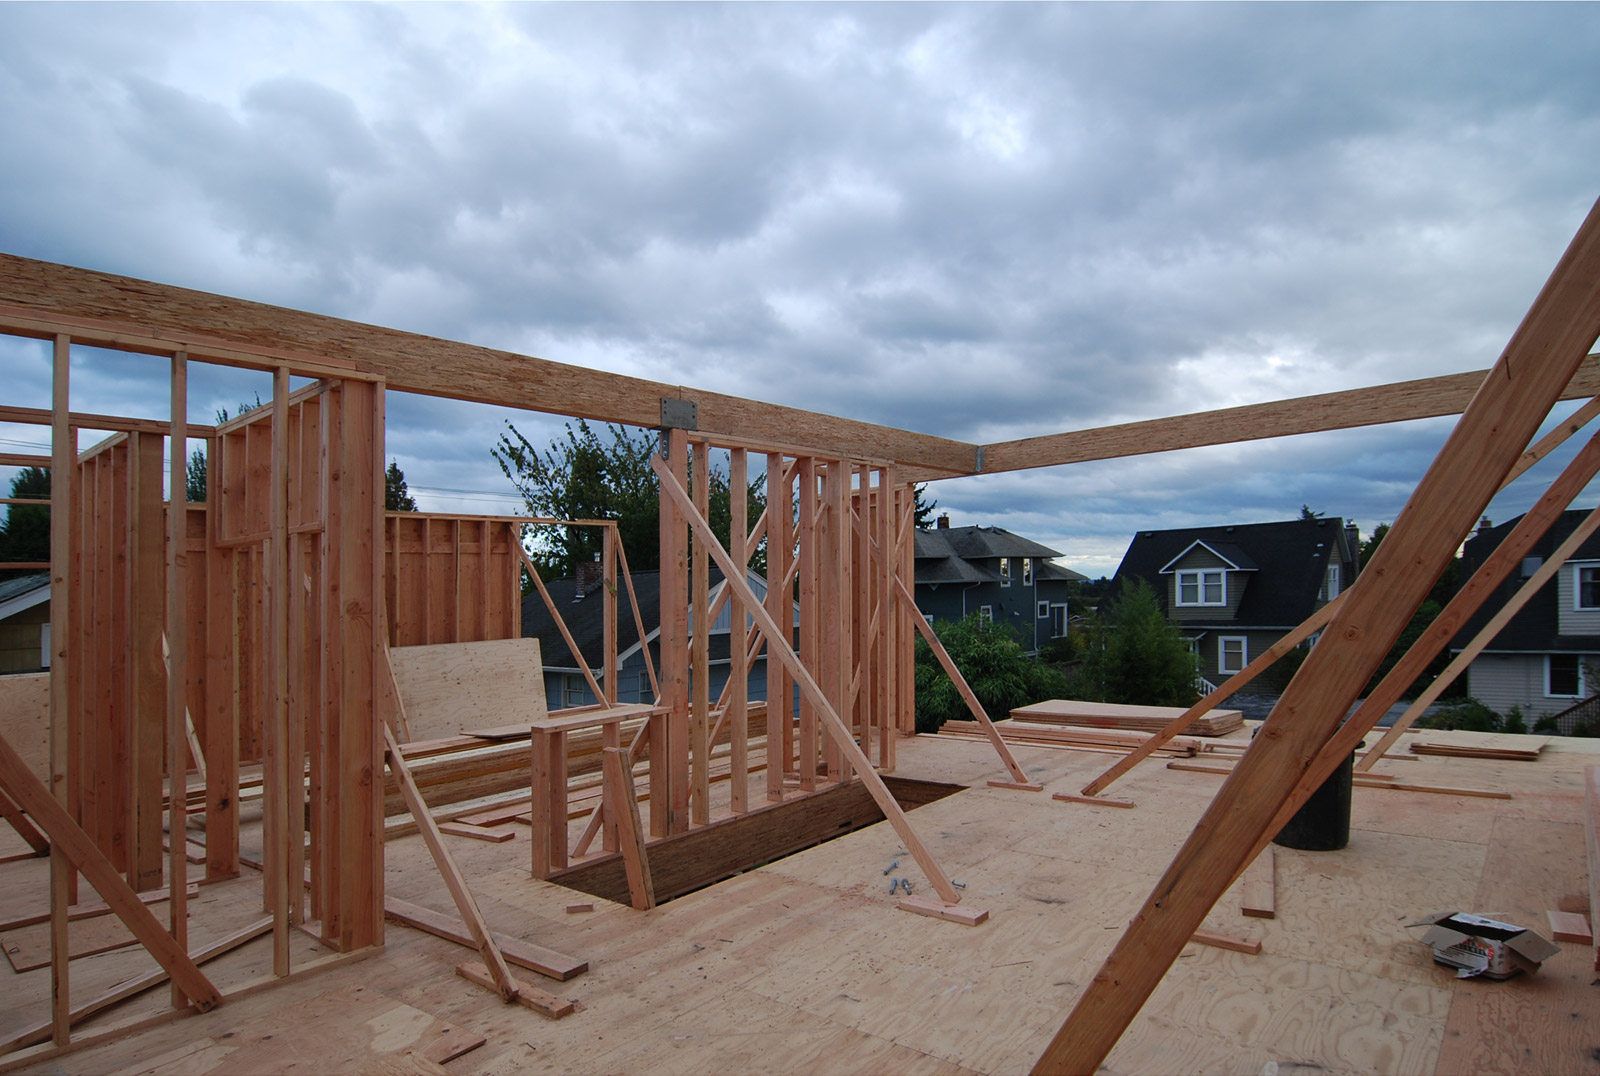
While the sewer line was being repaired and the other utility work was underway, the foundation was poured and the framing progressed far enough that we could confirm window and door sizes. The lead time on the custom glass and door package (manufacturing, assembly, and delivery) is an important critical path component for keeping the project moving along at a reasonable pace. Not to mention that we are attempting to stretch the physical capabilities of our door and window package to optimize the light and view potential of our site.
Keeping a project on schedule is often a strategy of compressing tasks on site and we’re always looking for opportunities to complete smaller tasks while larger items are being sorted-out, constructed, or inspected. As an example, we usually take some time during framing to lay-out the primary cabinetry and furniture on the floor. This allows us to make small modifications in framing that will help with things like lighting lay-out later.
UP NEXT
With the opportunity to roof and dry-in on the immediate horizon, we begin looking more closely at the pending MEP (Mechanical, Electrical, and Plumbing) rough-in, a process that has been refined over the years. Once the roof is on and building reasonably weather protected, we first install the primary electrical devices – can lights, electrical boxes, fans, and block-outs. This takes a couple of days and stakes out ground for these items before plumbing and mechanical lines have a chance to conflict with these lay-outs. With interior dimensions confirmed we can start work on the cabinet shop drawings. Although it’s a bit further out, we also set our sights on the eventual finish work.
AUXILIARY STRUCTURES
While we’ve got all the trades on site for construction of the primary residence, it’s always a good opportunity to tackle some of the smaller, less critical work. These periphery projects can often fill in the gaps and take care of lulls in the schedule (like waiting for inspections). At the CSH2014, we have a remodel of an old garage on site that is being updated to a new silver box. This structure will be used for storage and staging during construction, eventually to be finished out as the family art studio.
NEIGHBOR RELATIONS
On any project (residential ones in particular), an important factor throughout the construction process is neighbor relations. While we have a good track record, this project has proved to be particularly challenging. Neighbor relations at the CSH2014 are a continuous work in progress, kicking off with the single worst start of any of our projects over the past 16 years of business. Not long after we staked the property corners, a next door neighbor was concerned about the legal (and correct) location of the side yard and related property line. Although we had no obligation to do anything more than conform to the City of Seattle’s prescribed 5ft side yard setbacks, we offered to reduce the scale of the home and provide a wider side yard. We also promised to not place a fence tight to the line which would be close to their house and window openings. The house design factored in the mapping of our neighbor’s window pattern to ensure privacy between the two homes as well. We were proactively doing those types of things that a good neighbor would do. However, as the saying goes, no good deed goes unpunished. Following these conversations and concessions, our neighbor, out of the blue, hired an attorney and threatened legal action. While we were finally able to settle through further negotiations, the sad irony was that the written resolution basically prescribed what we had already agreed to verbally, it just cost our neighbor a healthy chunk of time and money in legal fees.
With the agreement in place, we proceeded into construction thinking the worst was behind us; we were meeting other neighbors and making friends. Change is difficult, we understand that. We had to redouble (re-quadruple?!) our efforts to keep a neighbor happy. There was still friction, but ultimately we found our way. Not be cliche, but we understand we are building both a project and relationships.
That concludes the CSH2014 progress to date. To sum up the lessons learned on this phase of the project: always include a healthy contingency for utilities, build in plenty of time for the ever-increasing list of required city inspections, get out ahead of the lead time required for the window and door package, mark out light and cabinet locations, and don’t underestimate the timesink of the un-neighborly neighbor.
Cheers from Team BUILD