[All photos by BUILD LLC]
Cantilevers are a significant feature in modern architecture and they’re a structural maneuver we like to employ when the circumstances are right. Today’s post covers the soon-to-be-completed House and Guesthouse in Magnolia which use cantilevers for a variety of different reasons. We’ll cover each condition and get into the nuts-and-bolts of how each cantilever was achieved.
SOUTHERN CANTILEVERS
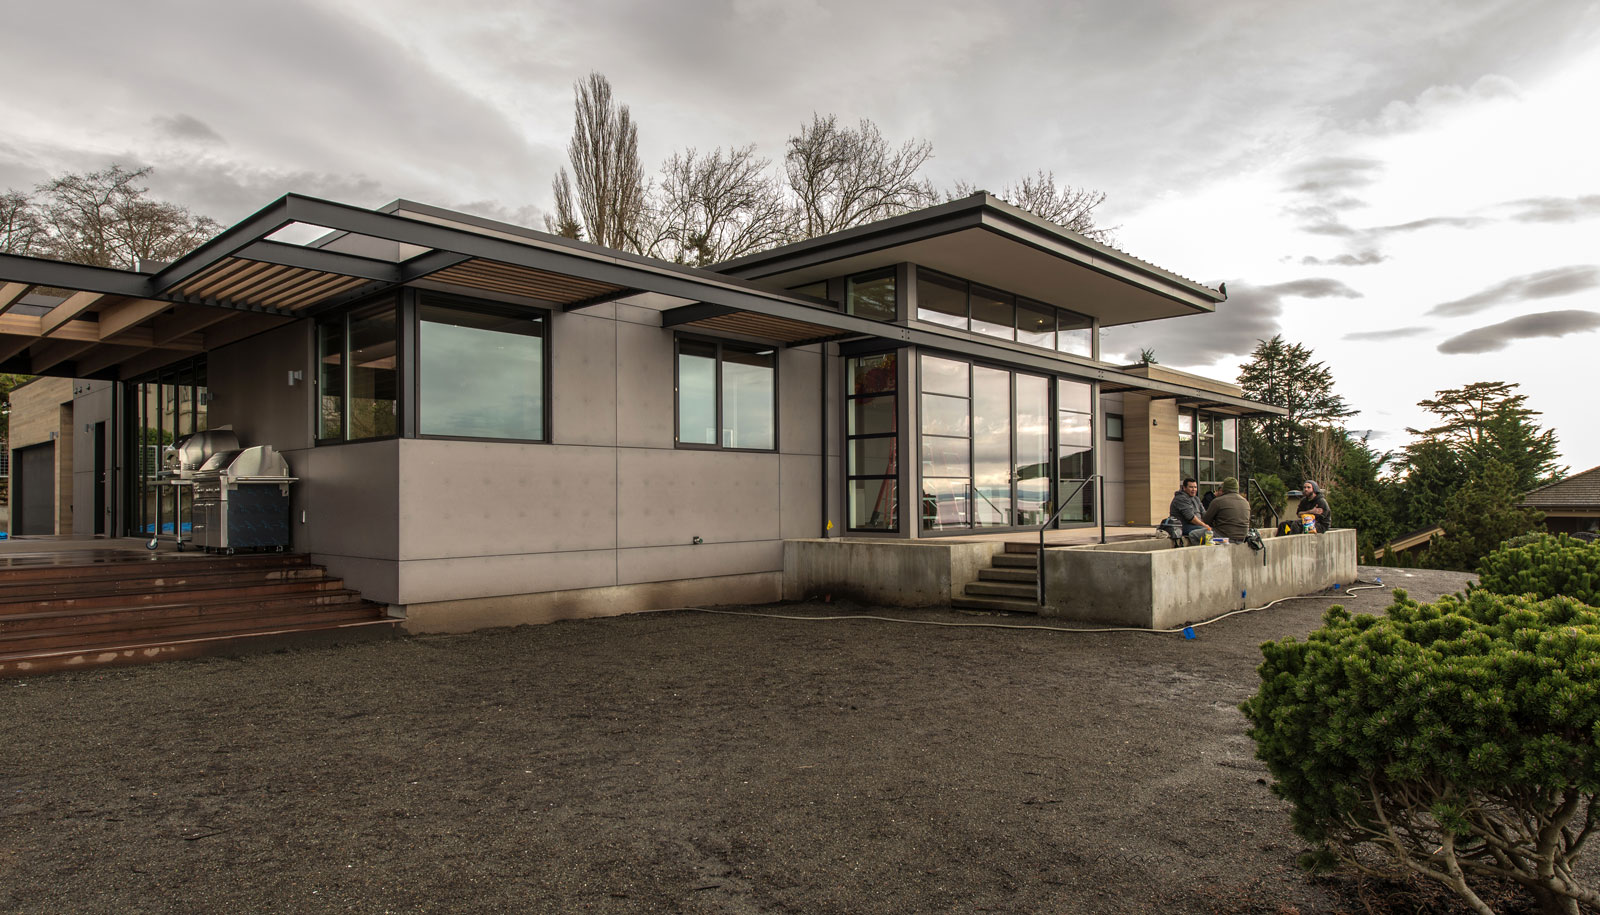
It’s important to point out that the main house uses the existing foundation from the previous structure — a mid-century home that was well worn by the time we found it (but it had good concrete). The reuse worked out well in terms of the footprint and basement functions, however it left the main floor of the home a bit restricted for area. Interior functions, like the bedrooms and office on the south end of the house, needed additional square feet to be practical, and this is where the cantilevers were indispensable. Bringing the living quarters out over the existing footprint 6’-6” allowed us to design a residence with spaces suitable for 21st century living, along with a swath of covered porch for the lower level spaces which open up to the south yard. At the expense of a few steel beams, the cantilever maintains the original footprint while adding some interesting massing and shadow relief to the south elevation. The property is also located on a steep slope, heavily scrutinized by the building department, and maintaining the original footprint kept the permitting process as minimal as possible (although still challenging).
Two mirror image cantilevers were achieved with W10x100 steel wide-flange beams that extend from the basement walls out underneath the bedrooms. The general rule of thumb is that the back-span (the portion of beam supported below) should be twice the distance of the cantilever. The cantilevered beams then extend out to catch a W10x77 steel beam at the perimeter of the cantilever. Because the beams are hefty and expensive, they’re used visually as well as structurally. The profile of each beam is painted and exposed where a rim-joist would typically be located, giving the cantilevered boxes an articulated base.
UPPER ROOF CANTILEVERS
The extended roof eaves at both the main residence and the guesthouse keep the rain off large door systems below and offer a concealed location to sneak in the roof venting. Both roofs also highlight the predominant volume of each structure; the dining room of the main residence and the atrium of the guesthouse. The exaggerated cantilevers establish an important visual hierarchy and lend a helpful drama to the compositions.
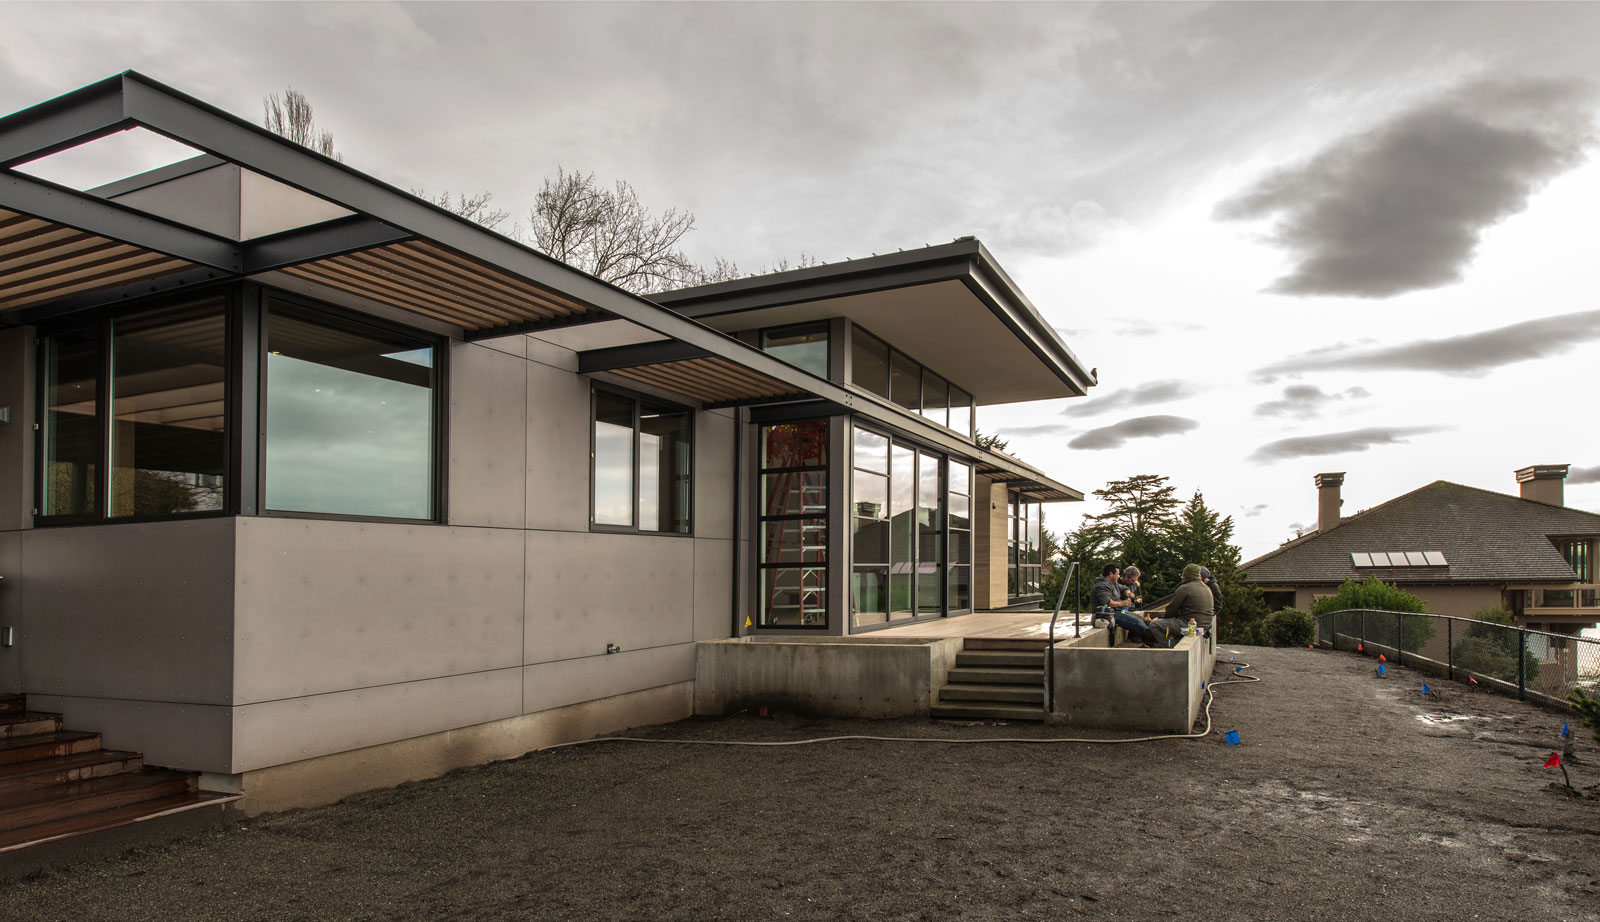
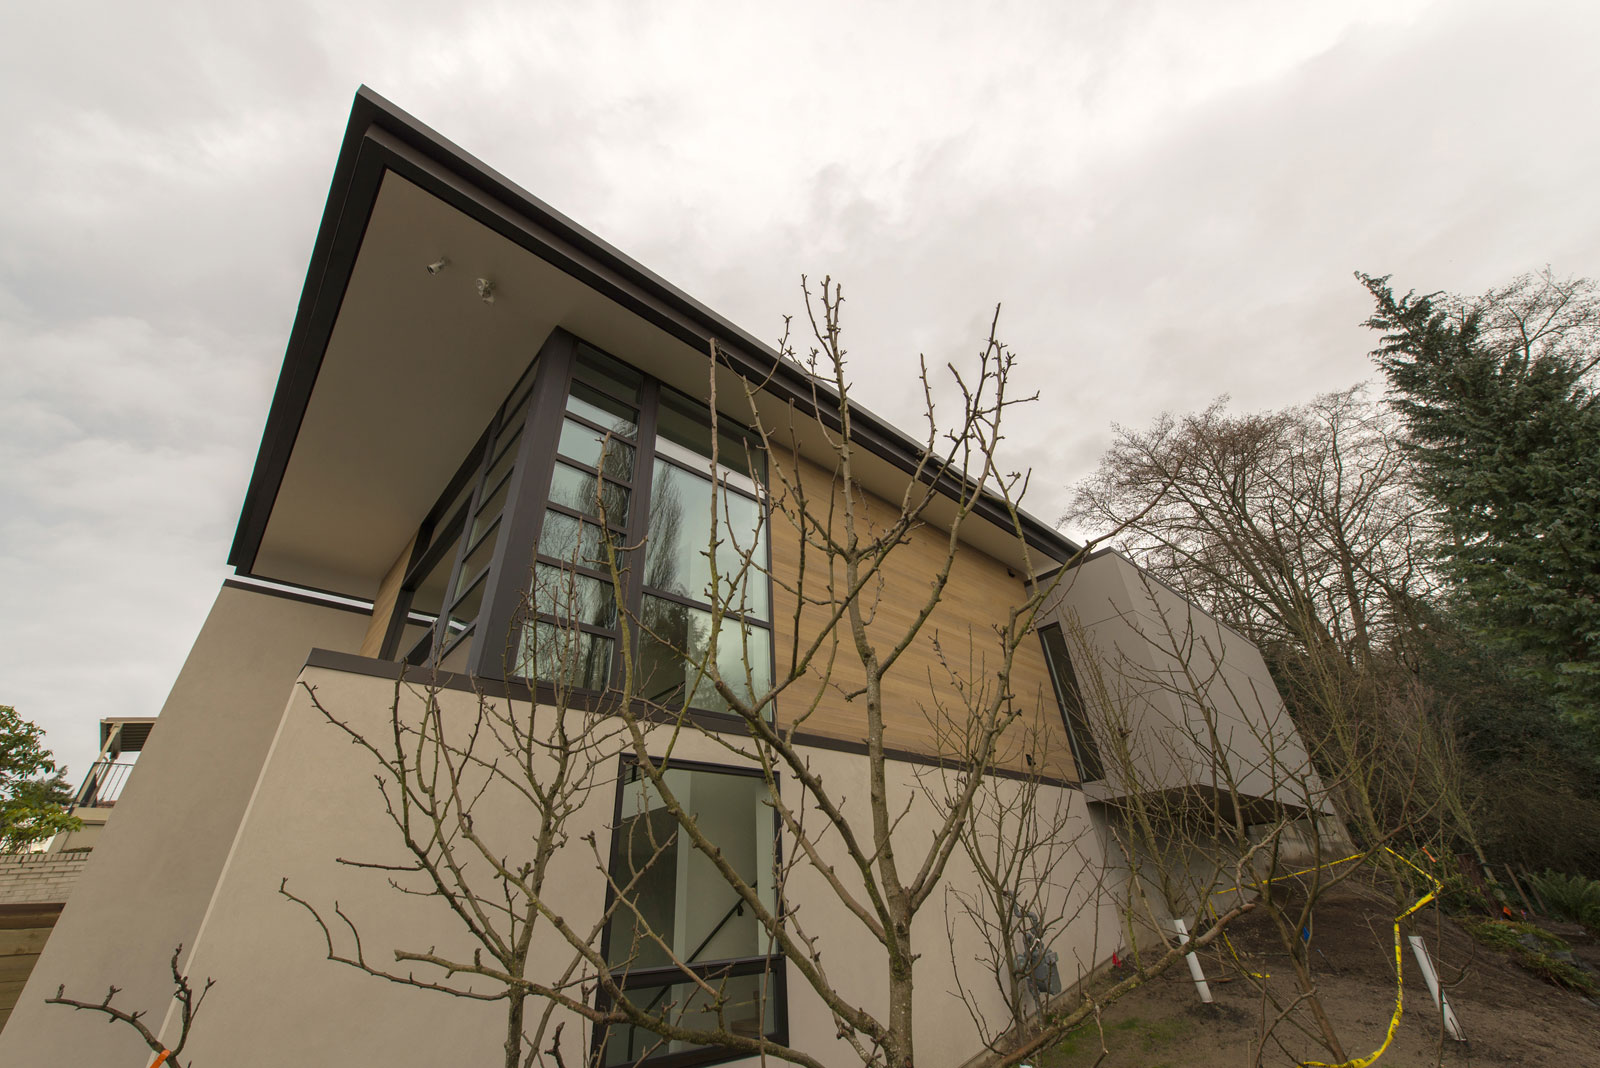
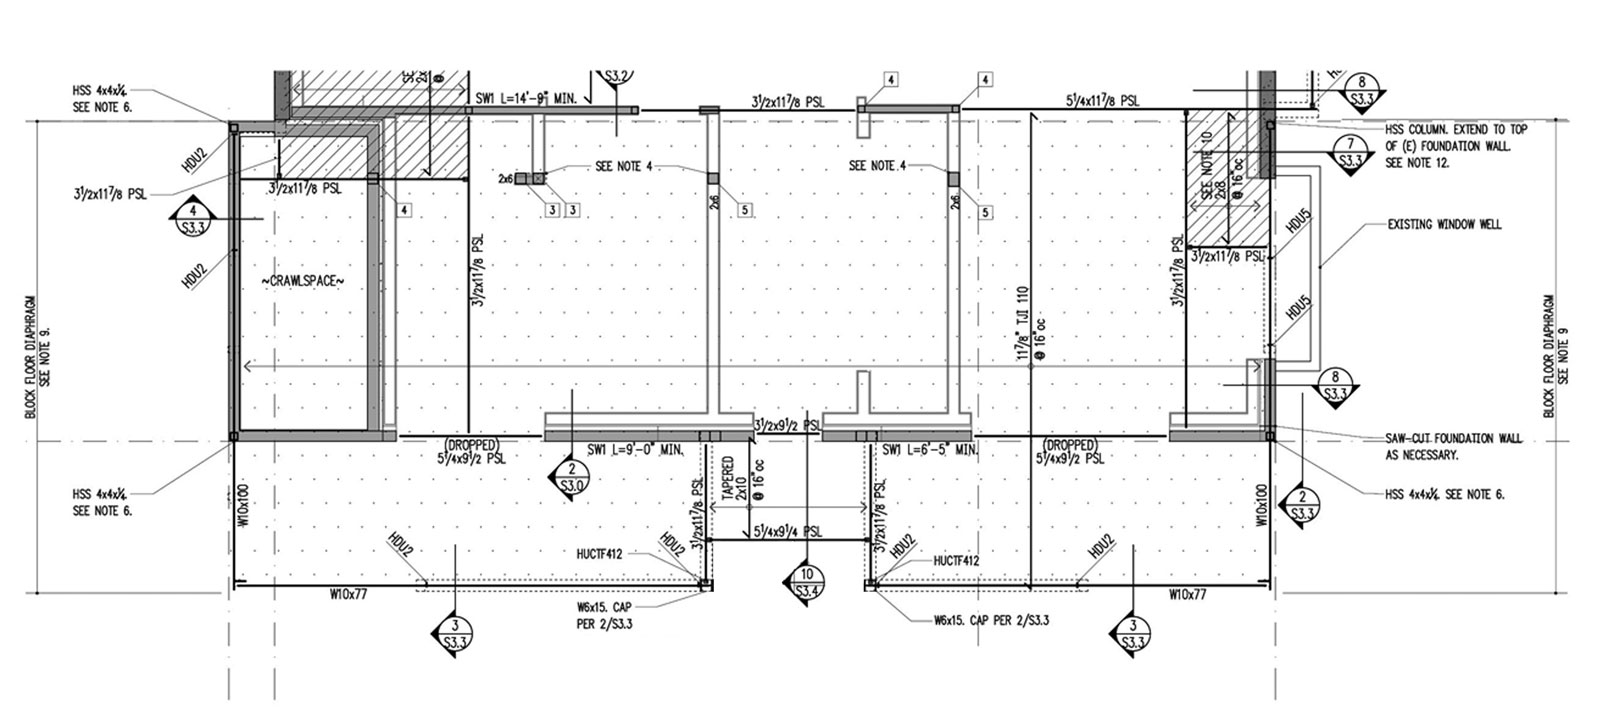
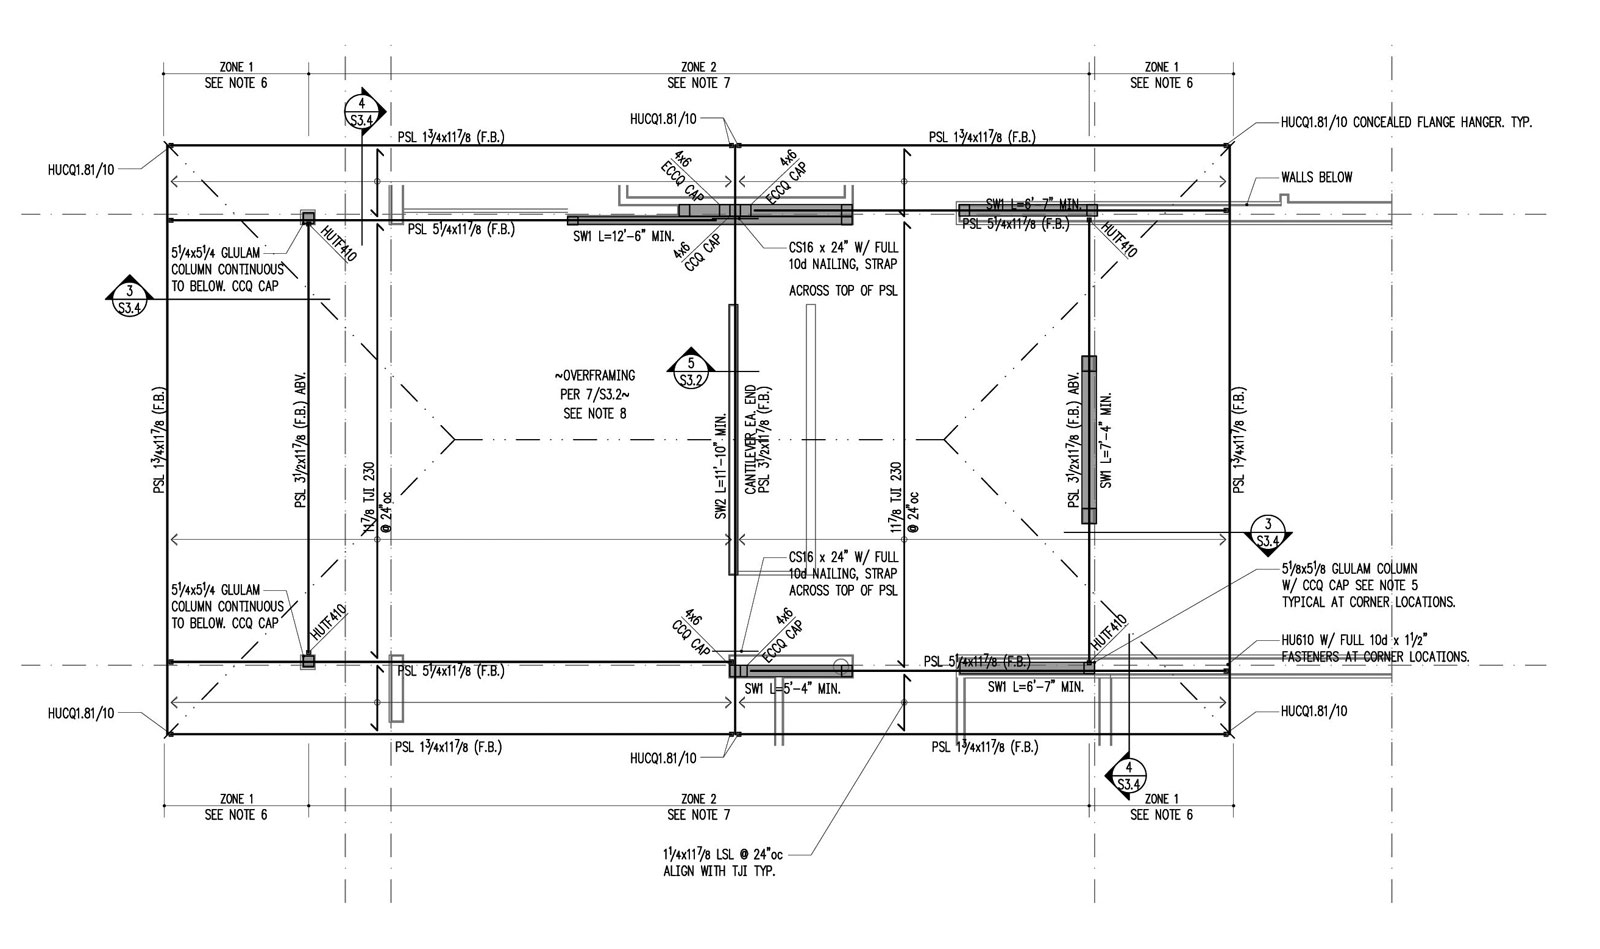
Each cantilever is approximately 6’-0” and is achieved with PSL 5-1/4” x 11-7/8” flush mounted beams which sit on 5-1/4” square glue-lam columns and extend out to catch a PSL 1-3/4” x 11-7/8” rim joist. This rim joist hangs off the cantilevered beams and becomes a cantilever itself for 3’-0” on each side as indicated in the structural plan below. This allows the primary beams to sit squarely over the columns while the entire assembly stays within the same plane. While the kit-of-parts for this assembly is relatively simple, the construction coordination requires extra effort.
SUNSHADE CANTILEVER
A datum line continues along the entirety of the main house, bringing a horizontal orientation to the elevations and visually connecting the various volumes and materials. Striking at 9 feet above the finished floor level, the datum line provides depth at walls and sunshade above windows. Its depth ranges between 3’ to 5’ depending on the push and pull of the volumes it intersects.
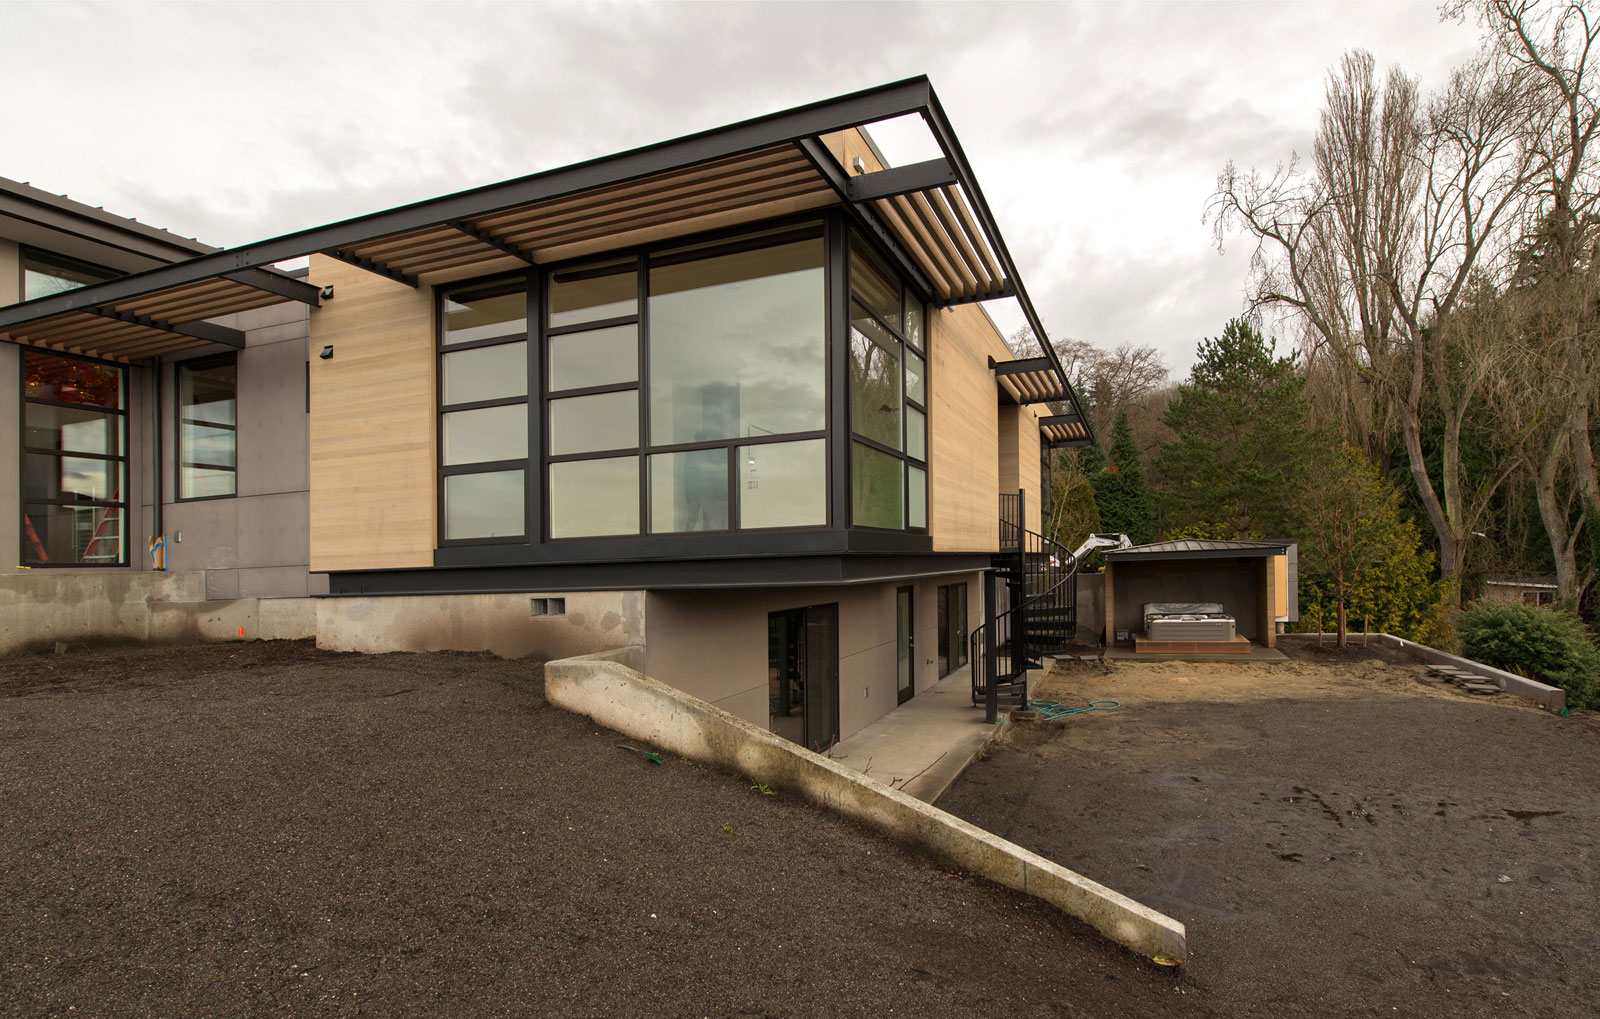
The primary component of the sunshade is a C8 x 11.5” steel channel at the perimeter as well as the cantilevered supports running back into the roof framing. The perimeter channel is attached to the cantilevered channel by means of a shear tab which can be mechanically connected in the field. The channels then run back into the roof framing and attach to 14” deep PSL beams with thru-bolts.
PAVILION CANTILEVER
A small pavilion structure houses an outdoor hot tub on the property and the cantilevered roof was designed to allow maximum circulation, a relationship to the main structures, and unimpeded views toward Puget Sound and Olympic Mountains due west. The cantilever extends out a full 8’-6” and maintains the cohesive visual language of the sunshades on the main residence.
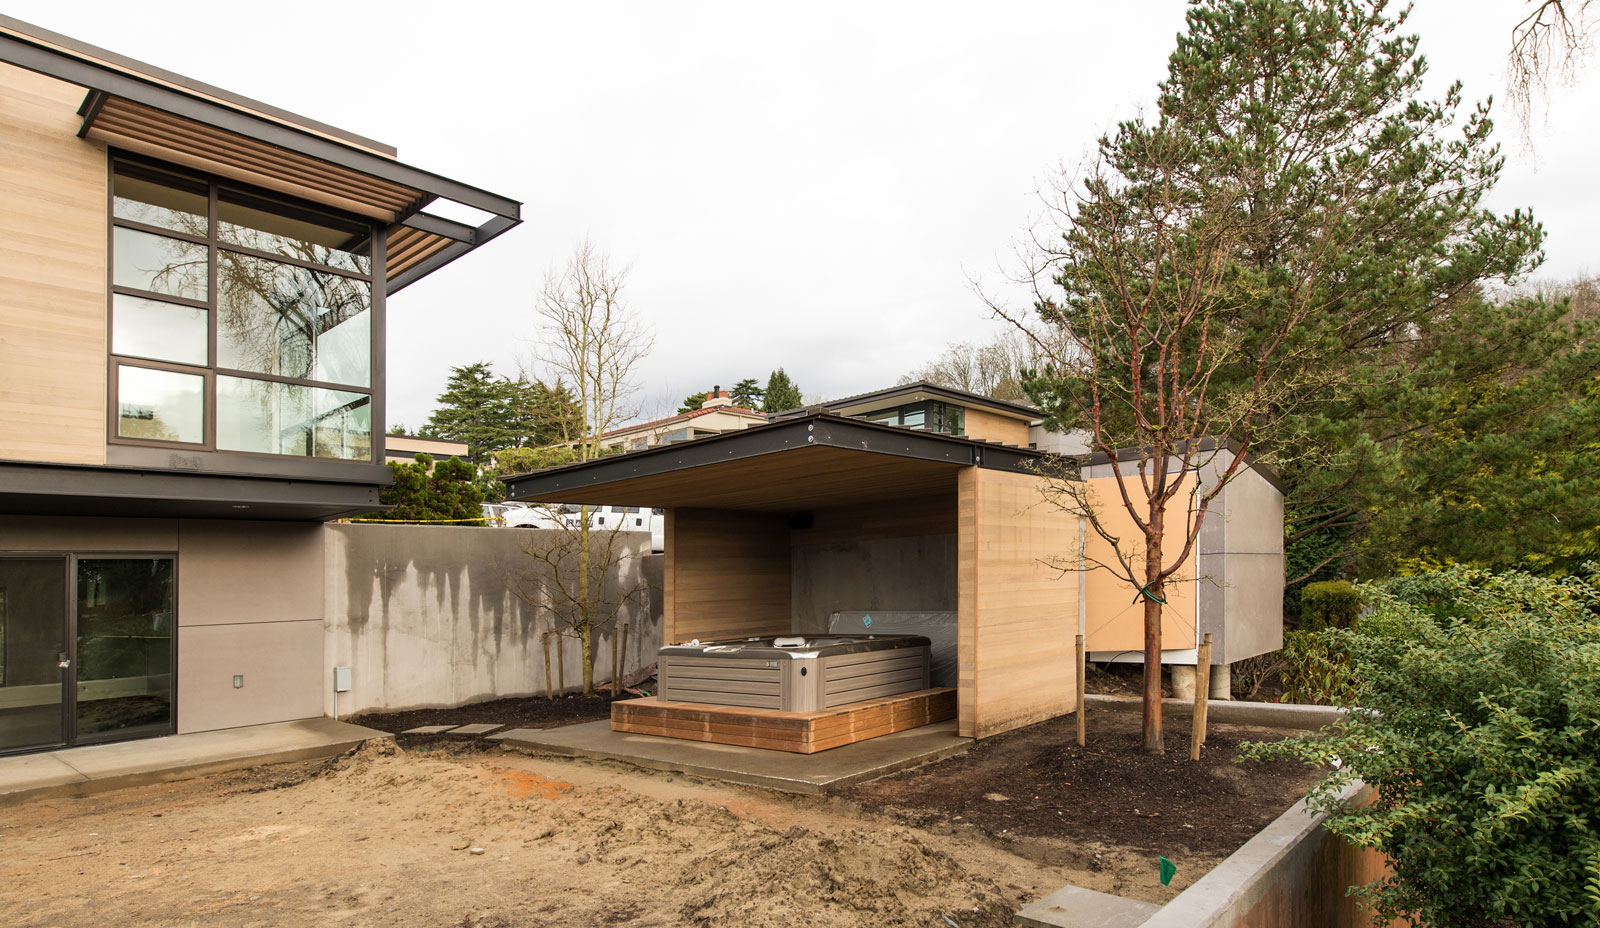
The pavilion’s plan didn’t allow for a 2/3rds back-span to 1/3rd cantilever ratio (mentioned above), so the steel channels in this case have additional structural attachments to accommodate the increased potential for uplift. The roof structure and potential live-loads are also relatively small in proportion to the beefy steel cantilevered beams in this application.
GARAGE CANTILEVER
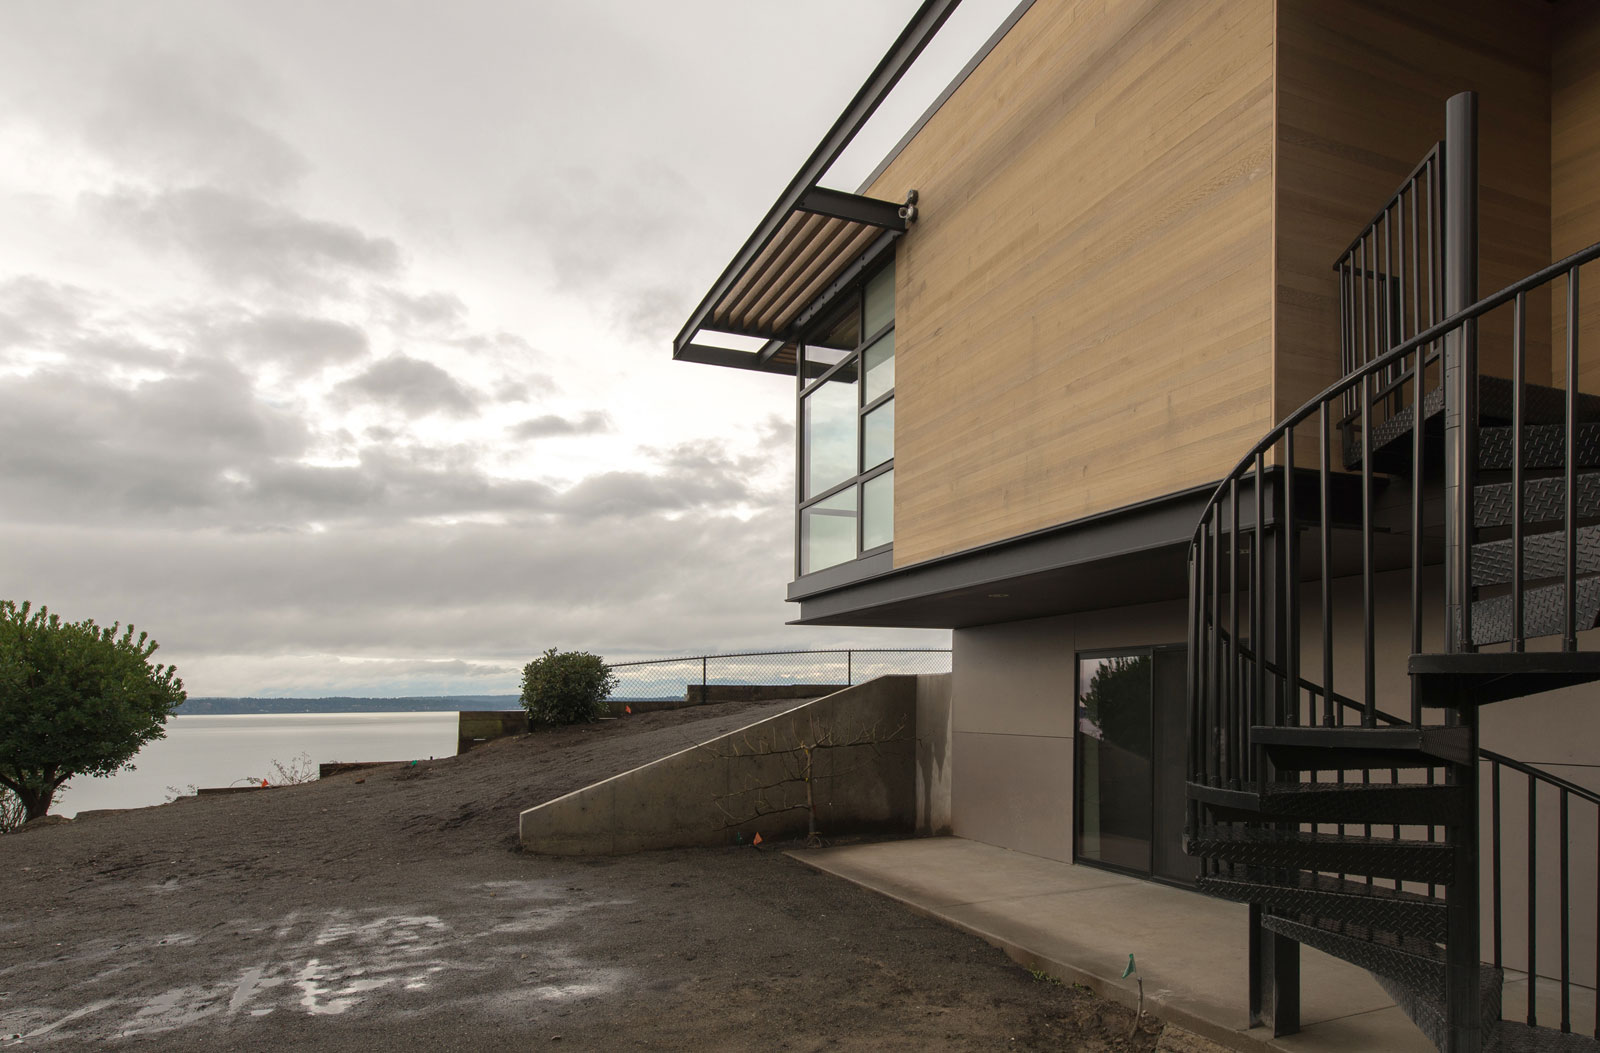
The guesthouse was entirely new construction on an empty lot, and because of the steeply sloped lot, its footprint was a delicate balance between usable interior area and the required site excavation. The wider the footprint of the guesthouse becomes, the deeper the foundation needs to be in order to stay an adequate distance below the grade as you proceed down the hill. It’s an equation of decreasing returns when you consider the cost of excavating and pouring footings/foundation on a steep slope. We were quick to find an efficient equilibrium for the living spaces, however the two car garage and storage needs within this tidy structure called for additional width. Here again, a cantilever offered a functional solution while bringing depth and visual interest to the massing.
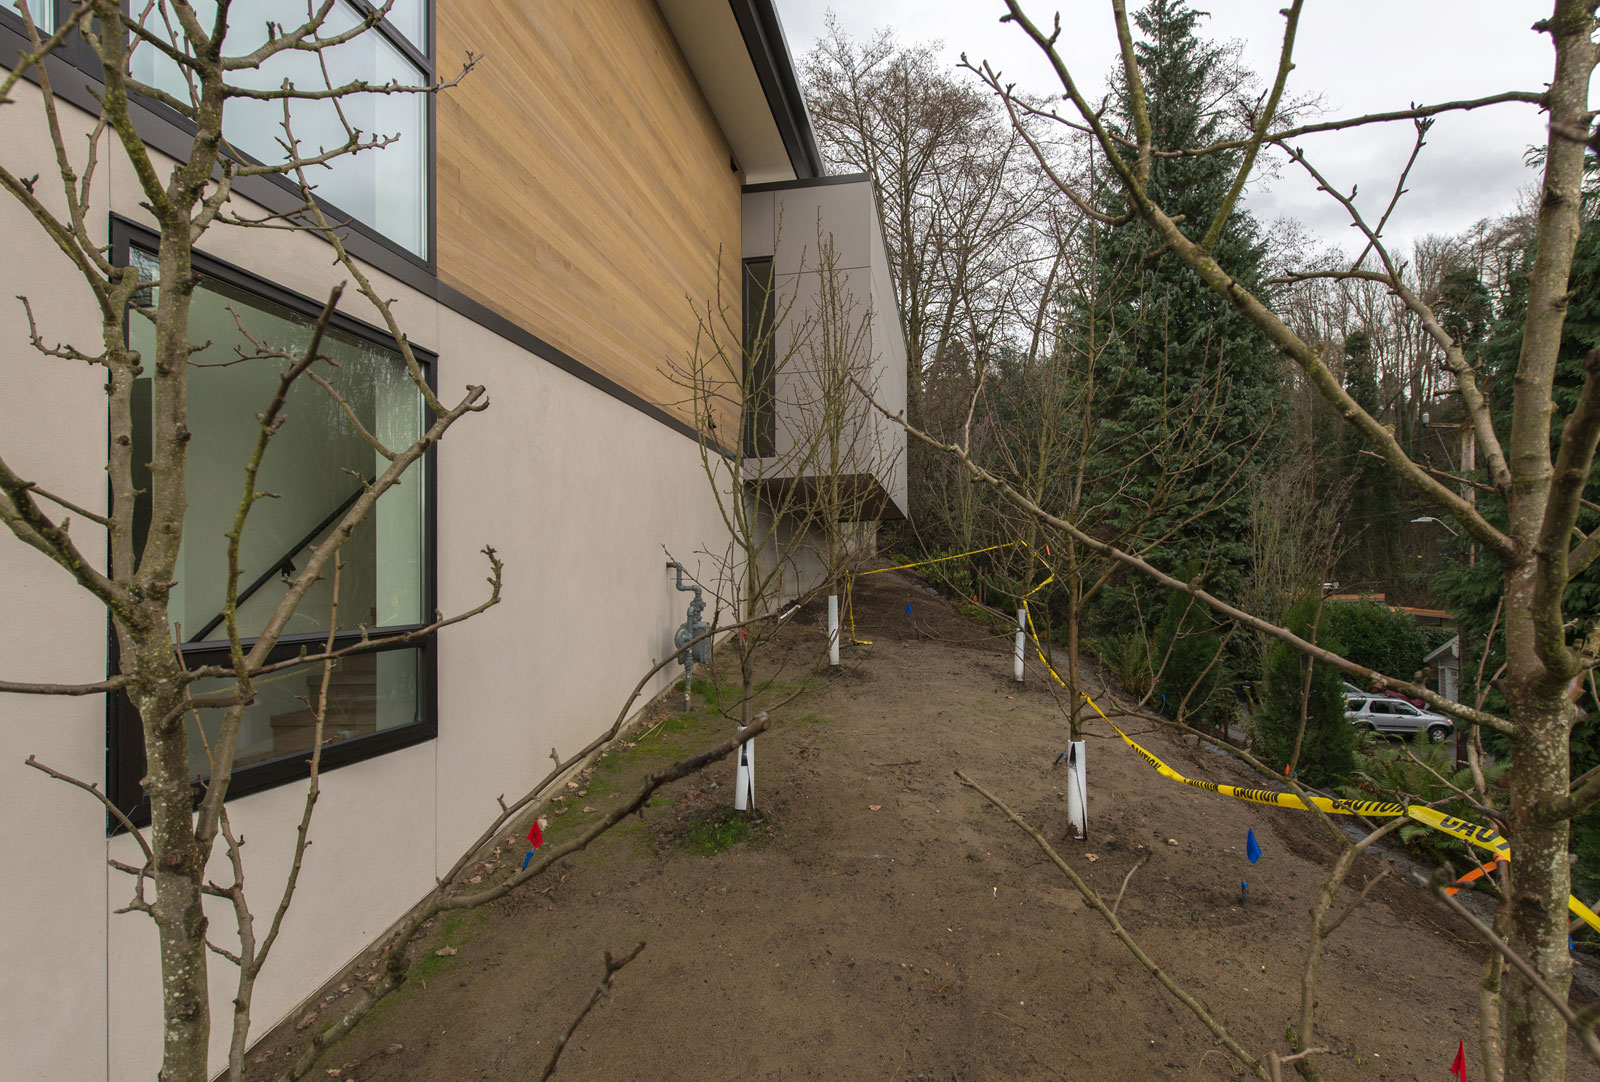
The 4’-9” garage cantilever is an extension of the concrete garage slab reinforced with additional steel rebar for the increased tension and compression at the cantilevered portion of the slab. The exterior cement board siding is then brought down to conceal the slab edge. A simple slot window was added to provide articulation between the two volumes and to offer what is the best ocean and mountain view we’ve ever seen from a garage.
Stay tuned for additional technical and design posts as we complete the construction of the House and Guesthouse.
Cheers from Team BUILD


