


[All photos by BUILD LLC]
There are several important roles that base provides in a house. Regardless of what the wall is finished with, the base is usually made of a more durable material, typically a solid wood either stained, sealed or painted; this provides a solid kick at the bottom of the wall for shoes, vacuum cleaners, and your kid’s toys to bounce off of without leaving much of a mark. Base gives the carpenters and floor installers a bit of margin to bring their respective materials together (about ½” with modern details). In the case of a hardwood floor, the gap also allows the flooring material to expand and contract a bit over the years. It acts like a scribe to the floor, subtly making up for any fluctuations that may exist over the course of the floor. Last but not least, base creates a visual grounding of the wall and helps give the room proportion. Traditionally, there were other reasons for base (like covering up the large gaps between materials, or seeing how much time you could spend creating ornament with a chisel) but we’re all about the modernism here.
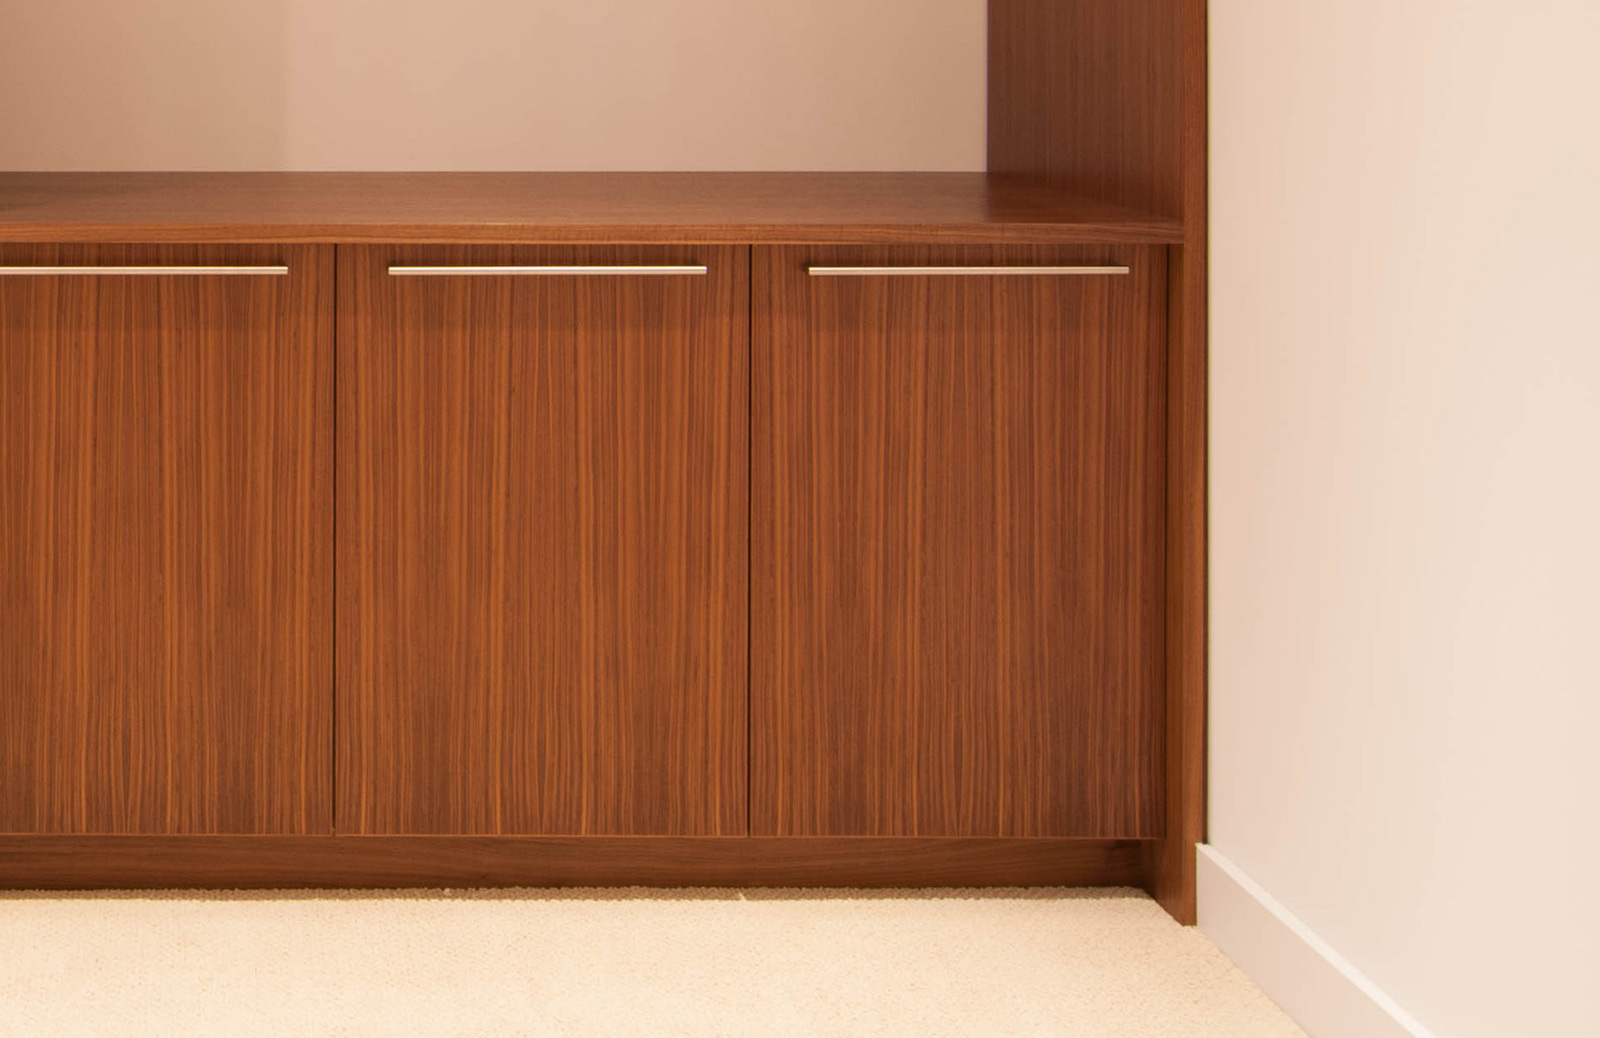
We covered three different modern base details in a previous post a while back. Since then, we’ve embraced the flush base detail more and more. Having originally spotted the detail in museums and galleries, we’ve worked hard over the years to make it practical and cost-effective on our residential projects. Within a straight run of wall, the detail is relatively simple: a 3½” x 5/8” thick board of poplar, MDF or other paint grade material is set in flush with the wall, scribed to the floor and separated from the gypsum wall board above with a 5/8” reveal. The challenges with this detail come into play when the base runs into another element or terminates. With base that sits proud of the wall the exercise is easier – it usually just stops as in the detail below where the 3 ½” x 5/8” painted poplar base simply bumps into the cabinet and ends.
Because flush base is more particular and refined, it requires more consideration at transitions. What happens when the base meets a stairway? Does the base follow the line of the stair orthogonally, diagonally, or does it just stop? What about when it hits a door or window? We’ve been asking ourselves about the modern protocols of base for years. We’ve also been experimenting with a handful of different solutions and today’s post covers some of our favorites. These are just the ones that we’ve had success with. There are many others out there.
STAIR APPLICATIONS
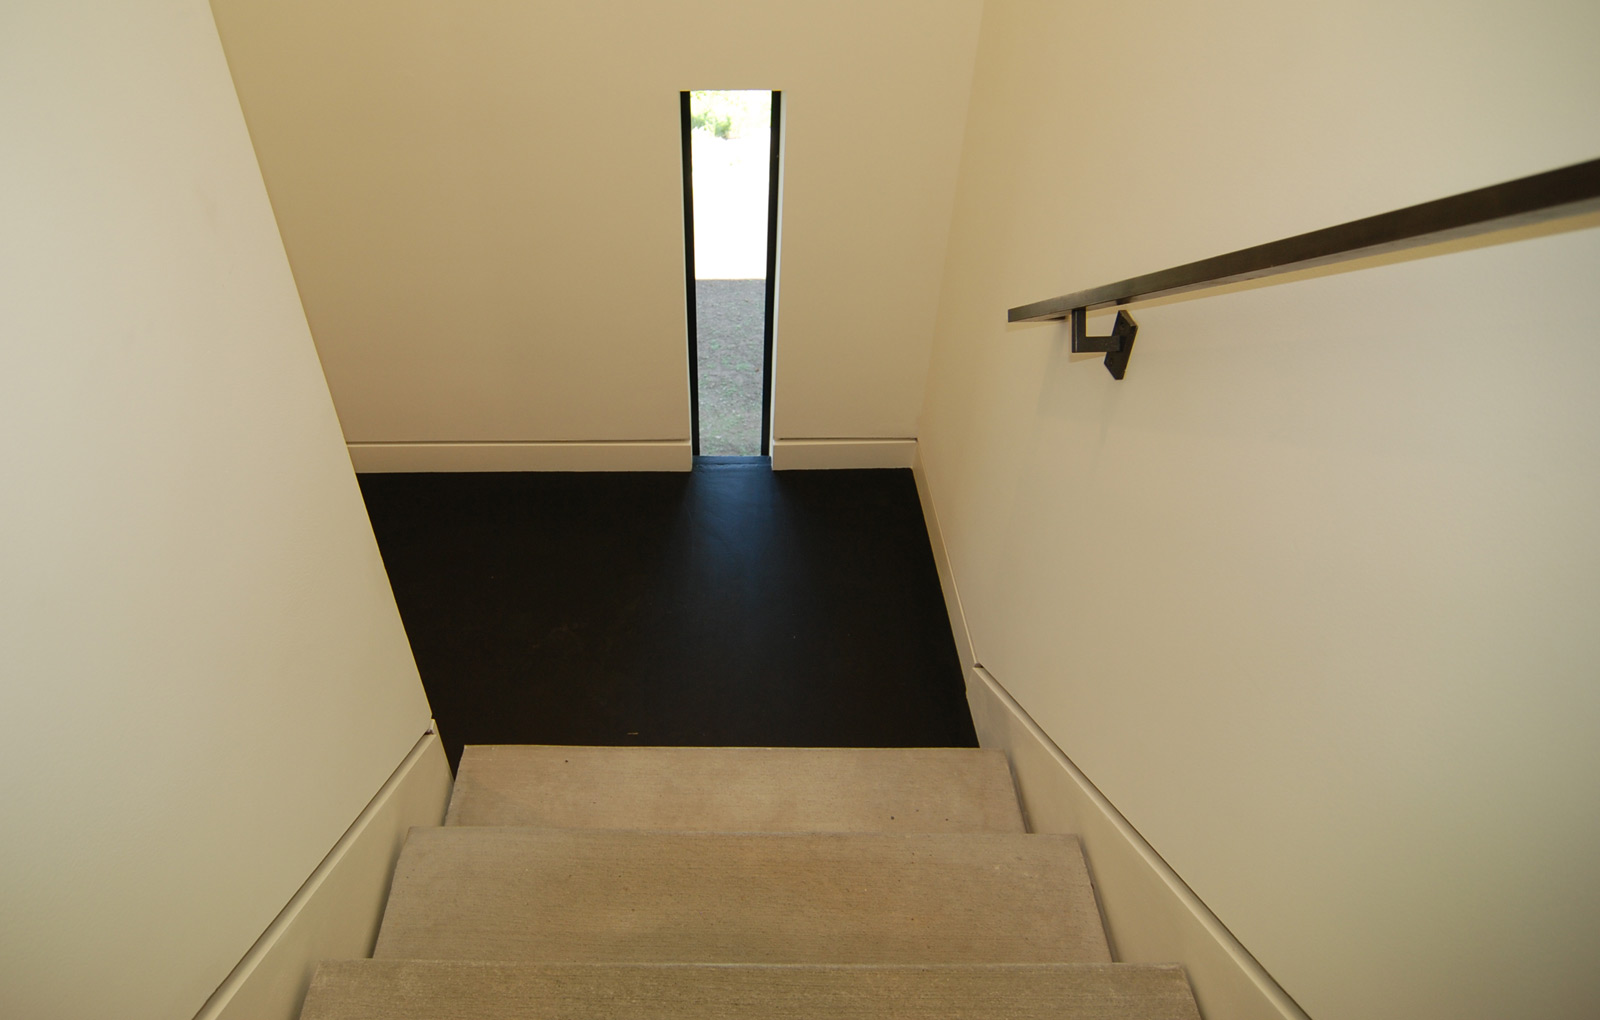
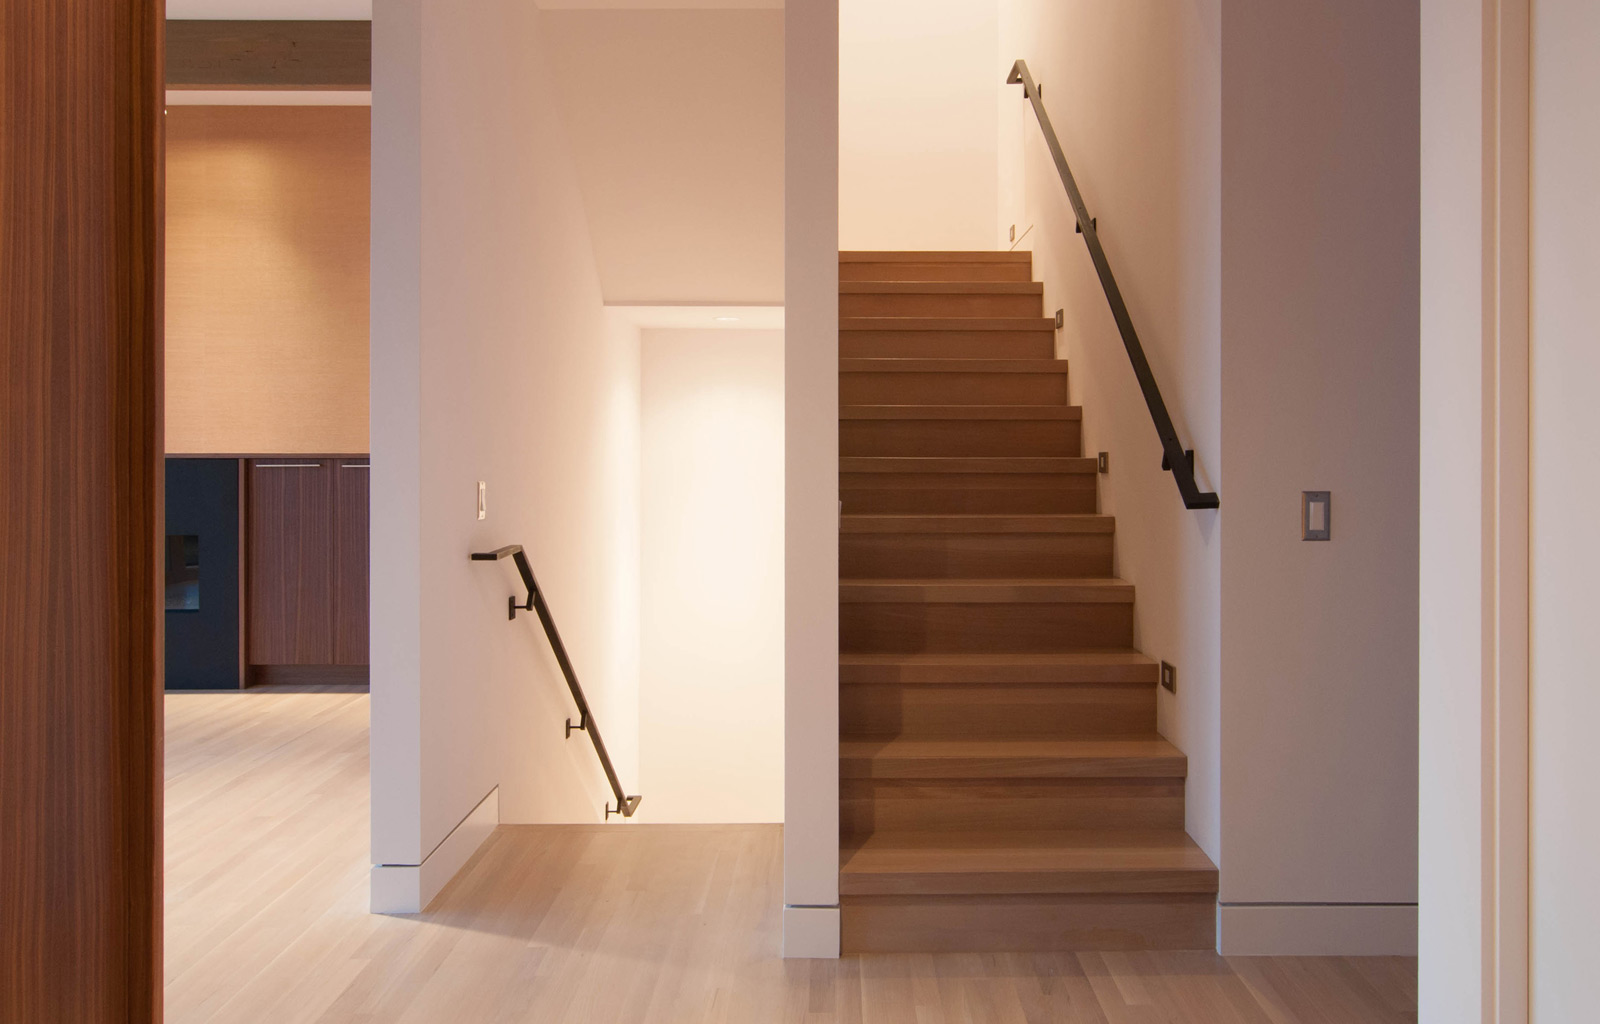
In this application, the base follows the angle of the treads and sits a few inches above the line of the stair nosing. It allows the line of base at the floor to continue up the stairs.

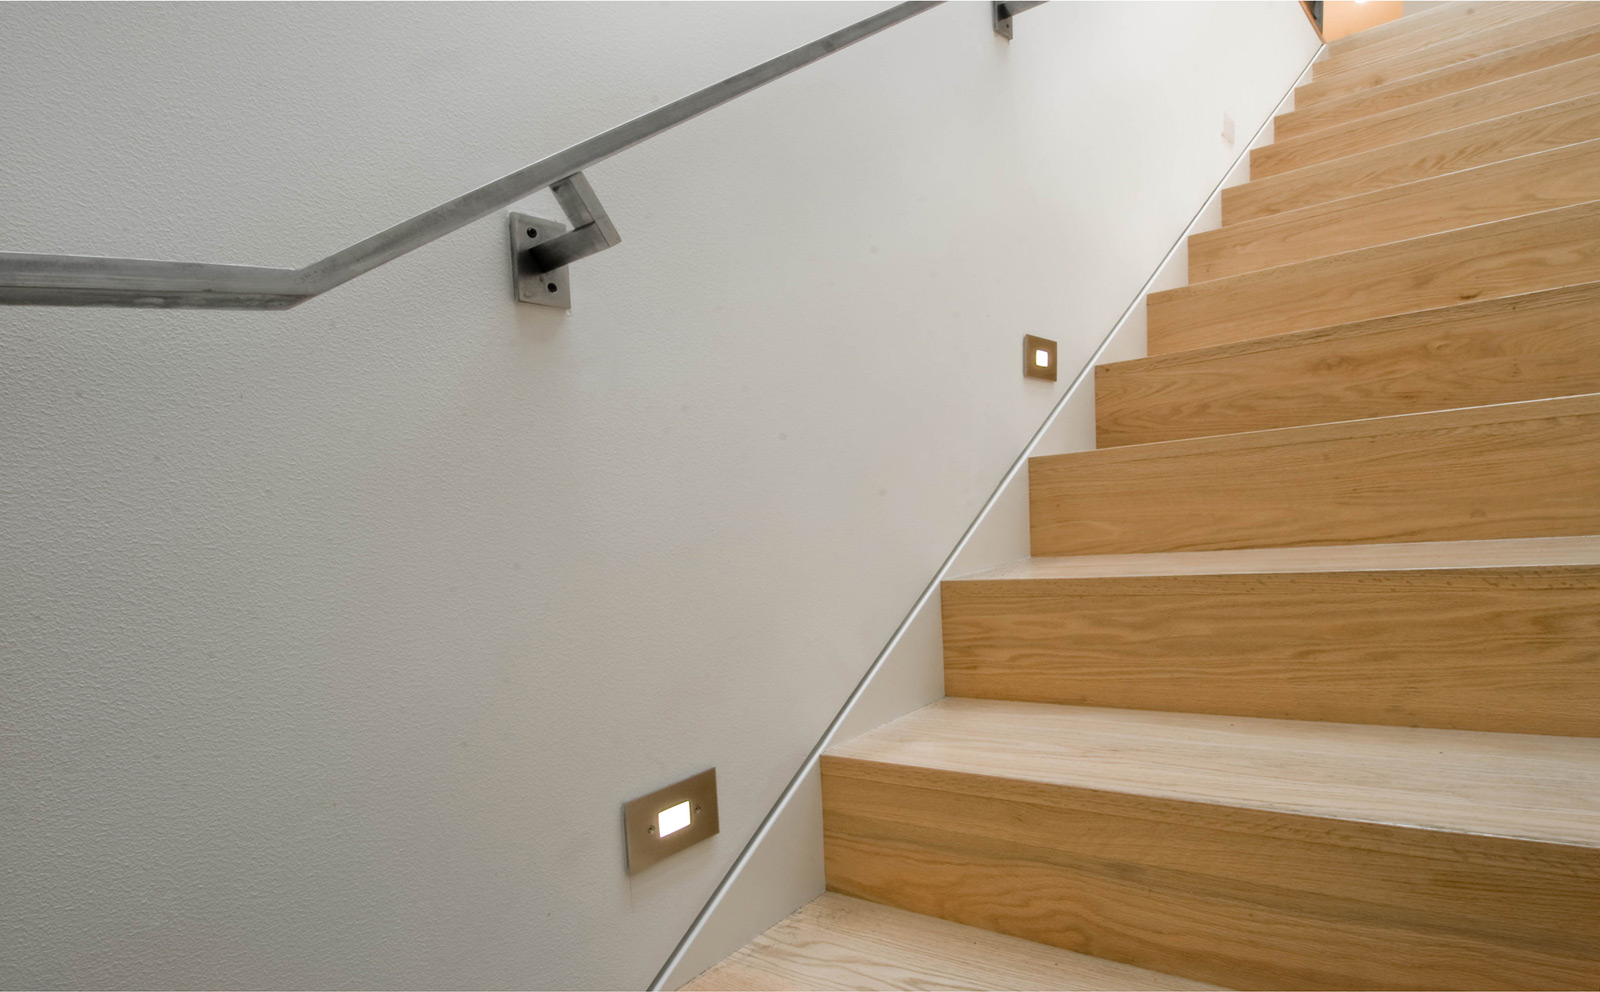
A variation on following the treads aligns the top of the base with the line of the stair nosing, which compresses the assembly a bit and gives a tighter appearance.
The stair nosing alignment comes in handy at the top of this stair, where a 3rd material is introduced into the composition. Here, a walnut wall panel aligns with the stair nosing, the stair riser and the baseboard (lots of tricky carpentry, drywall and flooring work here).

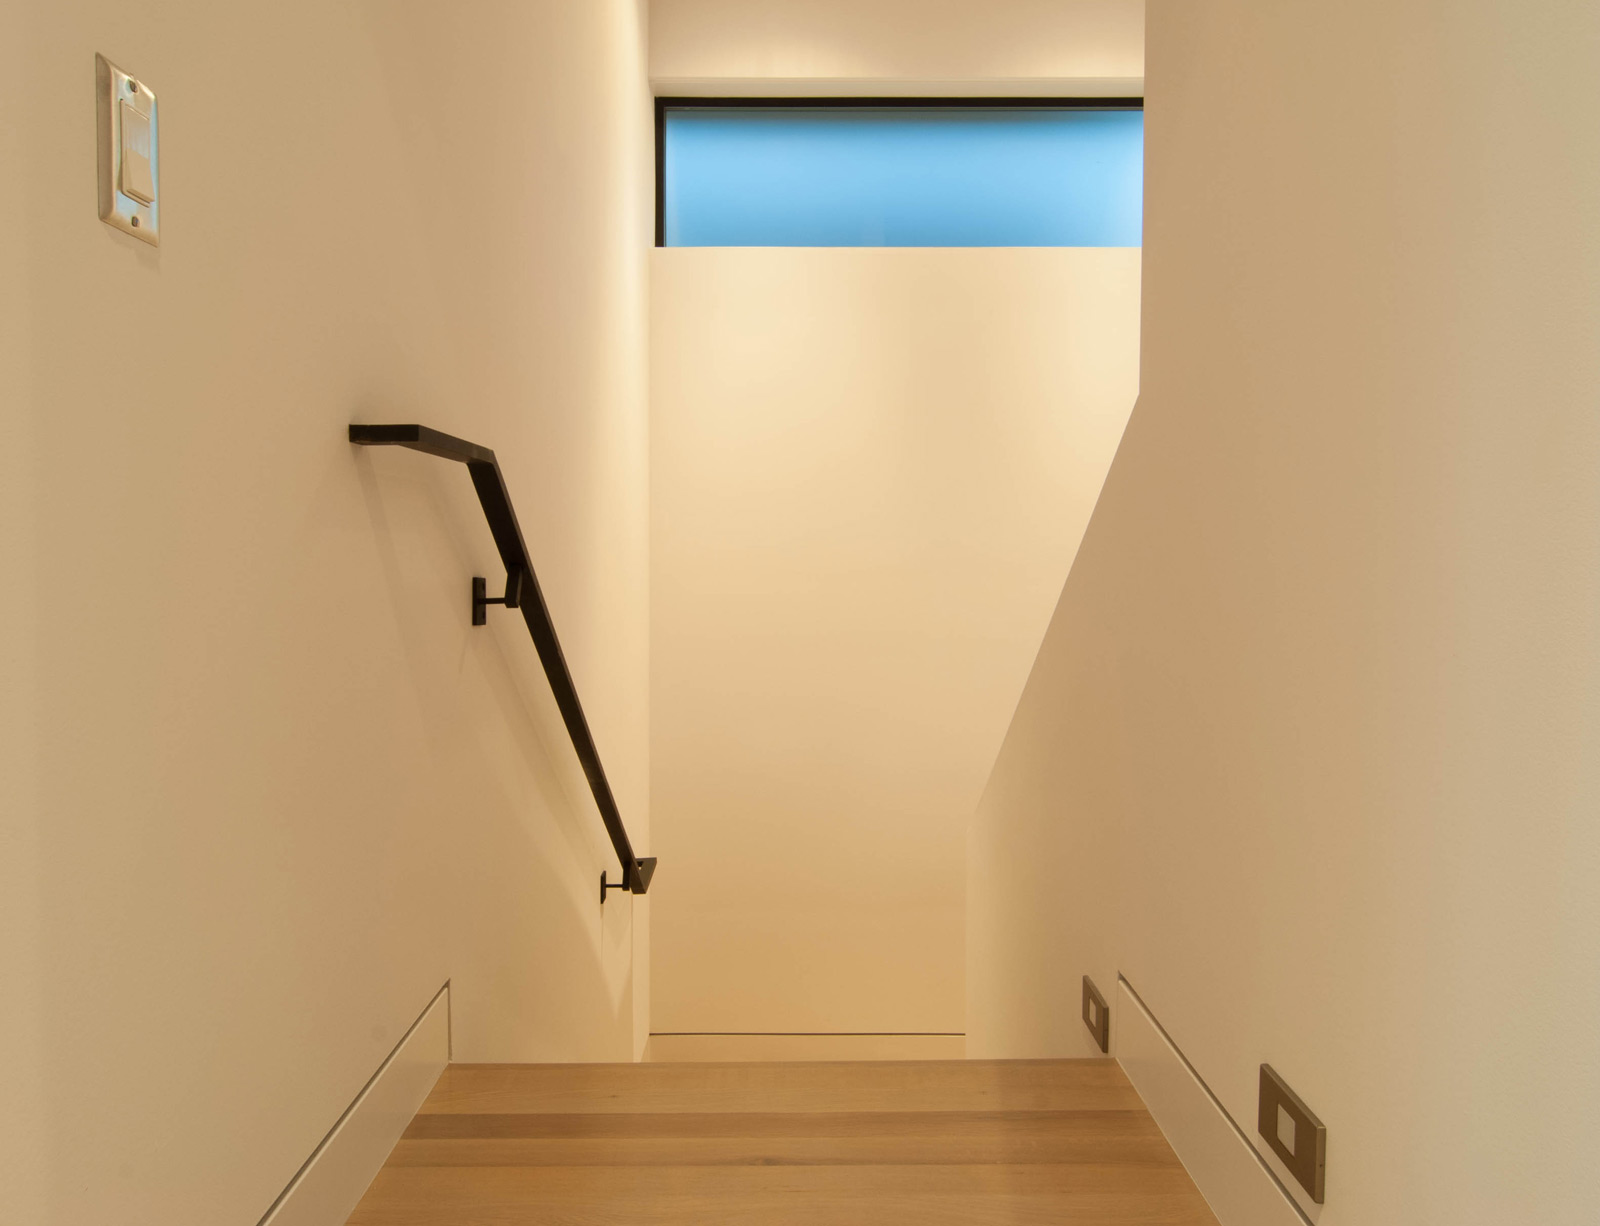
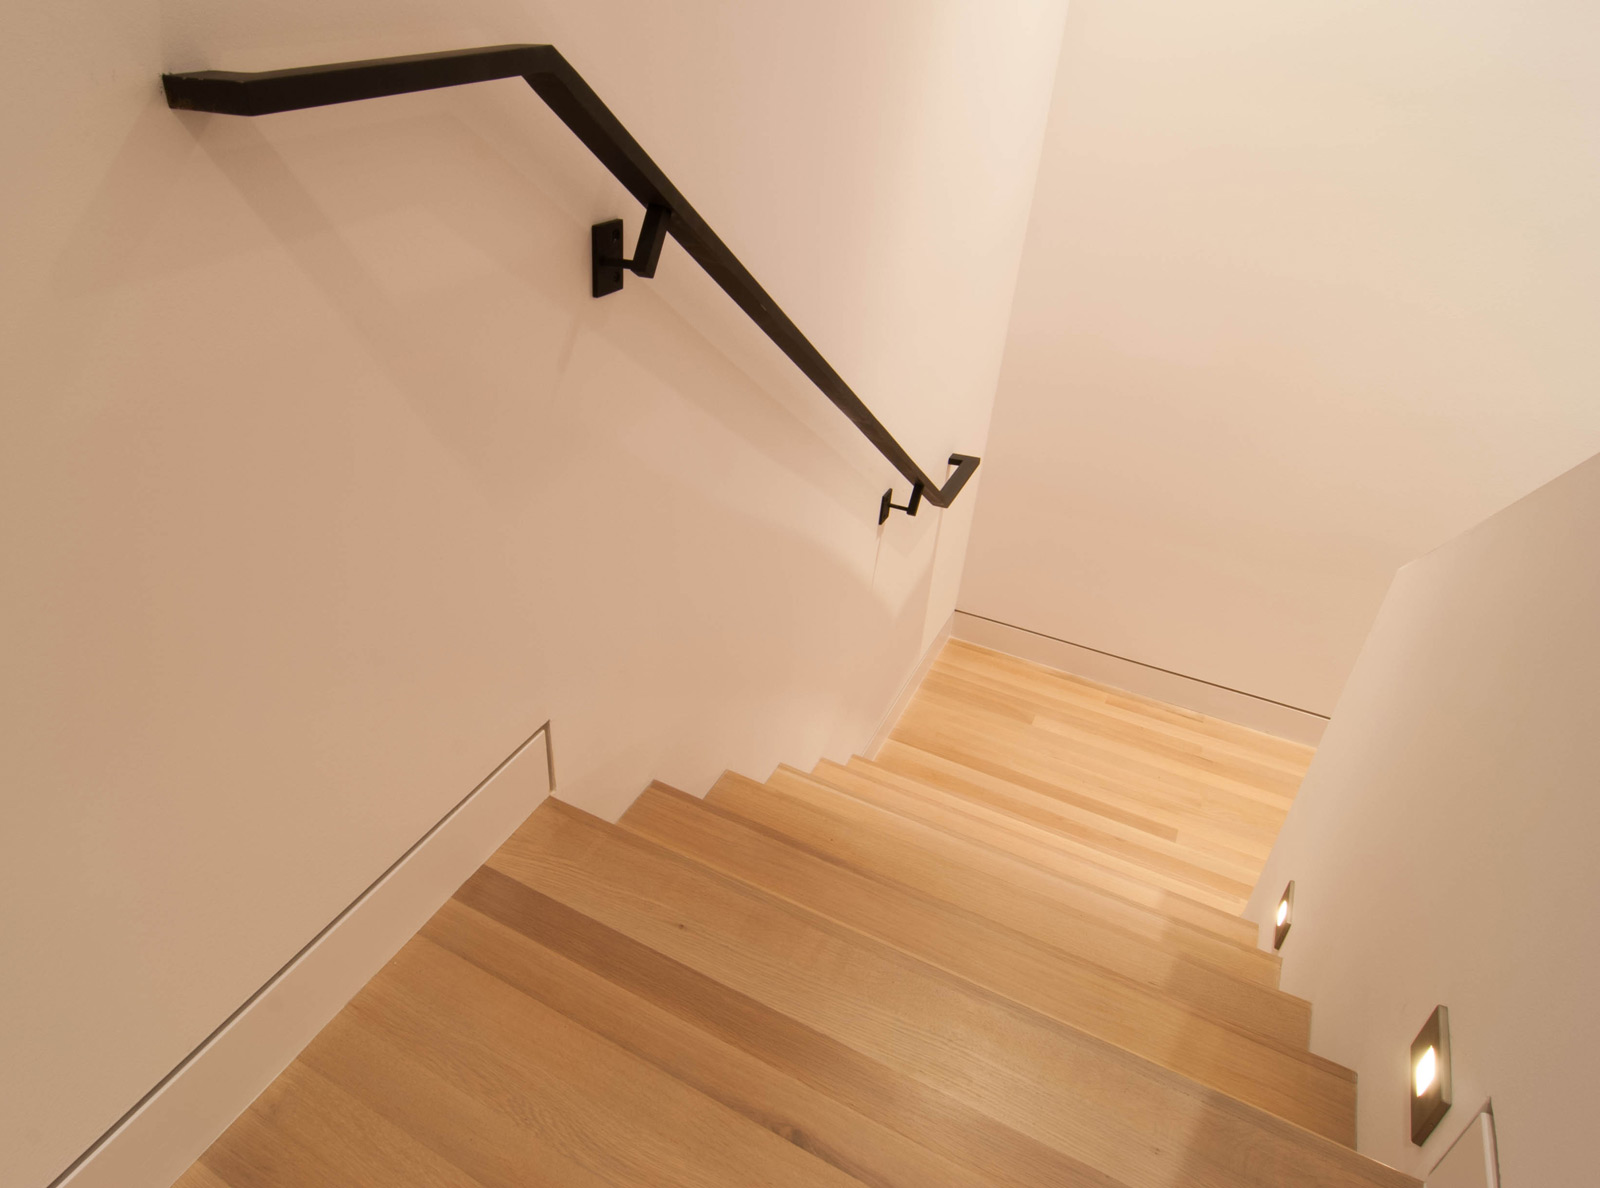
A handsome, crisp termination can also be achieved under the right circumstances. In the application below, we wanted to keep the stair minimal and clean. There also aren’t any kids in the home to scuff up the sides of the stair.
It’s also worth noting that this application allows the wall mount lights to be located closer to the treads.
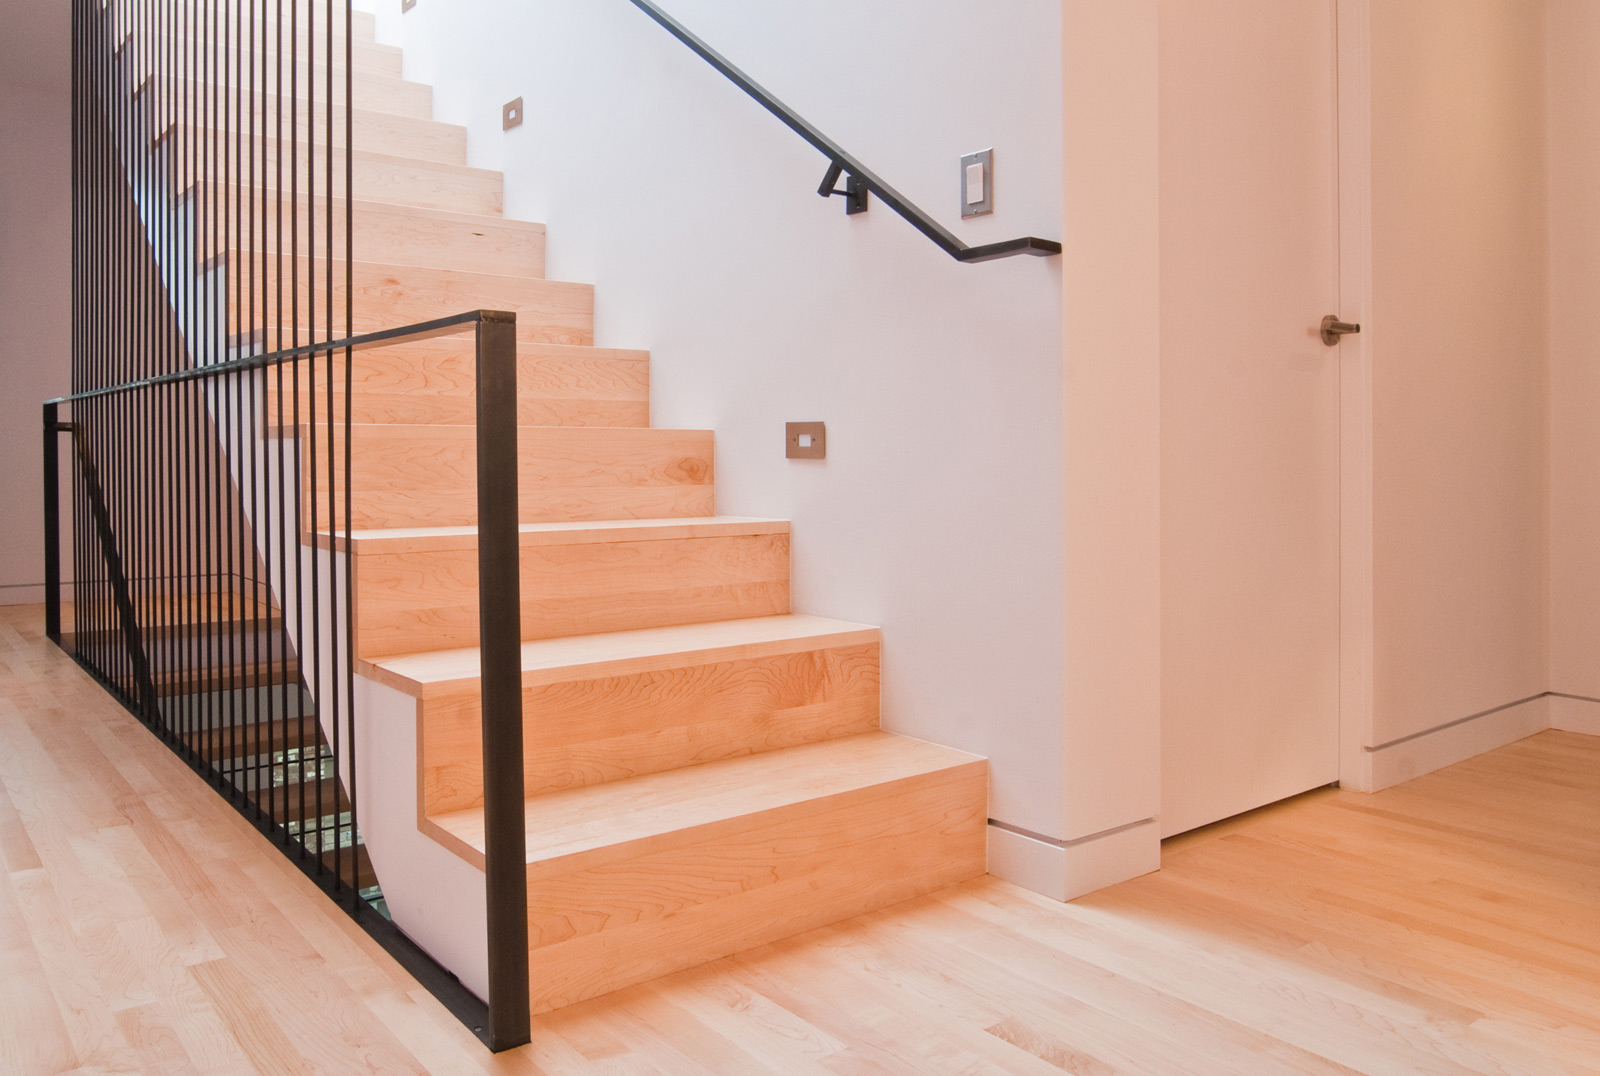
This method is particularly handy at corners, where the base termination seems natural (below, right).

DOOR JAMB APPLICATIONS
At sliding doors and pocket doors, a solid bumper is usually required at the jamb for the door in its closed position. Subsequently, it often makes more sense to terminate the base and run the vertical bumper (just another piece of trim really) all the way to the floor like in the application below.
Similarly at passage doors, we bring the drywall over the door jamb for a variety of reasons. This allows the line of the base to extend all the way to the door opening, giving the composition a clean, uncomplicated look.
Because the frame of aluminum sliding doors is slimmer than the thickness of an exterior wall, the base is wrapped around the corner and terminates at the aluminum frame.

WINDOW APPLICATION
In the application below, the window sill is brought out flush with the face of the drywall with the base and 5/8” reveal continuing underneath. This assembly tends to enhance the window sill and emphasize the line of the reveal around the room. Of particular importance with this assembly is that the base sets the window sill height.
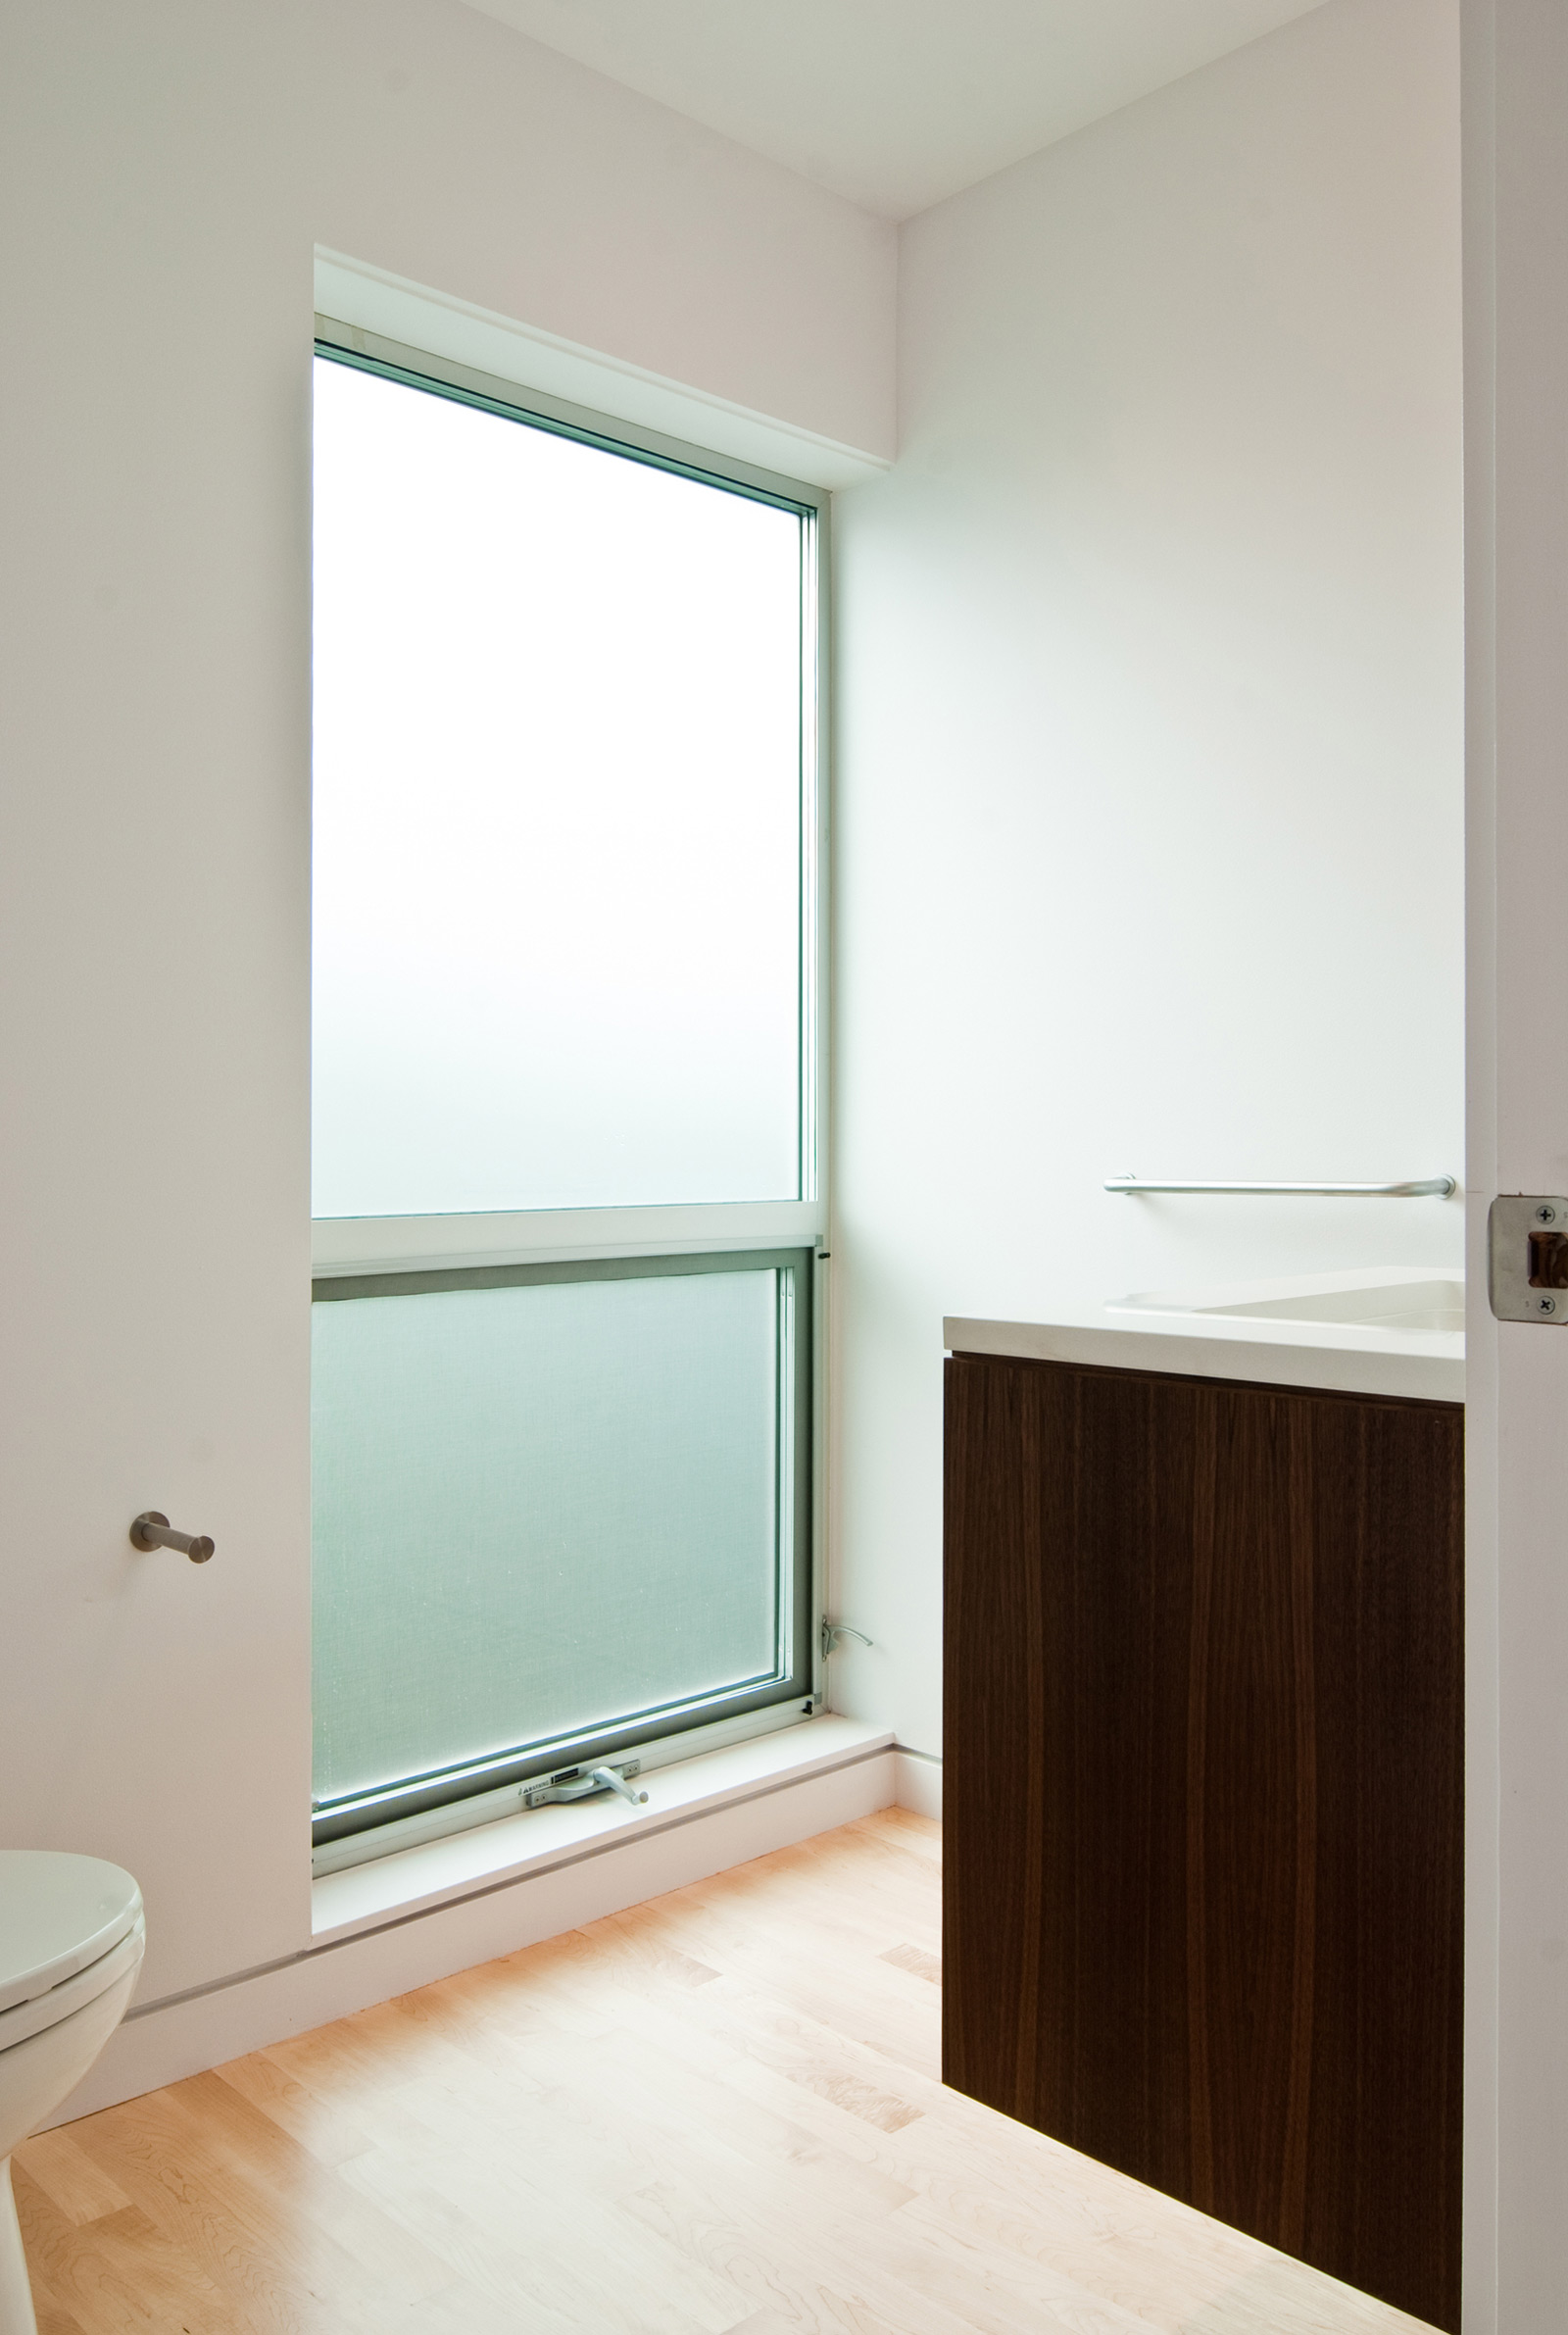
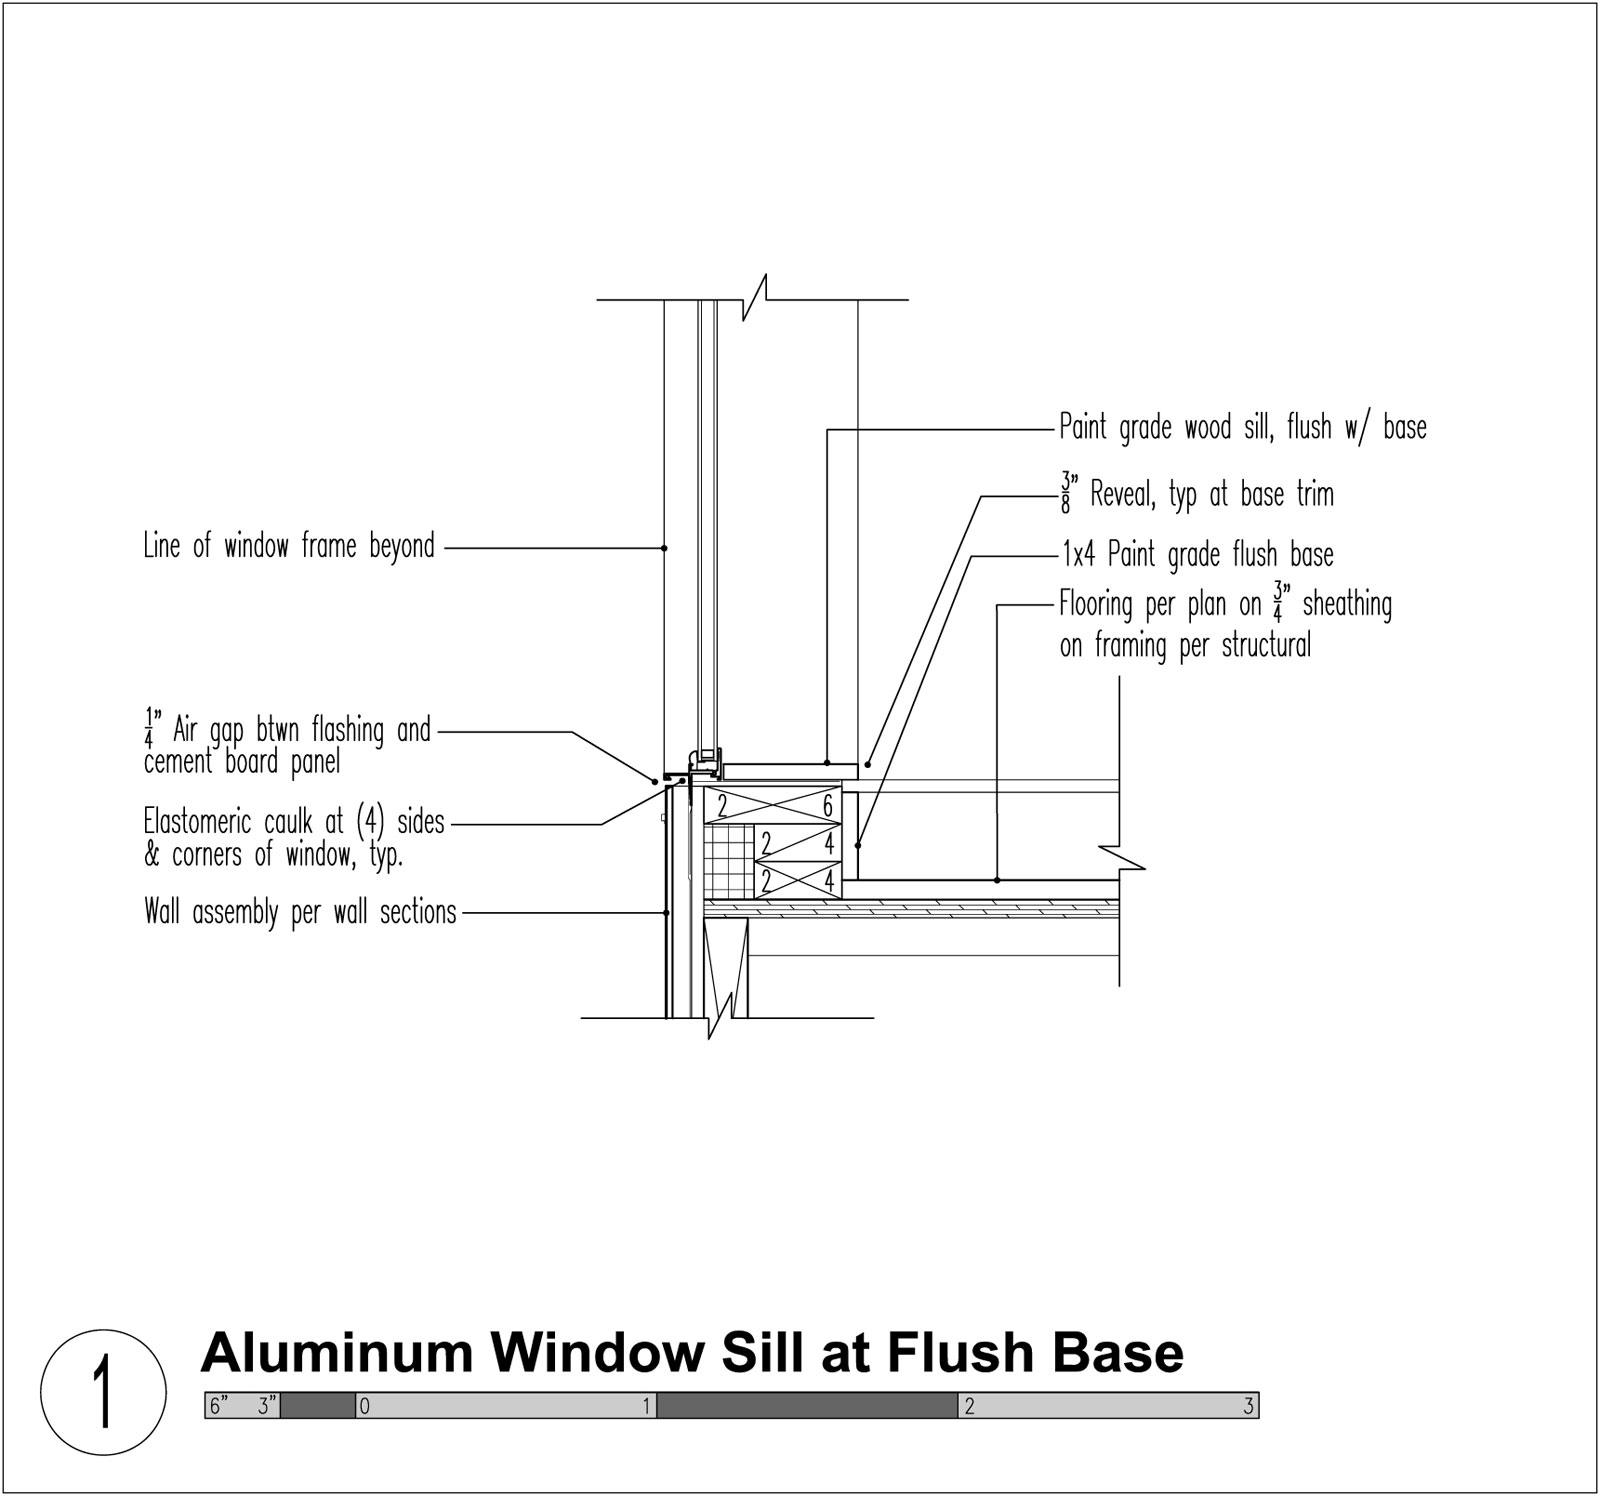
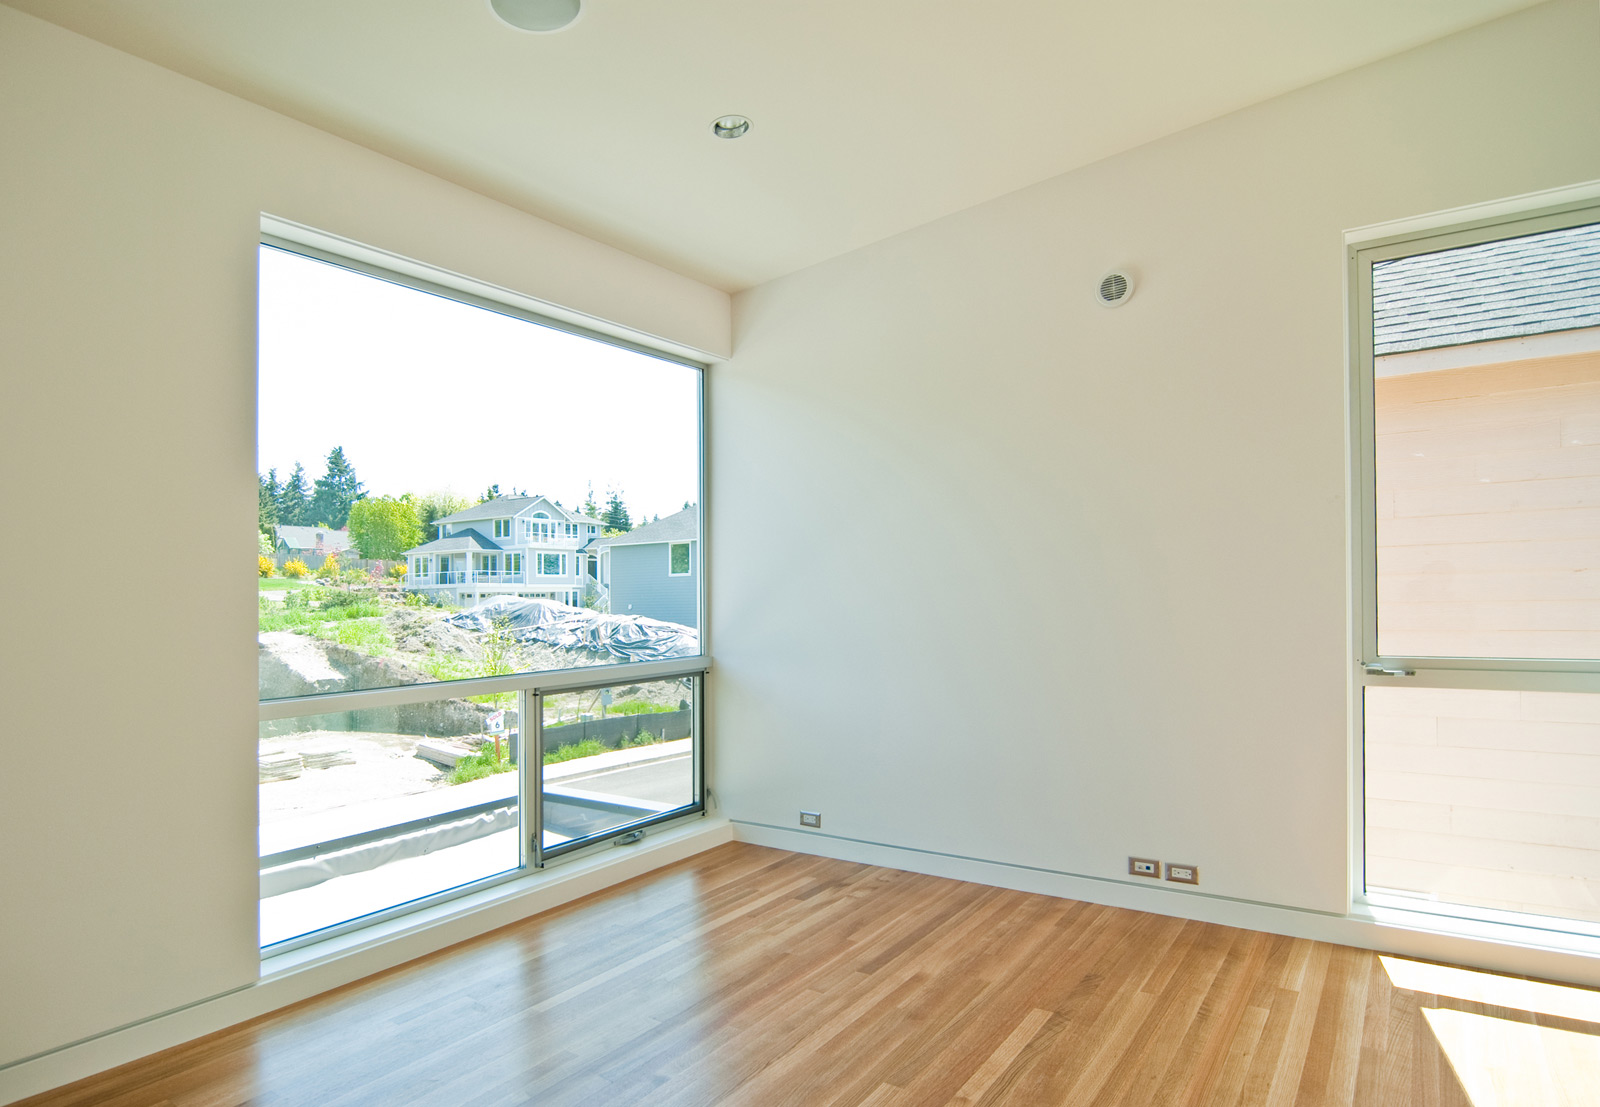
In the examples below, the window sill is pulled back to align with the back of the 5/8” reveal. The base still continues past the window sill but in a more unassuming way, allowing the reveal to meet the window opening. Again, the base sets the window sill height in this application.

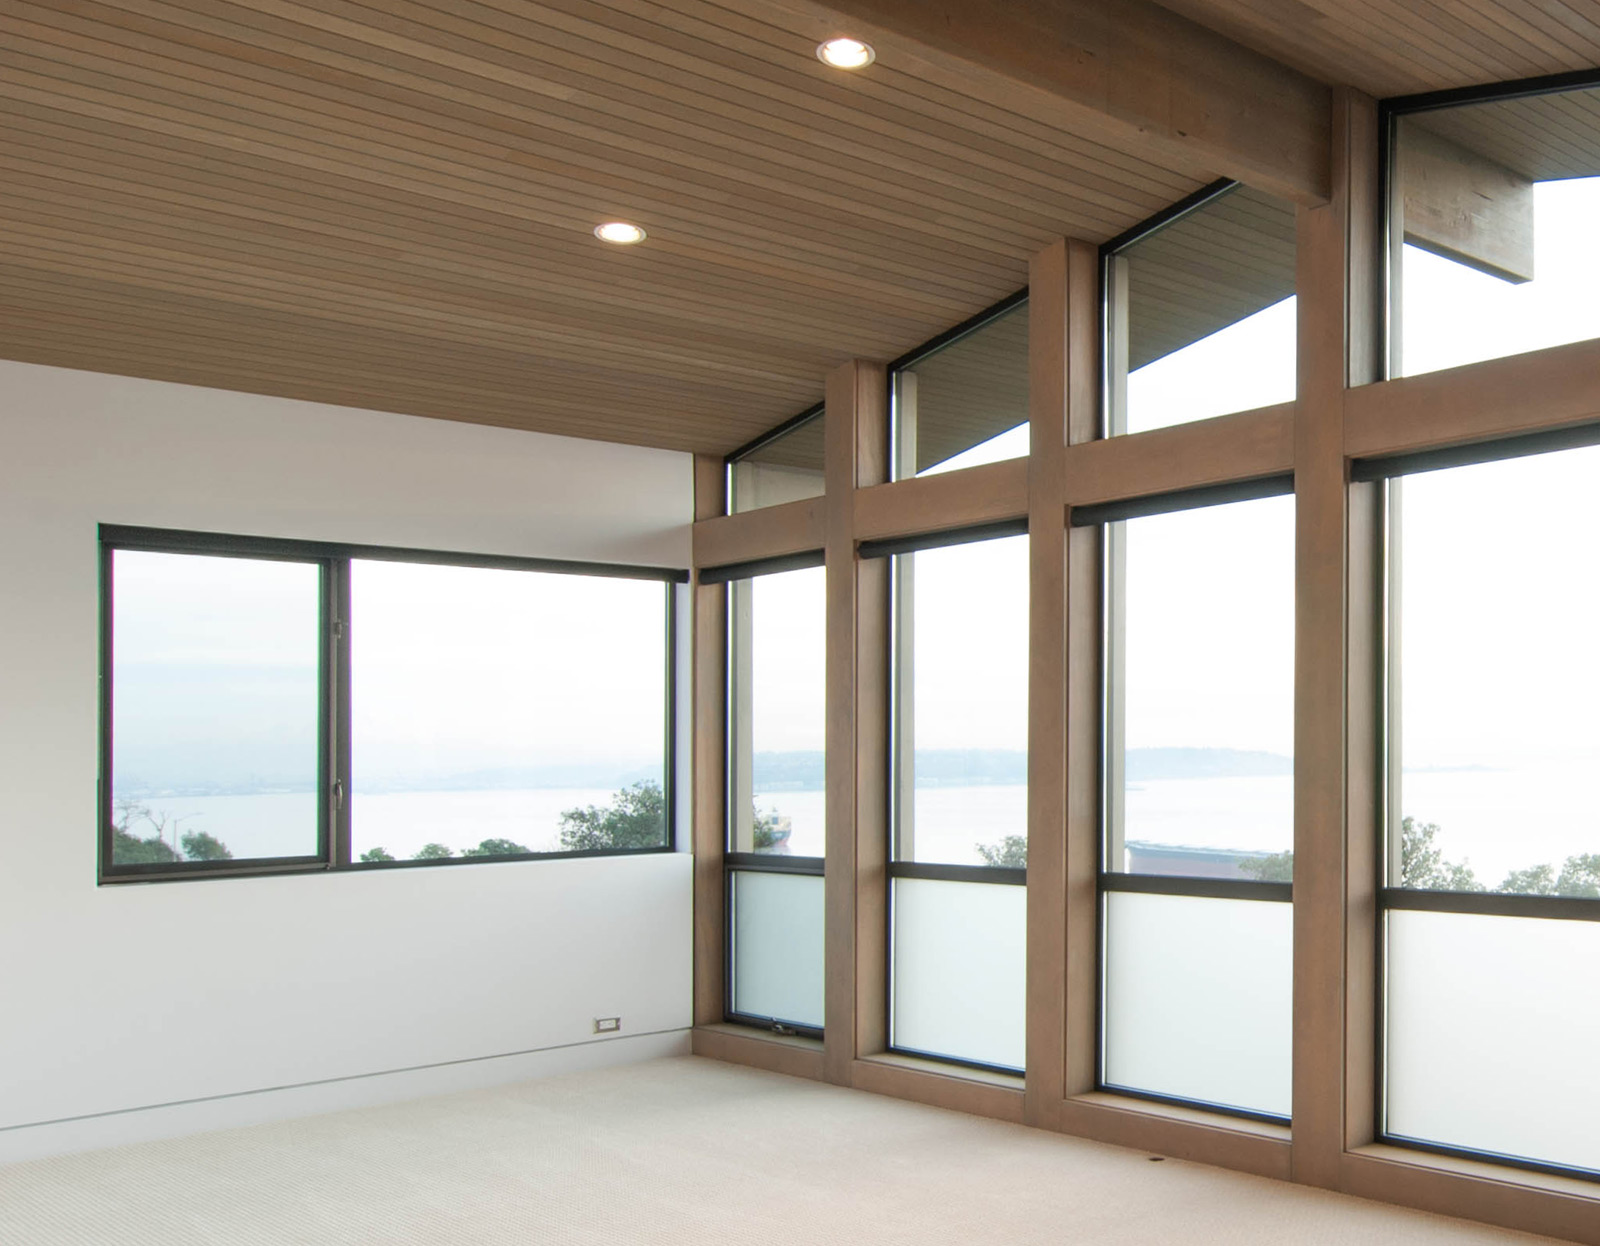
Another version of this detail abuts the flush base into a window base detail of a different material (in this case gray stained cedar).
IN SUMMARY
Each of these applications handles a different situation with different dependencies, but they all have one characteristic in common. Each application is designed so that the base is downplayed, and if noticed, is deliberate. It’s not the main feature of the room and it doesn’t grab your attention when you first experience the interiors. But once you notice it, the base is crisp, clean, and orderly — just as any modern detail should be. This catalog of base transitions is neither comprehensive nor complete and we continue to fine tune the applications on each project.
Cheers from Team BUILD