[All photos by BUILD LLC]
A guide about cover photos may very well be our dullest post yet. It even registers a higher reading on the bore-ometer than our post about site drainage. We’re already half-asleep just writing it. But, truth be told, cover photos are an important part of any project and, given our organized, meticulous nature, we have a system for cover photos. We highly encourage you to hit eject while you still can and escape to someplace cooler.
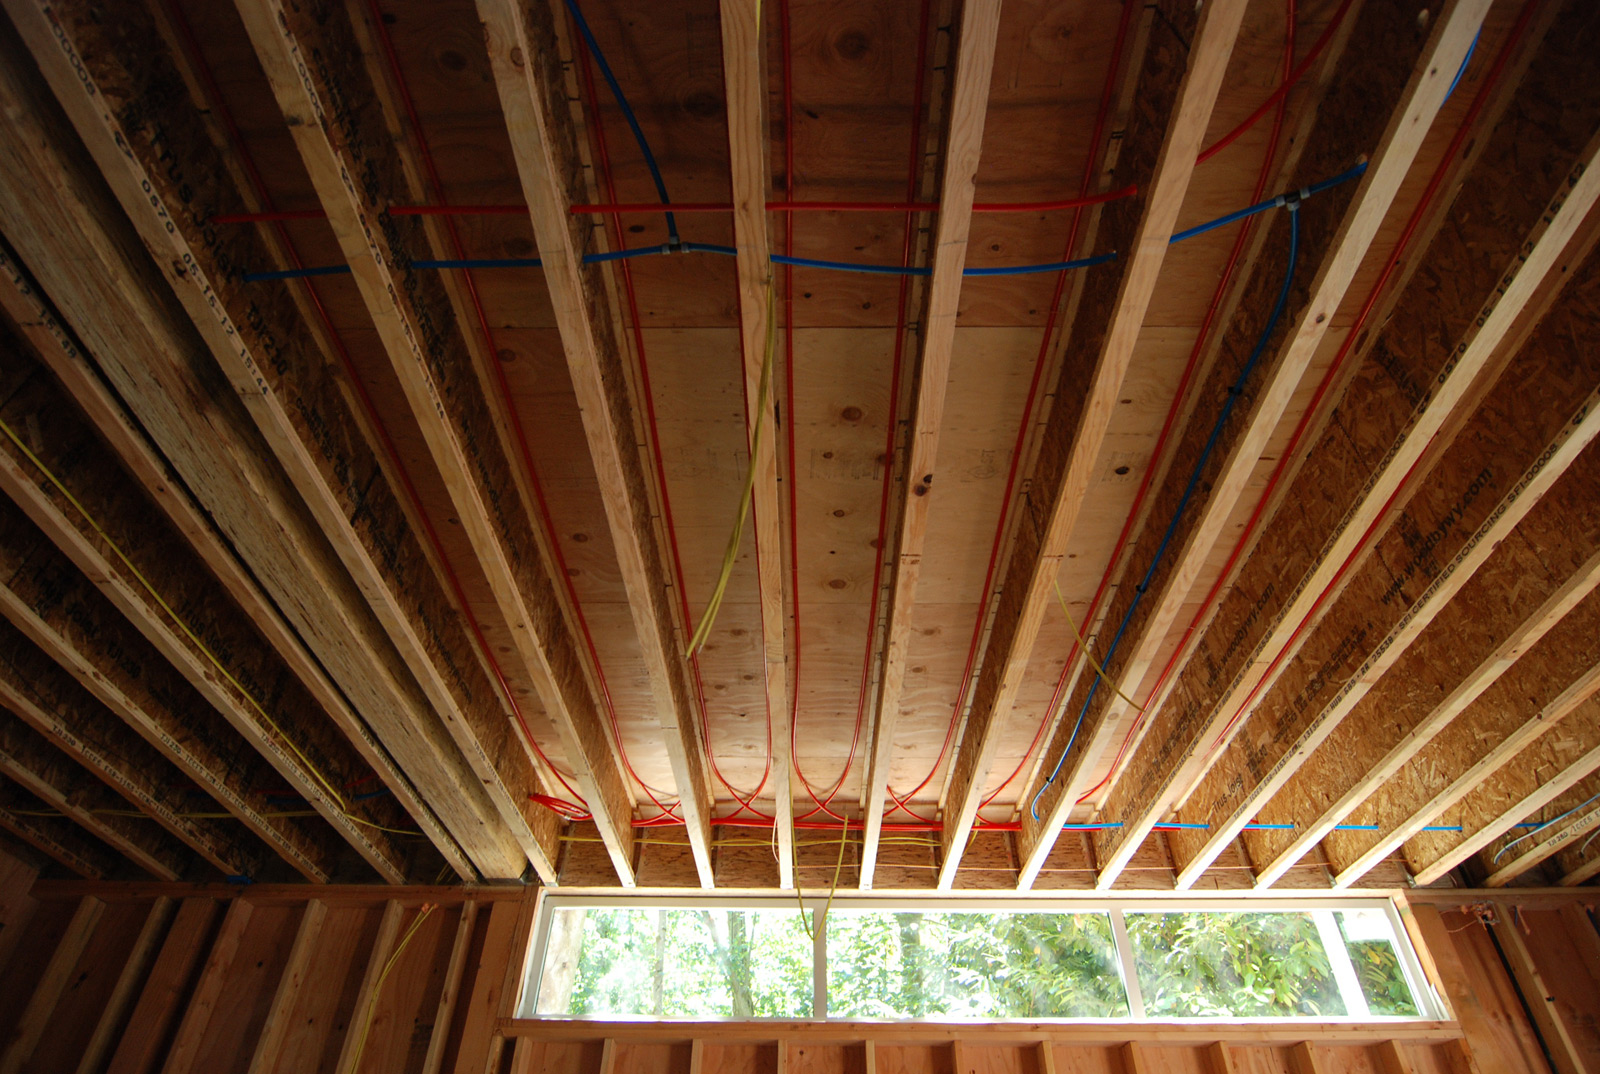
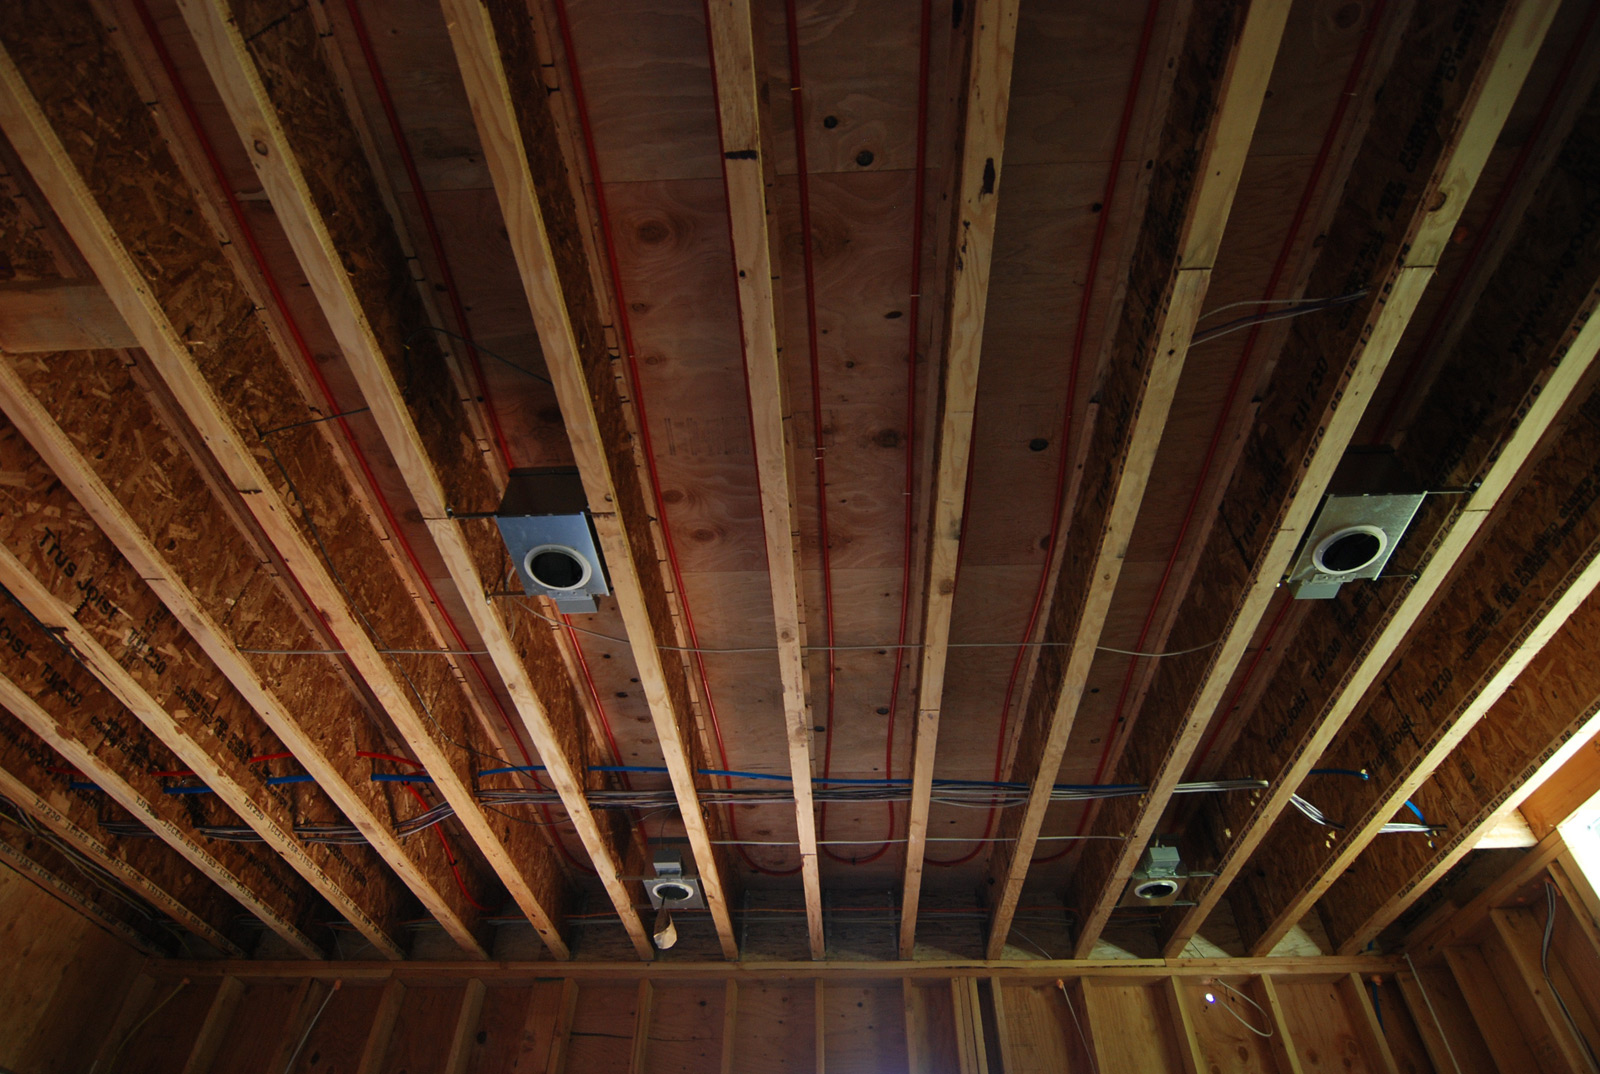
For those of you non-architects (see: normally adjusted human beings), cover photos are a series of photographs taken once a project is framed and after the systems (plumbing, heating, electrical) have been roughed-in on a job site. The cover photos occur just before the insulation goes in and the drywall (the cover) goes up; they document the framing and everything else going on inside the walls. This is important for several reasons:
– It helps locate electrical lines that may have a future purpose — like finding low voltage wires intended for future speakers.
– It prevents plumbing lines from being compromised — check those photos before you install that wall mounted bike rack!
– It defines where the blocking is for bathroom hardware, cabinetry, etc.
– It can sometimes help get things signed off by inspectors who wanted to see stuff like the insulation and caulking prior to drywall.
– It allows us architects to pretend like we have x-ray vision when we show up to the housewarming party.
In order to get a solid, legible set of cover photos, we’ve got 5 awesomely exciting tips for you (okay, so they’re entirely dull and not really all that awesome, but they’re useful and practical) and well, here they are:
1. Setting up the jobsite. Take a quick spin through the jobsite and get as much stuff off the walls as you can without pissing off the electrician. Move the stacks of extra insulation to the middle of the room so that you have a clear shot of the framed walls. There are inevitably empty cardboard boxes leaning up against walls all over the place; these would serve a greater purpose in your living room as forts for your kids.
2. Setting up the camera. Turn the flash off if you can –the flash will overexpose certain areas of the photos and will prevent detail from being visible. Set your camera to manual so that the photos are calibrated to the framing itself. Auto settings will average out the entire shot (including the brightly lit exterior through the windows) and the framing will be too dark in the photos. You don’t want to use a shutter speed less than 25 and you can always bump up the film speed (the ISO) as high as you need. We keep the auto focus on because we probably had one too many bourbons the night before and we tend not to use a tripod because it’s a hassle.
For you camera geeks out there, we don’t bother with RAW shots for cover photos. It just takes too long to process shots that probably aren’t going to be shown in an art gallery anytime soon. JPEGs seem to capture everything we need in a cover photo shot.

3. Taking the photos. Take your photos in a regular order. In each room we take the shots in the order of North, East, South, West then the ceiling, and finally any detail shots that might be necessary to describe the framing & systems. That way, when we get back to the office there is a predictable pattern and naming them is easy. Always name the shots when you get back to the office; in a month you won’t be able to tell the difference between the framing of the north wall of the powder room from those artsy shots of plywood you now have as your laptop wallpaper.

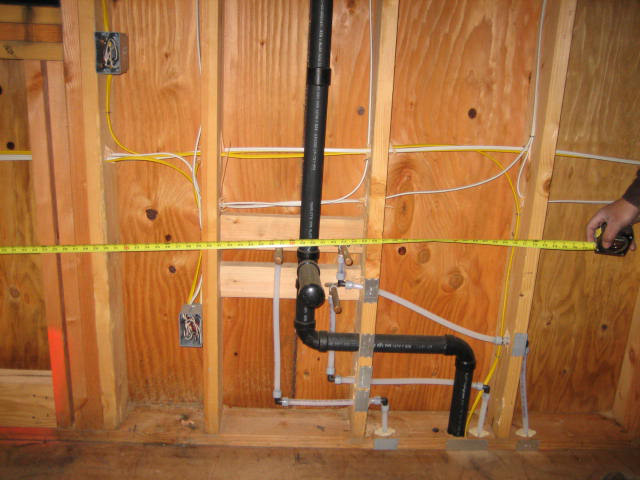
4. Scale. Depending on the project and the situation, it can be useful to get some scale into the photos. Lean a tape measure up against the walls for each photo or get some of the trades-people in the shots; catching them off guard will give your cover photos some humor that you can enjoy for years to come.

5. Distribution. Make a copy of the photos for the homeowners and the builder. You’ll be amazed at how grateful they’ll be for a thumb-drive full of the most uninteresting photos you’ve ever taken (neck-and-neck with those riveting shots of site drainage testing). For added respect, act like you labored over these photos.
Bonus. If you’ve actually made it this far through the post you should really be getting a free meal or something. But since it’s breakfast here and probably lunch or even dinner wherever you’re at, we’re going to keep the bonus to a simple and final tip. Use the video camera option on your camera or smartphone and do a simple walk-through of the structure. The changing perspectives of moving footage can reveal more of the three-dimensional intricacies of the space and typically provides a greater level of information.
Yawn. Cheers from Team BUILD


