


[All images by BUILD LLC]
There are a number of rainscreen details that team BUILD has been fine-tuning and implementing and the recently completed Pham Residence in Bellevue, Washington is an excellent project to review the latest application. Because the structure is a simple box, there was more reliance on the rainscreen to develop massing, depth and articulation (more information about the genesis of the design can be found here).
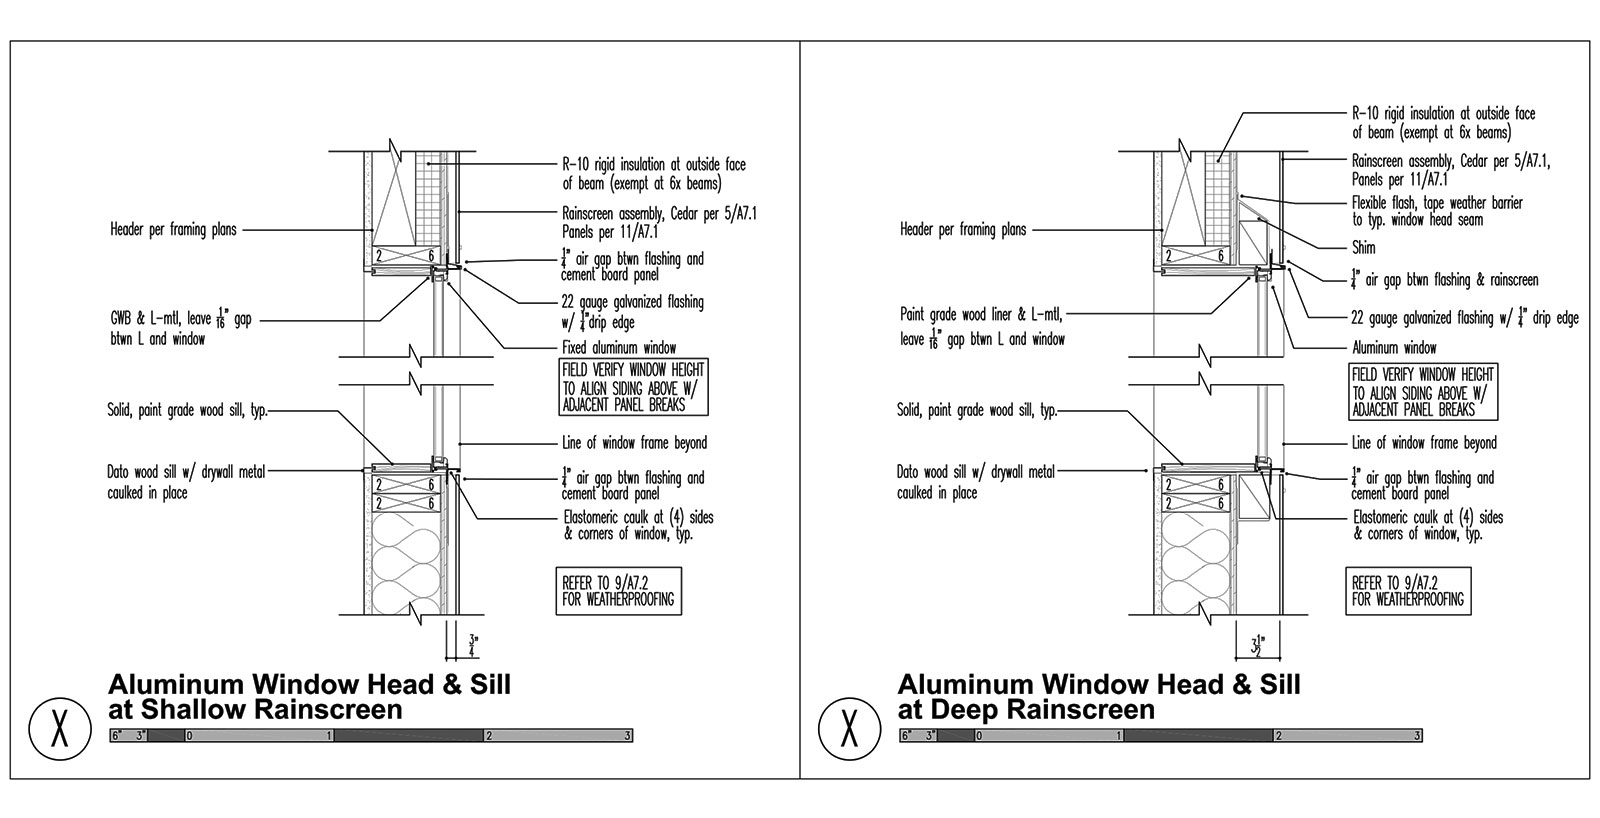
While the structural systems of the residence (the shearwalls and bearing walls) remain in a single vertical plane along the east elevation, it was important that the envelope show a change in both plane and material. This strategy relies on both a deep and a shallow rainscreen system, where each depth is developed via the thickness of the vertical battens separating the rainscreen from the water resistant barrier. In the case of the Pham Residence, the rainscreen is either Oculus aluminum composite panels or horizontal cedar, though the details below can accommodate a variety of rainscreen materials. Of particular note, is the wrapping of the rainscreen at the thickened condition in the horizontal orientation. This provides a crisp edge and a crisp visual of the differing material planes.


The shallow rainscreen detail is really just a typical rainscreen assembly with a ¾” air gap between the rainscreen and the water resistant barrier (below left). The depth is developed with the deep rainscreen system (below right) and it’s at this condition where the detailing becomes a bit more tricky. The deep rainscreen system is straight-forward at solid walls, but extra consideration is required at openings like windows and doors where the exterior frame of the windows is consistently aligned with the face of the rainscreen. This requires padding out the nailing flange of the window and providing the necessary water proofing.
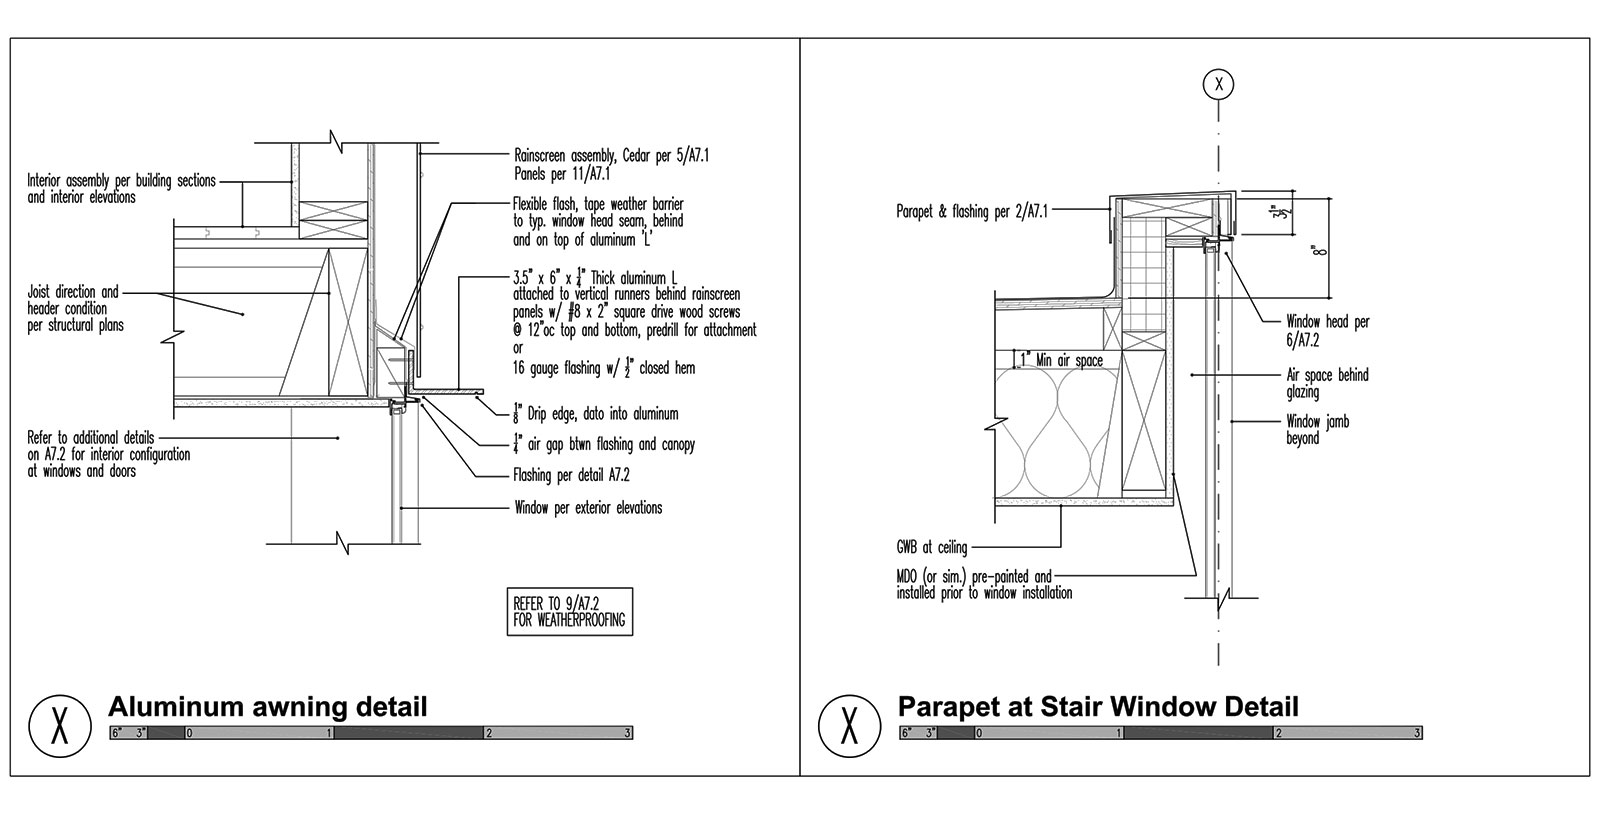
The thickness of the deep rainscreen carries up the window jamb condition (below left) and continues up to the roof parapet where the cap is separated into two heights. This allows a single-ply membrane and cap flashing to be installed at the roof so that the interiors can begin drying out, whereas the taller flashing doesn’t get installed until after the rainscreen is completed. Keeping the interior dry is no longer dependent on installation of the rainscreen with this detail.

The cedar at the corner of the ground level maintains the overall geometry, though the structure and the envelope recess back to allow a covered entry and an exterior approach sequence. Cedar slats to match the siding wrap the space (below left), keeping a consistent envelope with the upper level. This allows for the introduction of a rock garden and glowing spheres, leading guests to the entry. The framework for the slats sits on the concrete foundation of the rock garden and frames the entry steps (below right).


To provide a more pronounced depth, greater shadow lines, and better weatherproofing of the windows, small canopies are added to the window heads of upper level windows (below left). The detail is especially noticeable at corner conditions where the canopy profile wraps ninety-degrees. A foundation to roof glazing detail was also implemented at the window adjacent to the stair. While this detail requires some forethought and construction planning, it offers a dramatic look to the east elevation of the residence.

There are a few additional details referenced in the drawings above they may be of interest. The cedar rainscreen detail below is a good starting point for the basics of horizontally applied cedar over a water resistant barrier.

The detail below indicates our standard rainscreen panel assembly, covering the face attachment pattern and inside/outside corners.

While these strategies and techniques continue to evolve, the collection of details above make for a valuable kit of parts. The Pham Residence is an excellent application for some of our most advanced rainscreen details and it’s always useful to pair details with the finished result.

Cheers from Team BUILD