


[All photos by BUILD LLC]
Shoring doesn’t get much credit in the architectural world, but it should for all the hard work it does. In a region like the Pacific Northwest, with its hilly terrain and ever-increasing density, shoring is not only helpful, but it’s often the single most important design ingredient allowing for construction on what would otherwise be prohibitively steep or tight sites. Given the shortage of empty lots in most urban areas, challenging sites have become more appealing to home owners and builders, which, in turn, has created an increasing reliance on shoring. Today’s post gives credit to this quiet worker, spelling out the basic concepts, explaining the construction process, and presenting a handful of site photos from a current residential project.
Although there are numerous types, including pin piles and other systems that supplement foundations, today’s post focuses on soldier pile shoring.
What is shoring?
Soldier pile shoring is an assembly of vertically oriented steel wide flanges encased in a cylinder of concrete placed every six to eight feet on center in a straight line, referred to as piles. Wood boards, referred to as lagging, span horizontally from one wide flange to the next and the entire assembly holds back earth on one side allowing a vertical cut on the other. The shoring wall’s purpose is much like a retaining wall, although the physics and construction methods are very different. On residential projects the height of shoring can range from as little as six feet up to about 12 feet, and commercial projects can utilize shoring techniques to go much deeper via tie-backs that extend retained depths well beyond this range (a topic for another post). Shoring walls can be permanent or temporary. Temporary applications are typically supplemented with concrete walls once the earth has been properly retained.
When is shoring used?
Shoring is most effective when two criteria are present together on a jobsite: the necessity for flat ground to build on and proximity of the building footprint to a property line, or existing structure. The need for flat (and presumably buildable) ground requires a method of cutting back and retaining the earth. While there are several techniques to do so, methods like concrete retaining walls require a great deal of space. In order to safely build the formwork for concrete footings and walls, the surrounding earth must be temporarily removed (usually at a 45 degree angle) on both sides of the wall to provide adequate construction access. If the structure is close to a property line or another existing structure, the space required of this excavation is prohibitive. Where the concrete retaining wall requires several feet on each side, a shoring wall requires only a few inches.
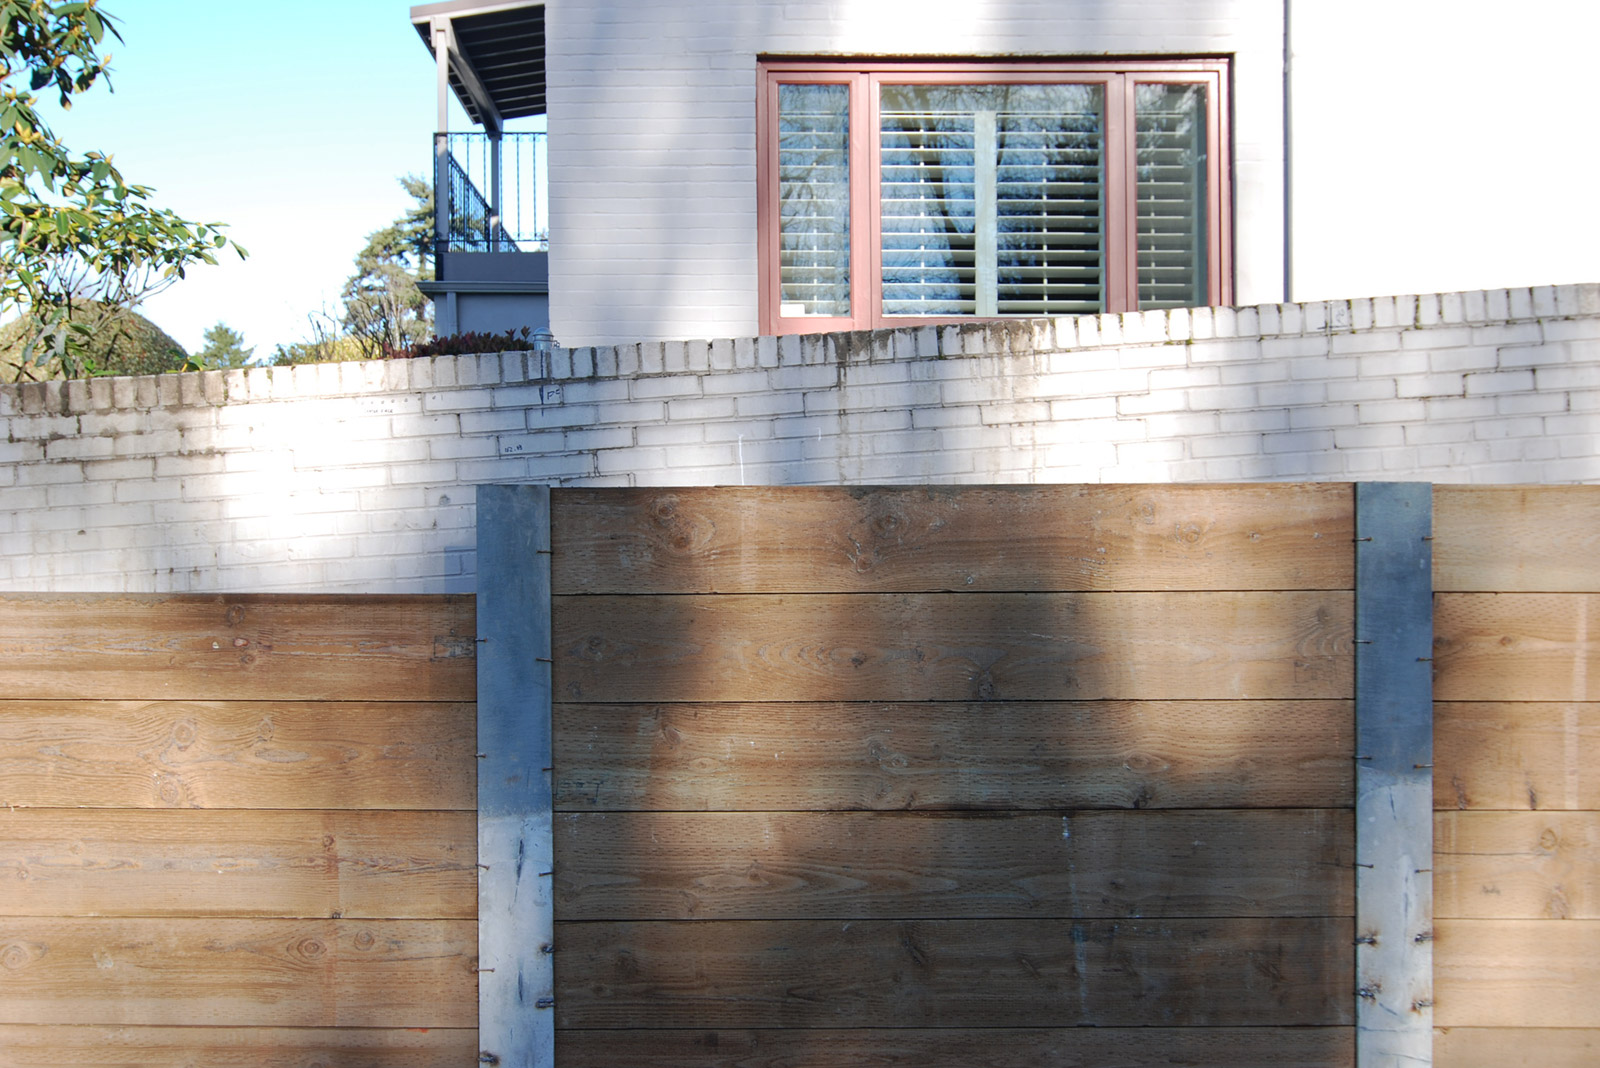
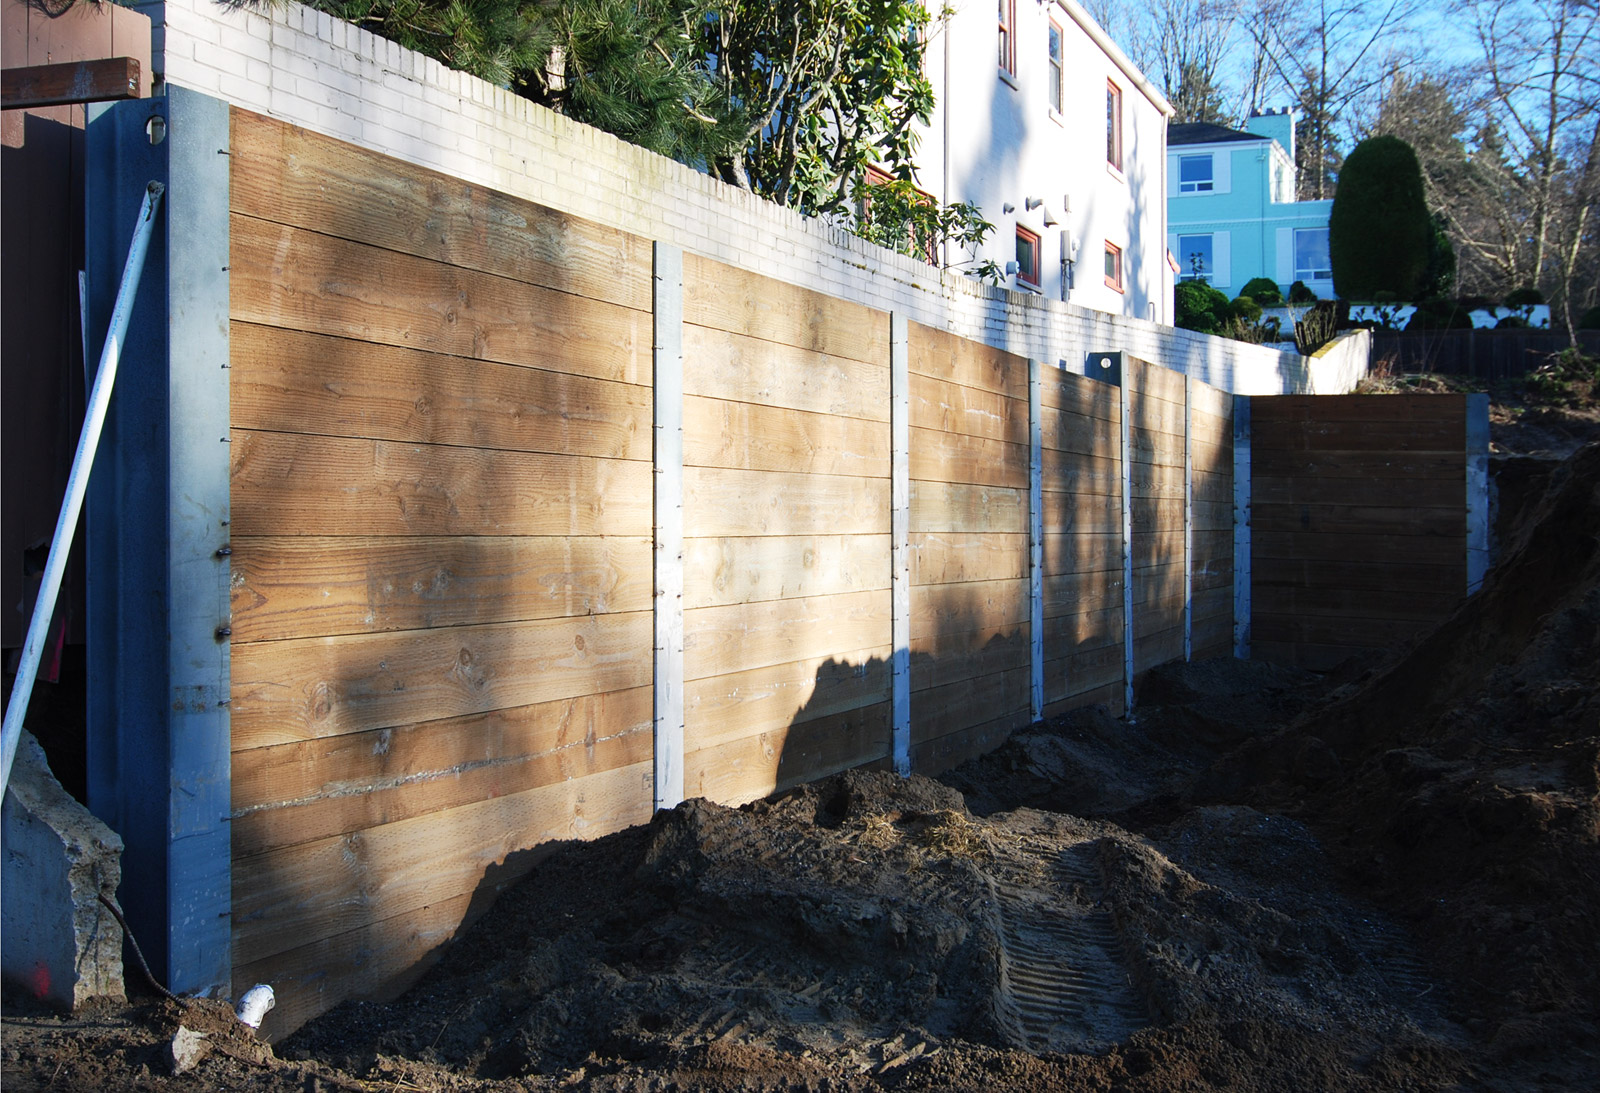
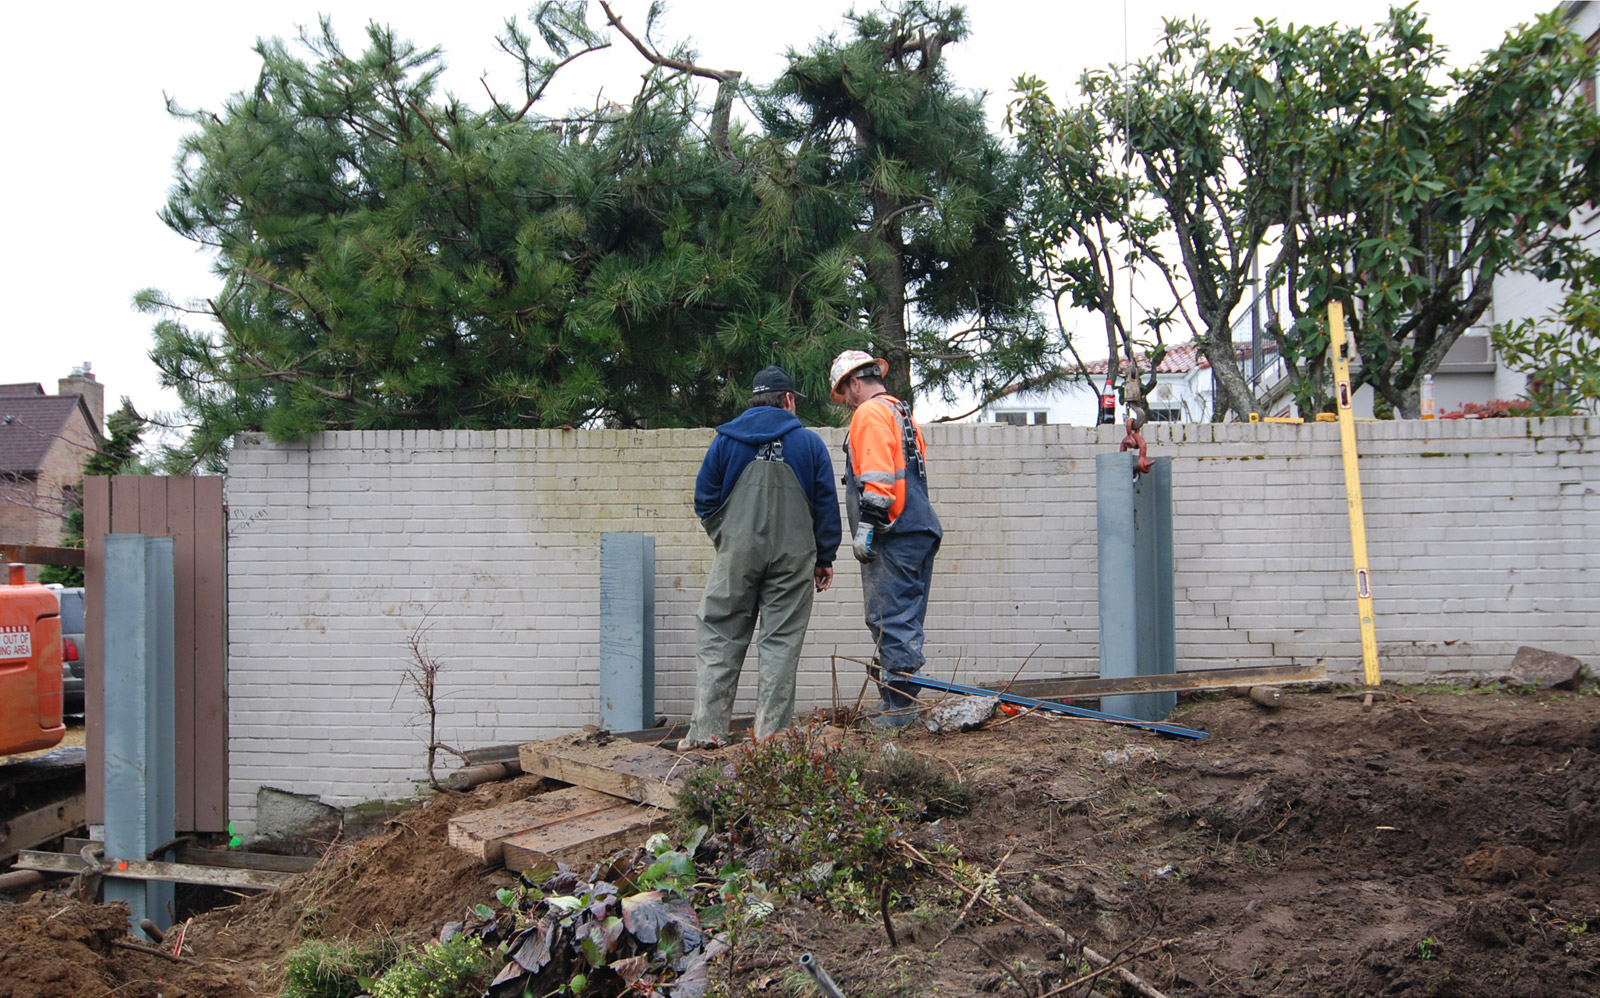
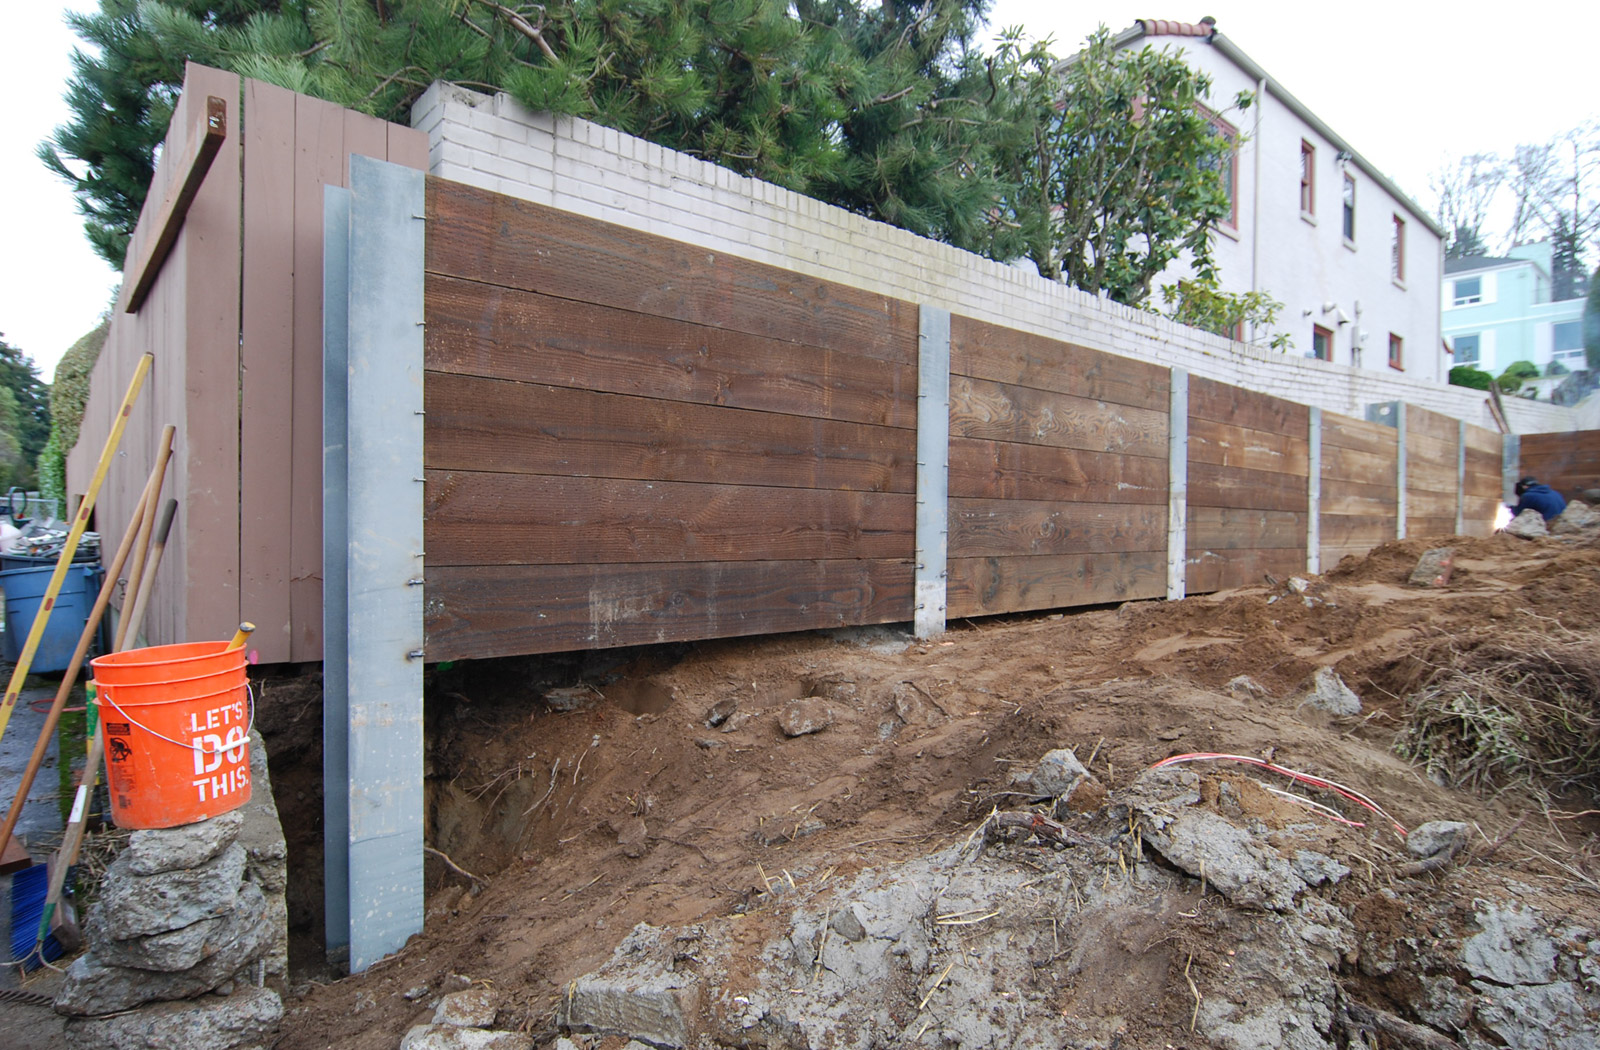
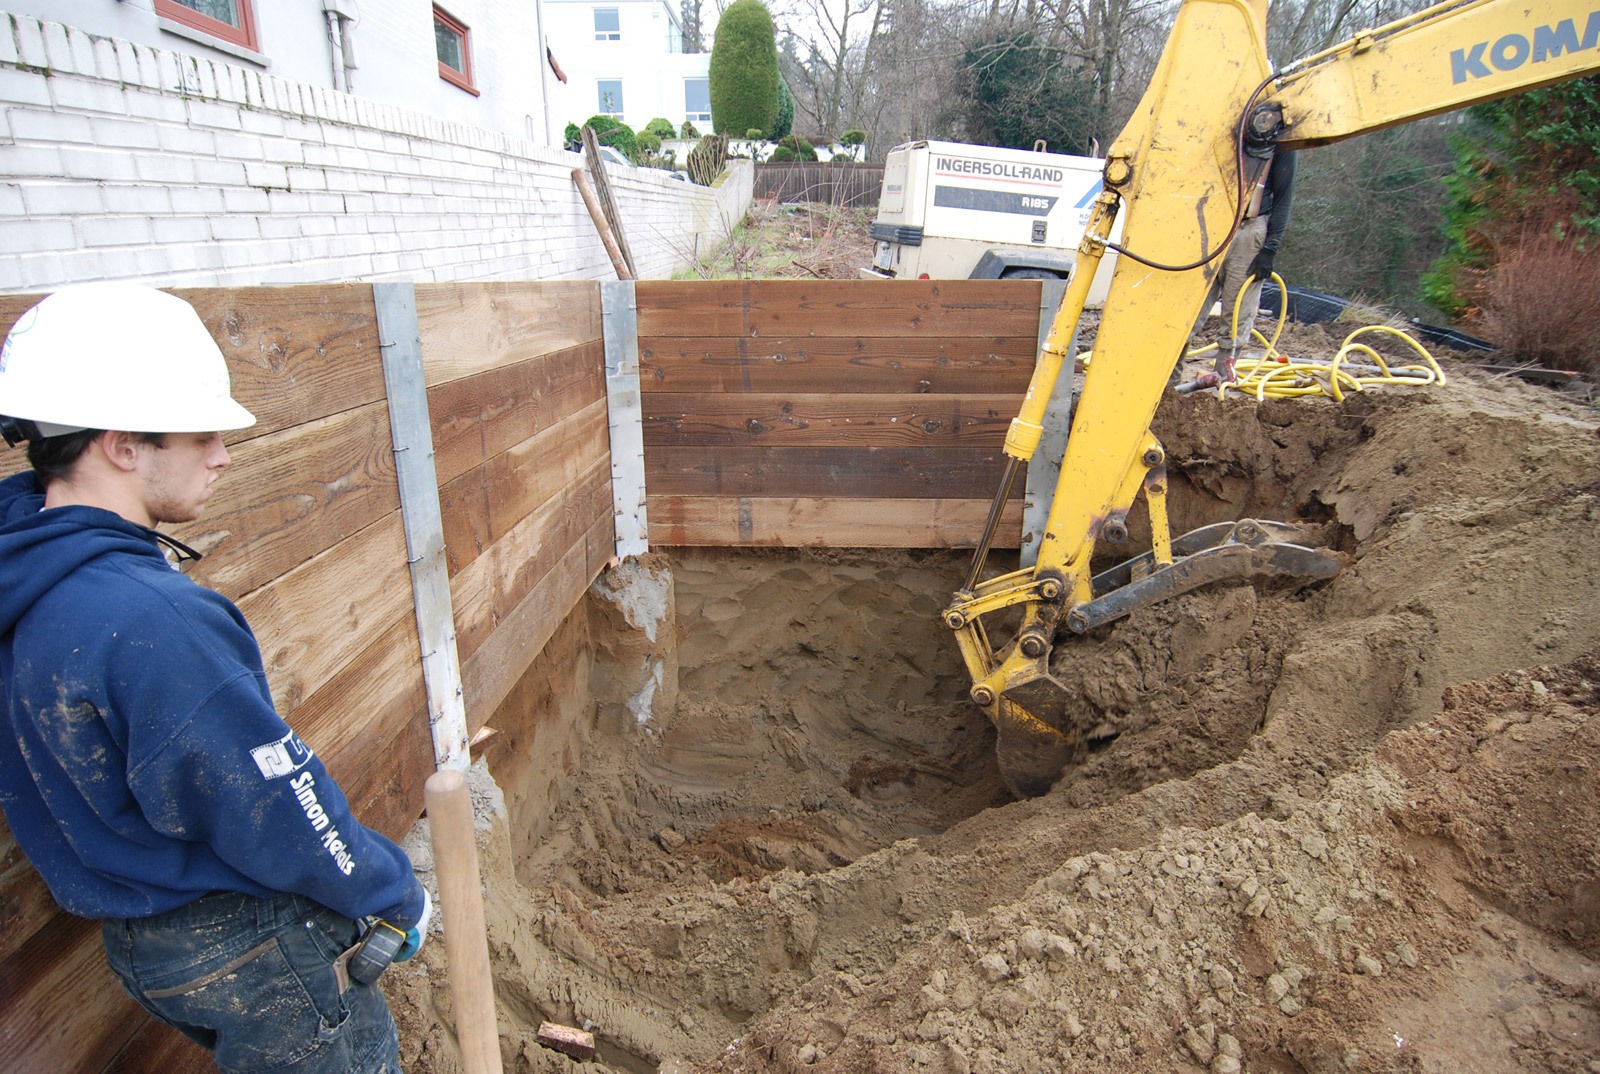
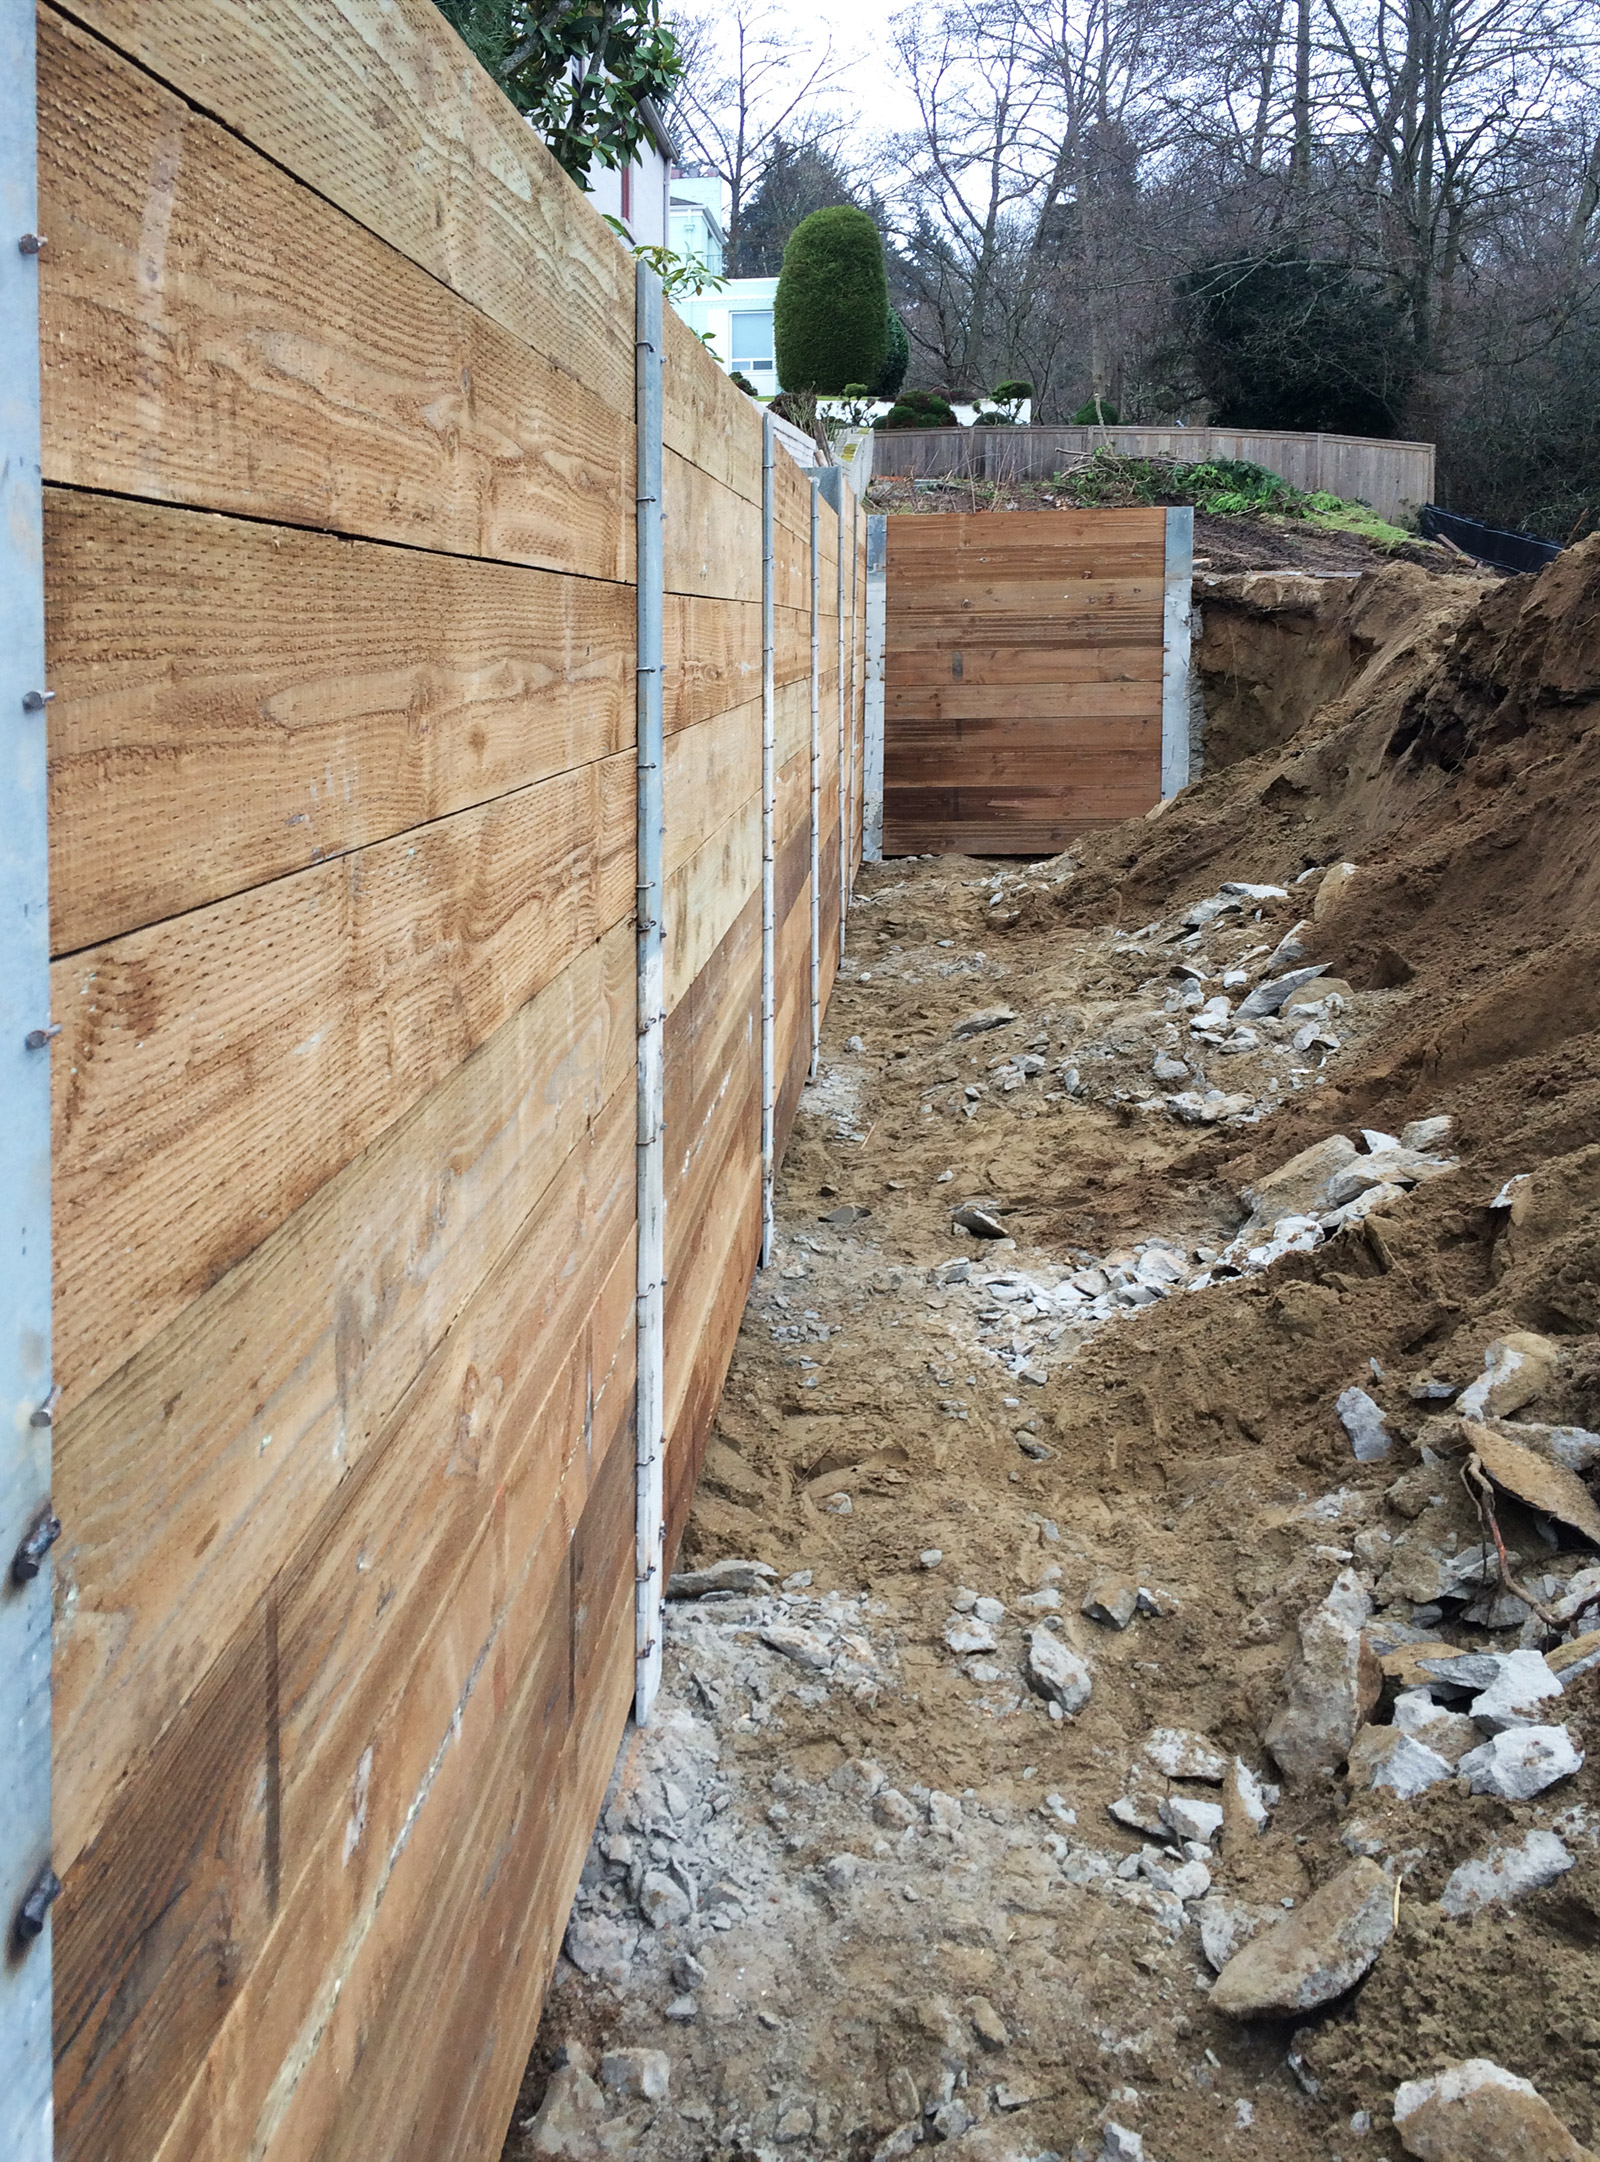
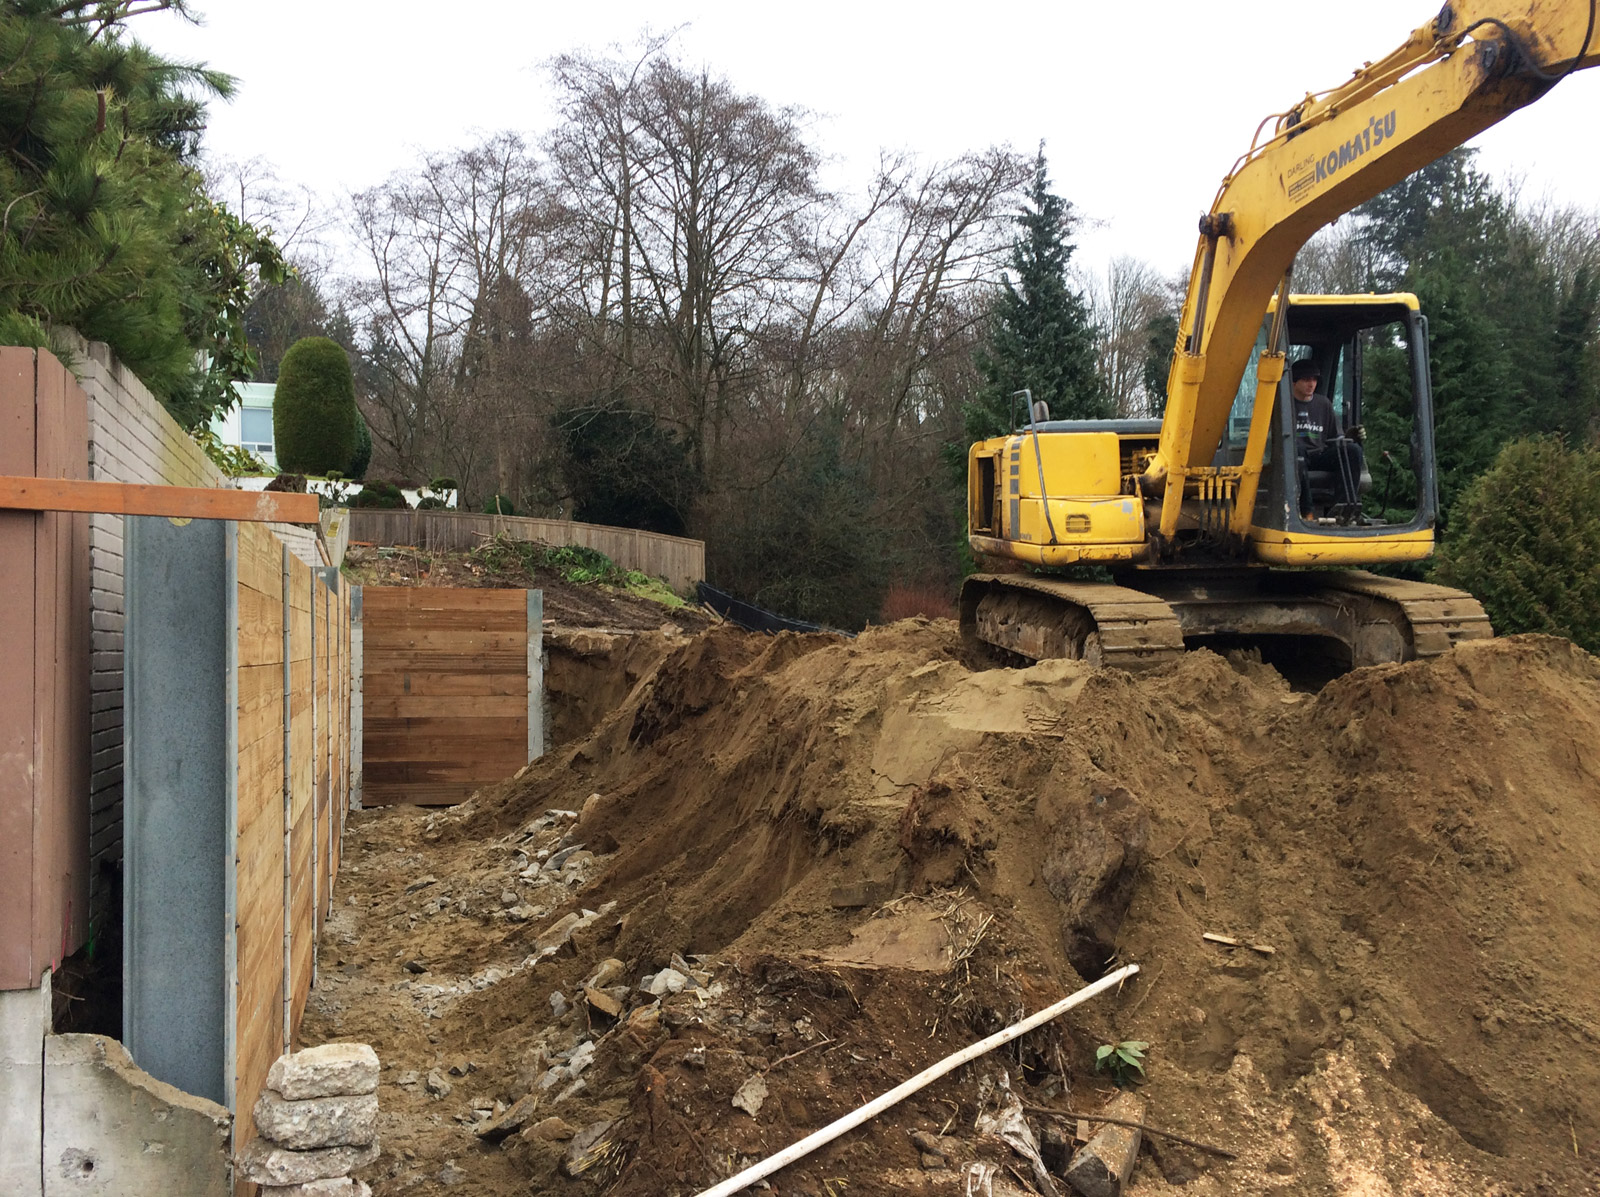
The image above shows an empty parcel on a hillside. In order to build on this lot, flat grade is required near the existing brick wall which resides on the other side of the property line. The image below shows the completed shoring wall just inches away from the property line and brick wall, with the neighboring house in the background.
How is shoring constructed?
1. The structural engineer’s drawings are reviewed by the construction team and the pile locations are marked on site.
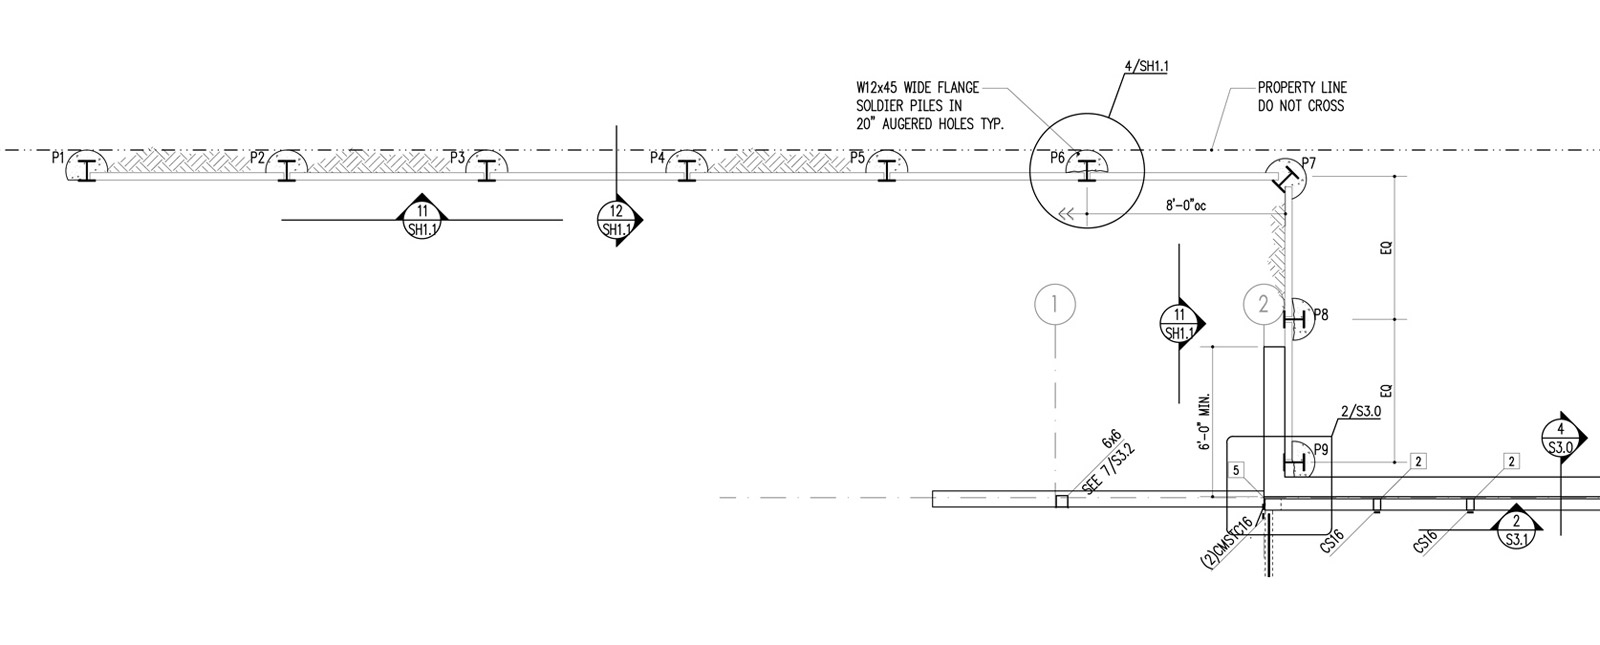
[Drawing by AJP Engineers]
2. Early survey information is reviewed, control points are established on-site, and the property line is confirmed if shoring is present along the property line (which it nearly always is). With this information in hand, the team can safely and legally proceed with shoring installation.
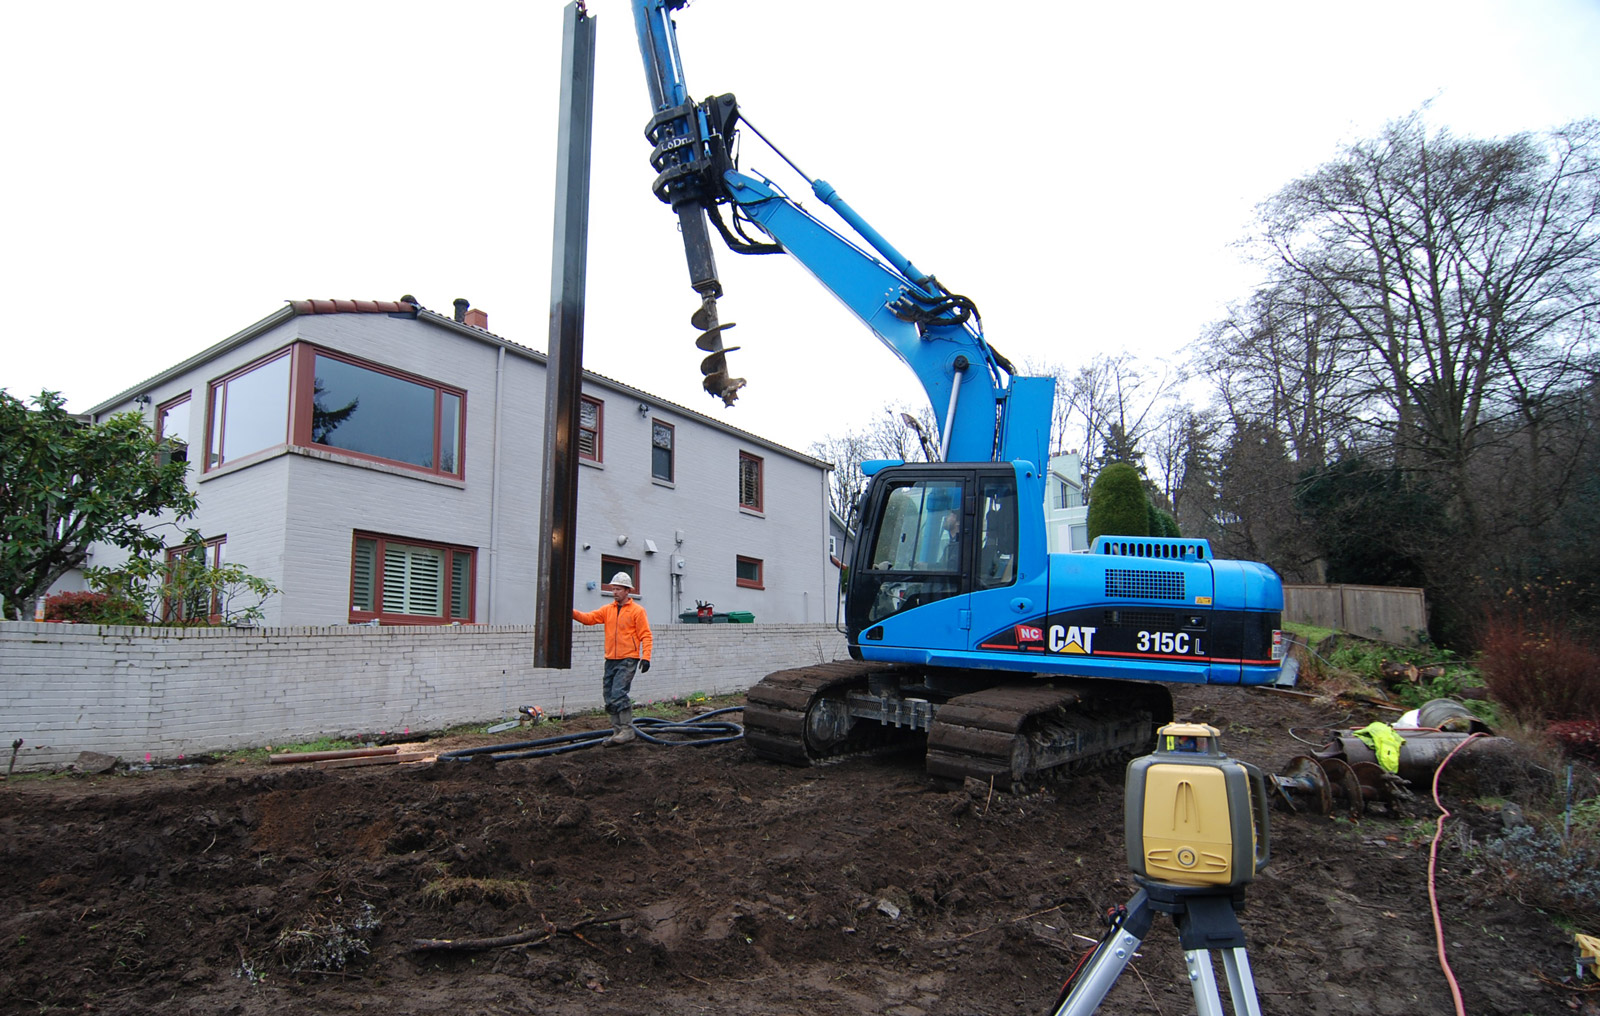
3. The hole for each pile is augered one-by-one and the wide flanges are dropped into place. The wide flange section can vary depending on the project, however W12s are often used in residential applications; this requires the augered hole to range anywhere from 18 to 24 inches in diameter. In the image below, the drilling rig has just completed a 24 inch diameter hole and is lifting a W12x45 (that’s 12 inches deep and 45 pounds per linear foot) into place.
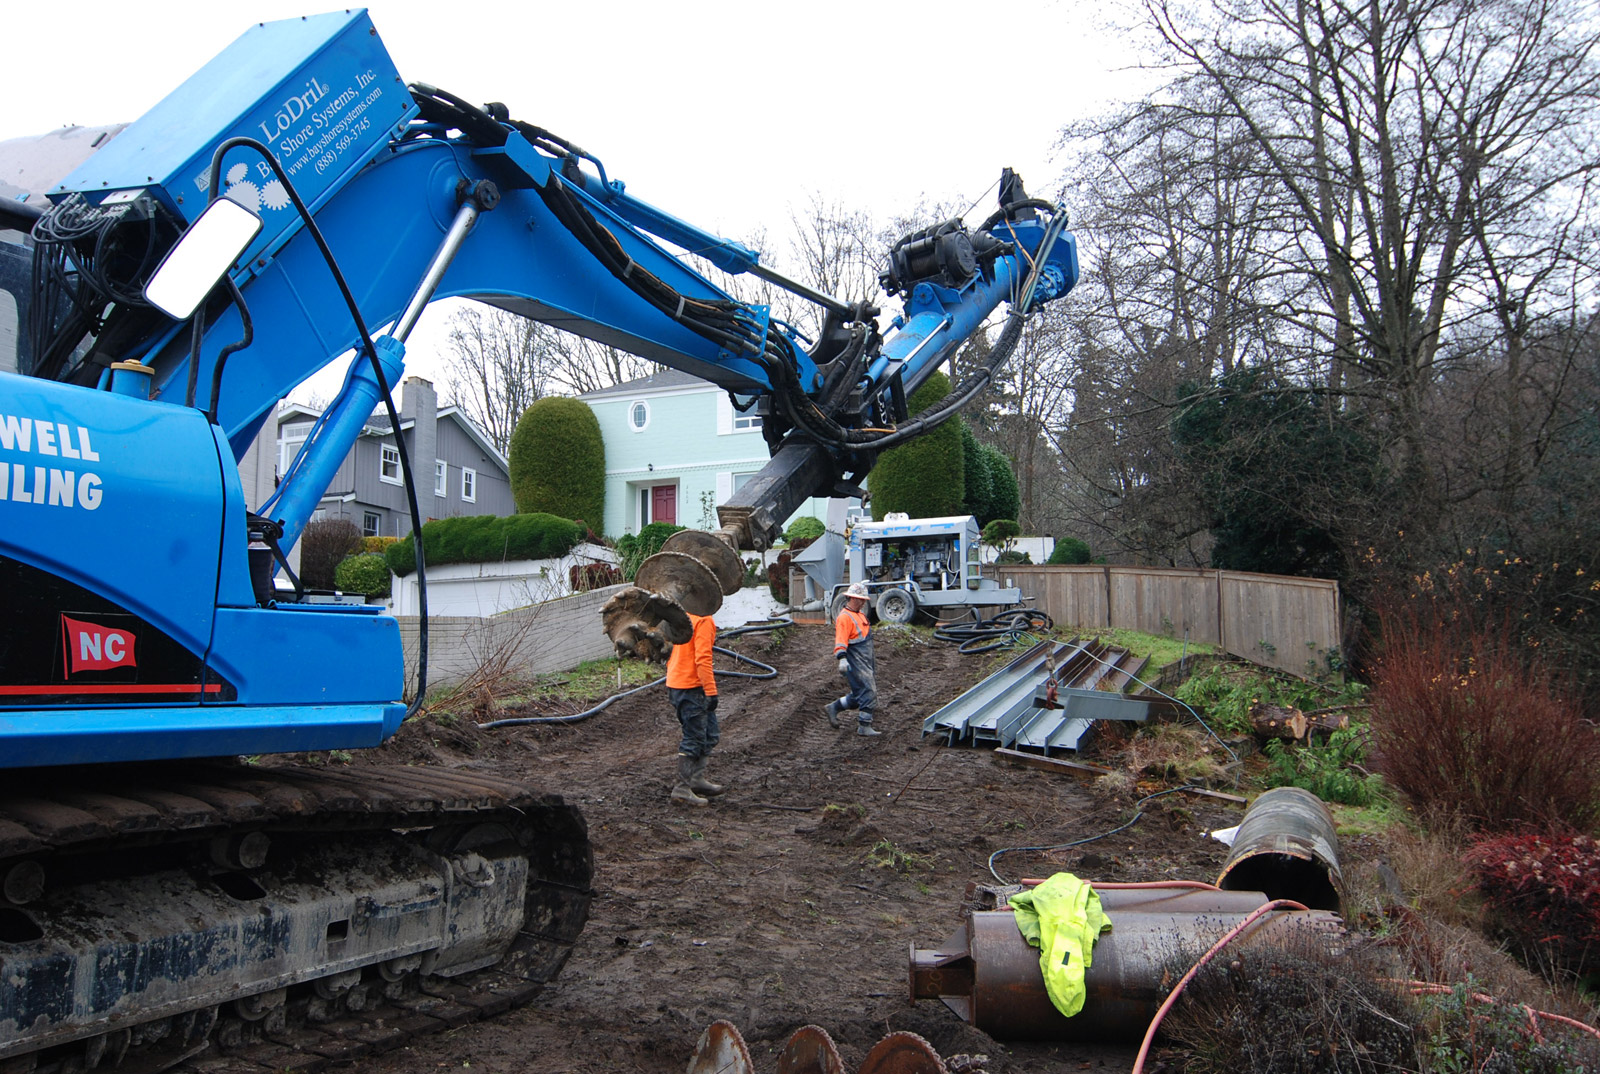
In the event of poor soil conditions, where the soil would collapse in on the hole, an auger cast is used in conjunction with the drilling. A steel sleeve follows the drill to the bottom of the hole, as the drill retracts, the dirt is pushed upward and replaced with concrete. The wide flange is then inserted into the concrete filled hole. The image below shows the steel sleeves along with a pile of wide flanges in the background.
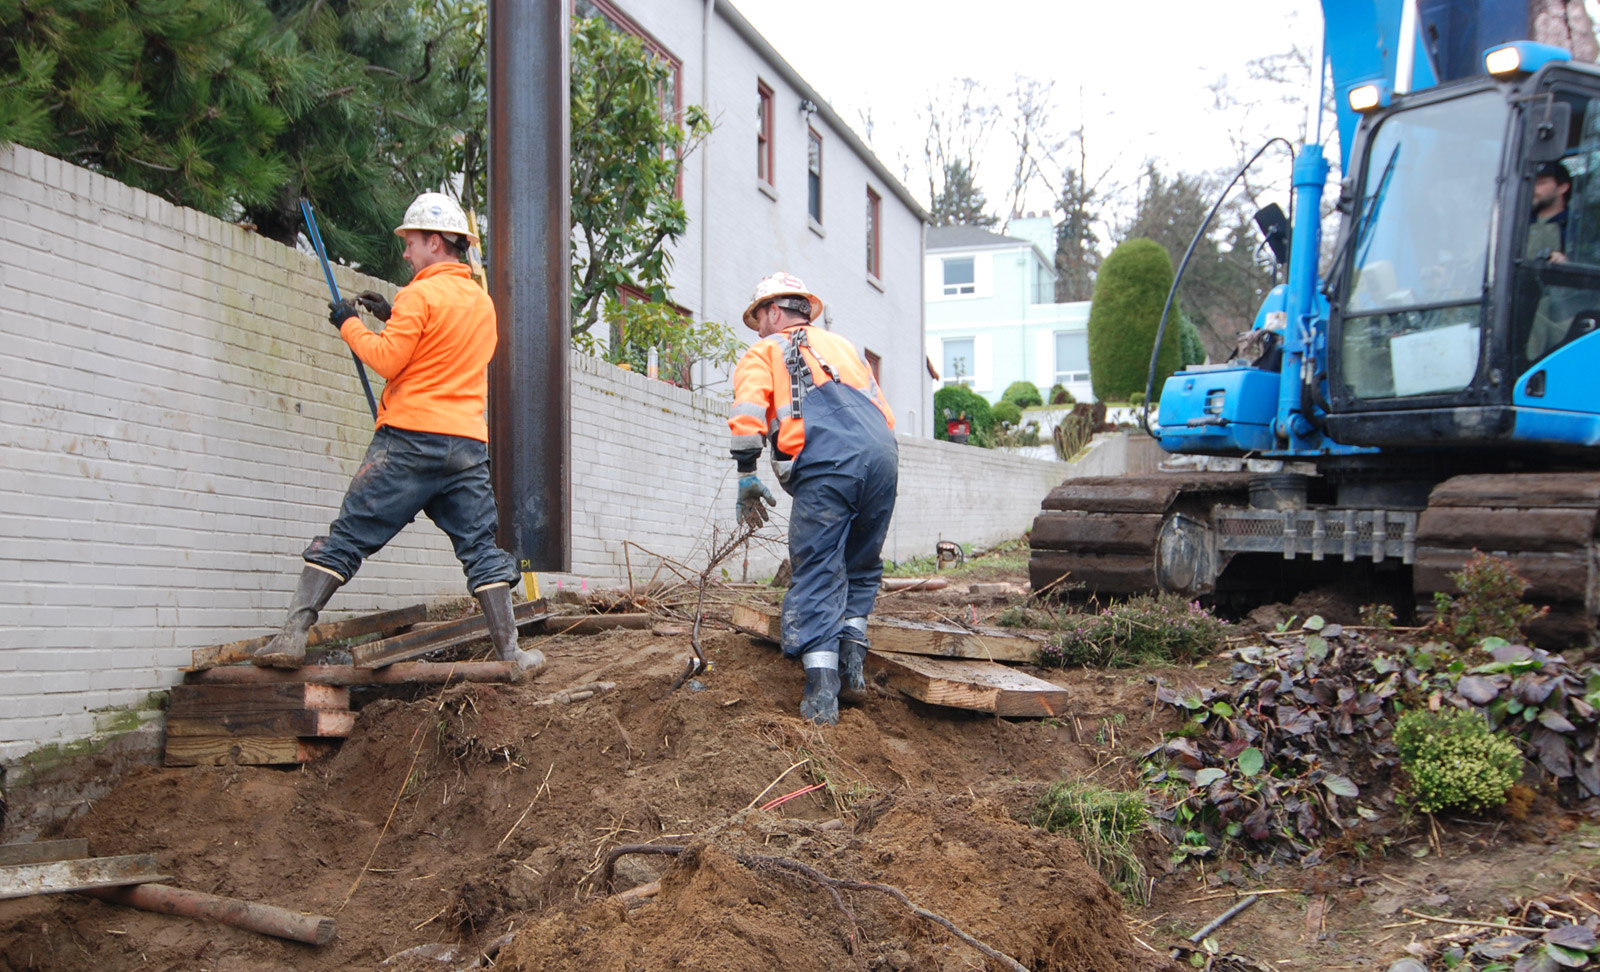
The wide flange is carefully set into place in the image below.
4. The augered holes are filled with structural concrete up to the level of the proposed grade (this is the intended grade once the earth is removed from the low side) and lean concrete from the proposed grade to the top of the pile.
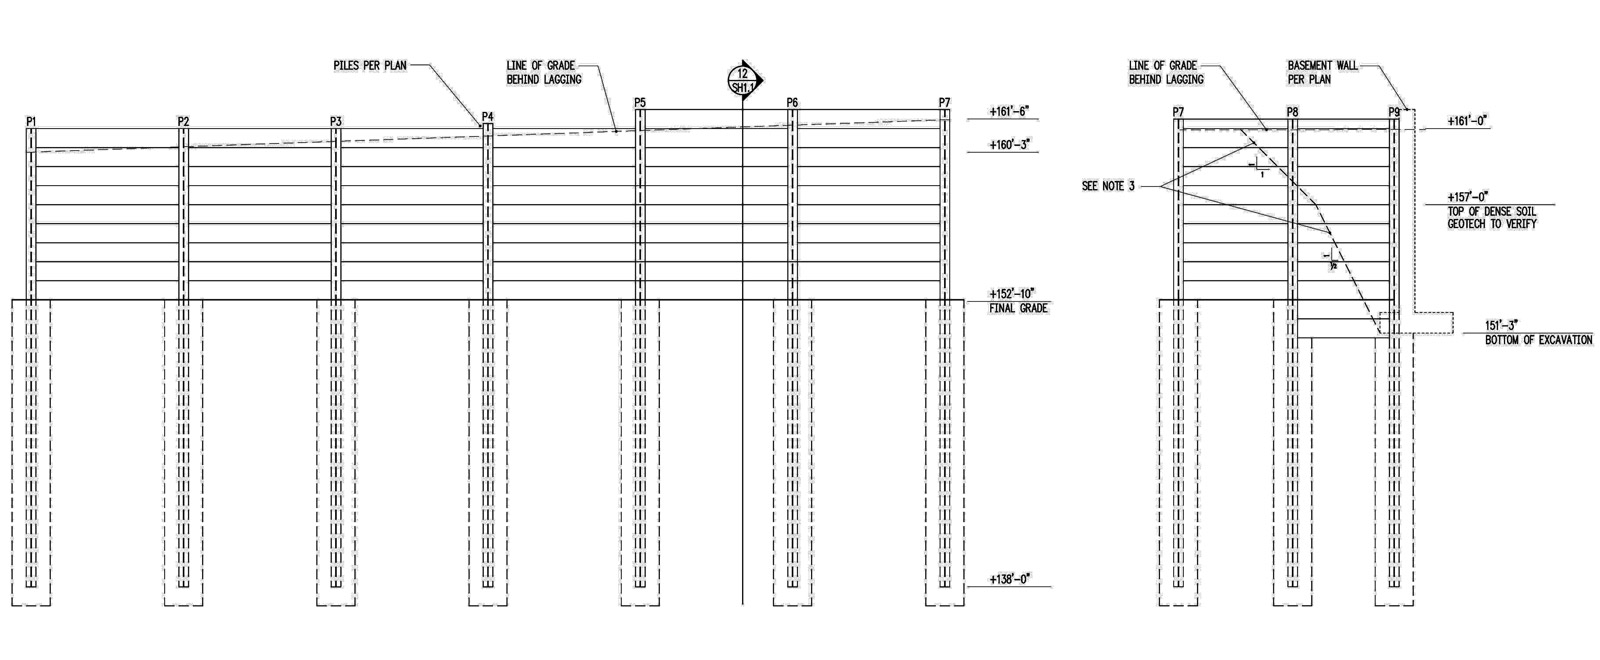
[Drawing by AJP Engineers]
The elevation drawing above identifies the row of piles and indicates their height and depth. The piles on this particular project range from approximately seven to ten feet of retained earth. The approximate rule of thumb for shoring is 1/3 retainment to 2/3 below grade, however the engineer’s drawing should always govern. The plan drawing below shows a typical wide flange encased in a concrete cylinder with lagging on both sides.
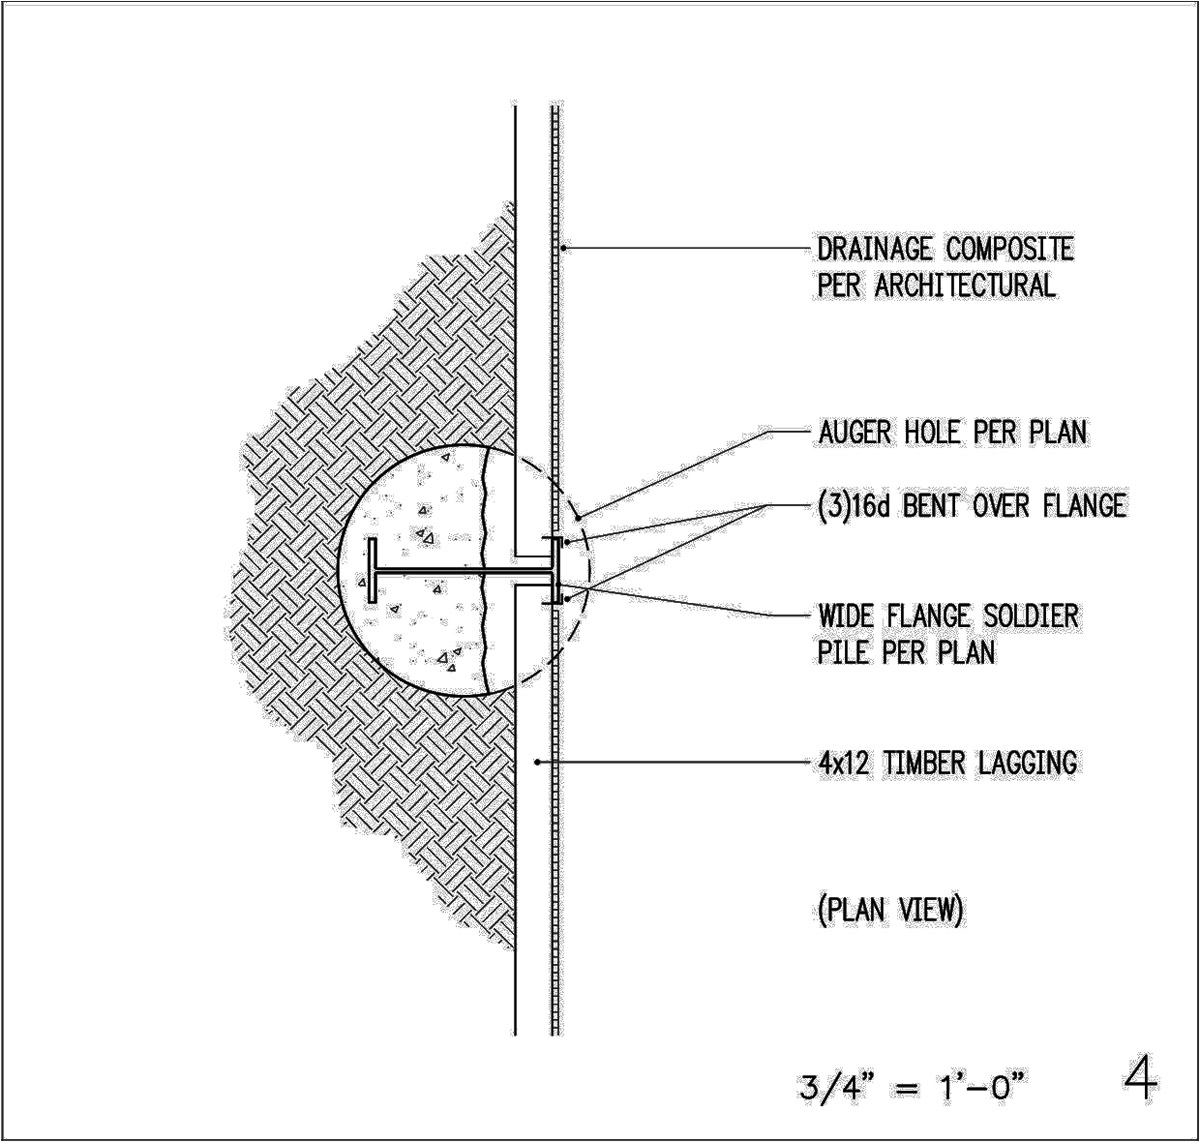
[Drawing by AJP Engineers]
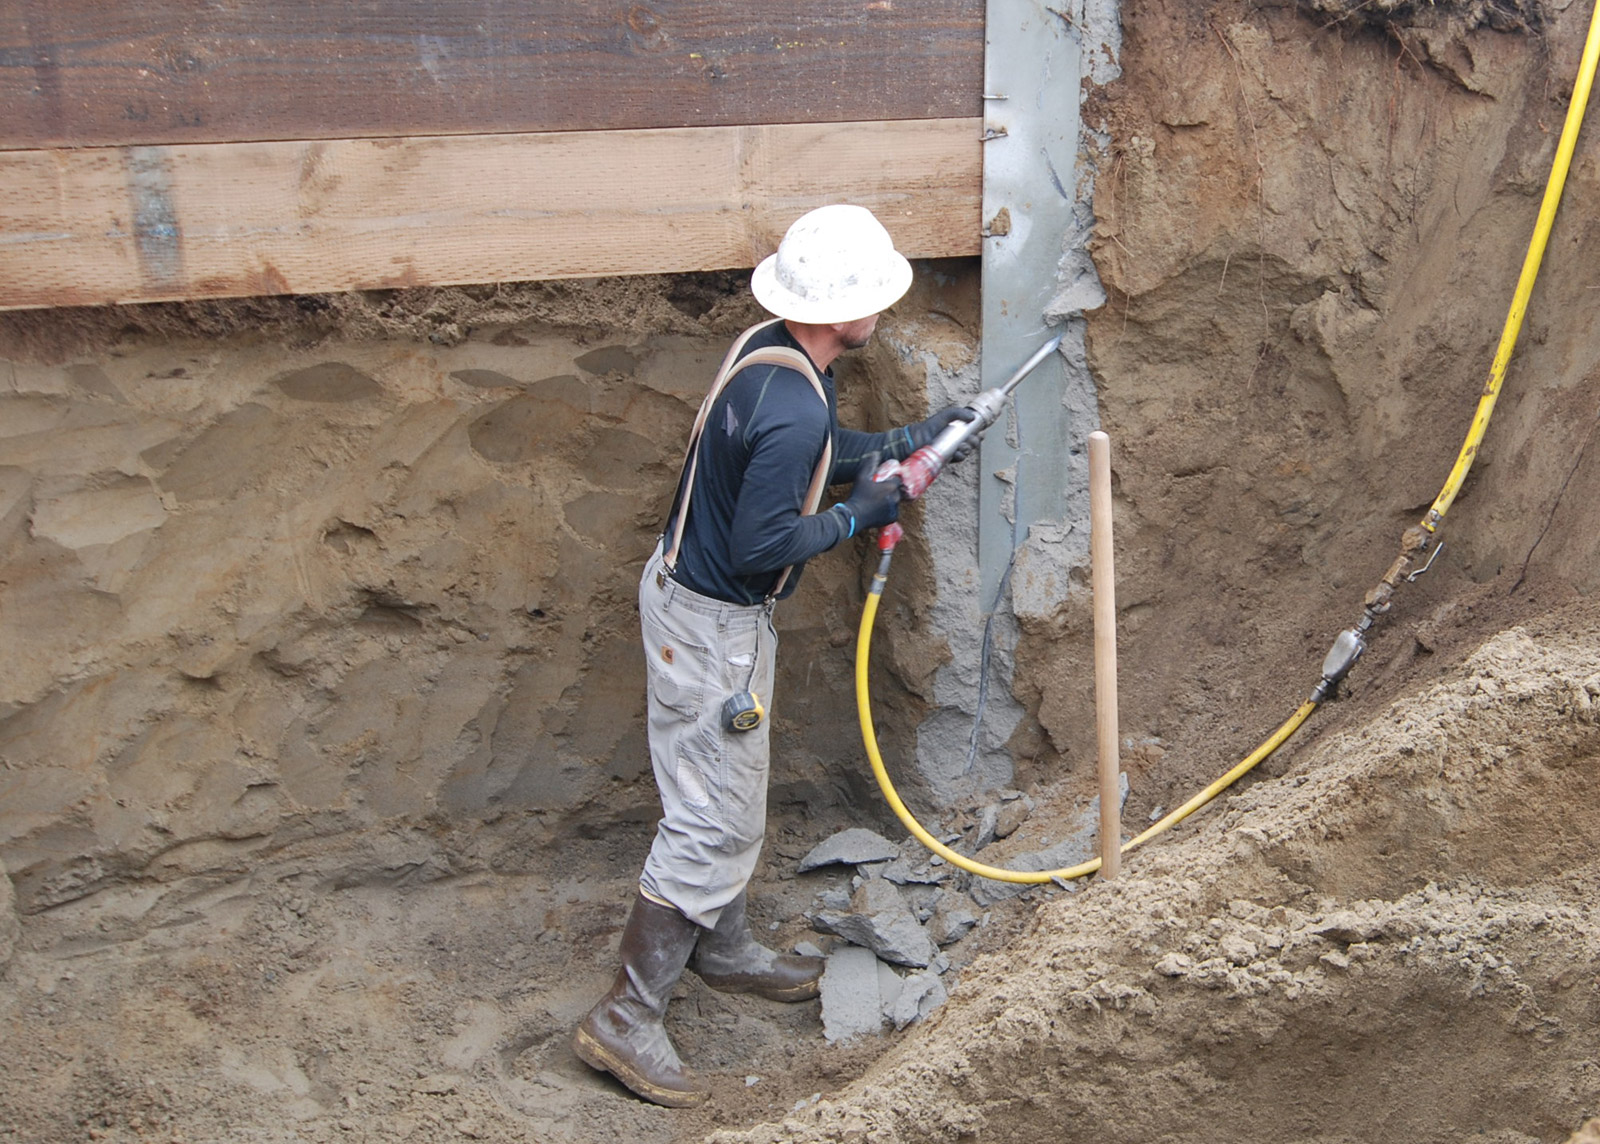
5. The top five feet of earth is removed and the lean concrete is chipped out where the lagging will be placed. Lean concrete is used precisely because it is brittle and can be removed relatively easily with a pneumatic jack hammer.
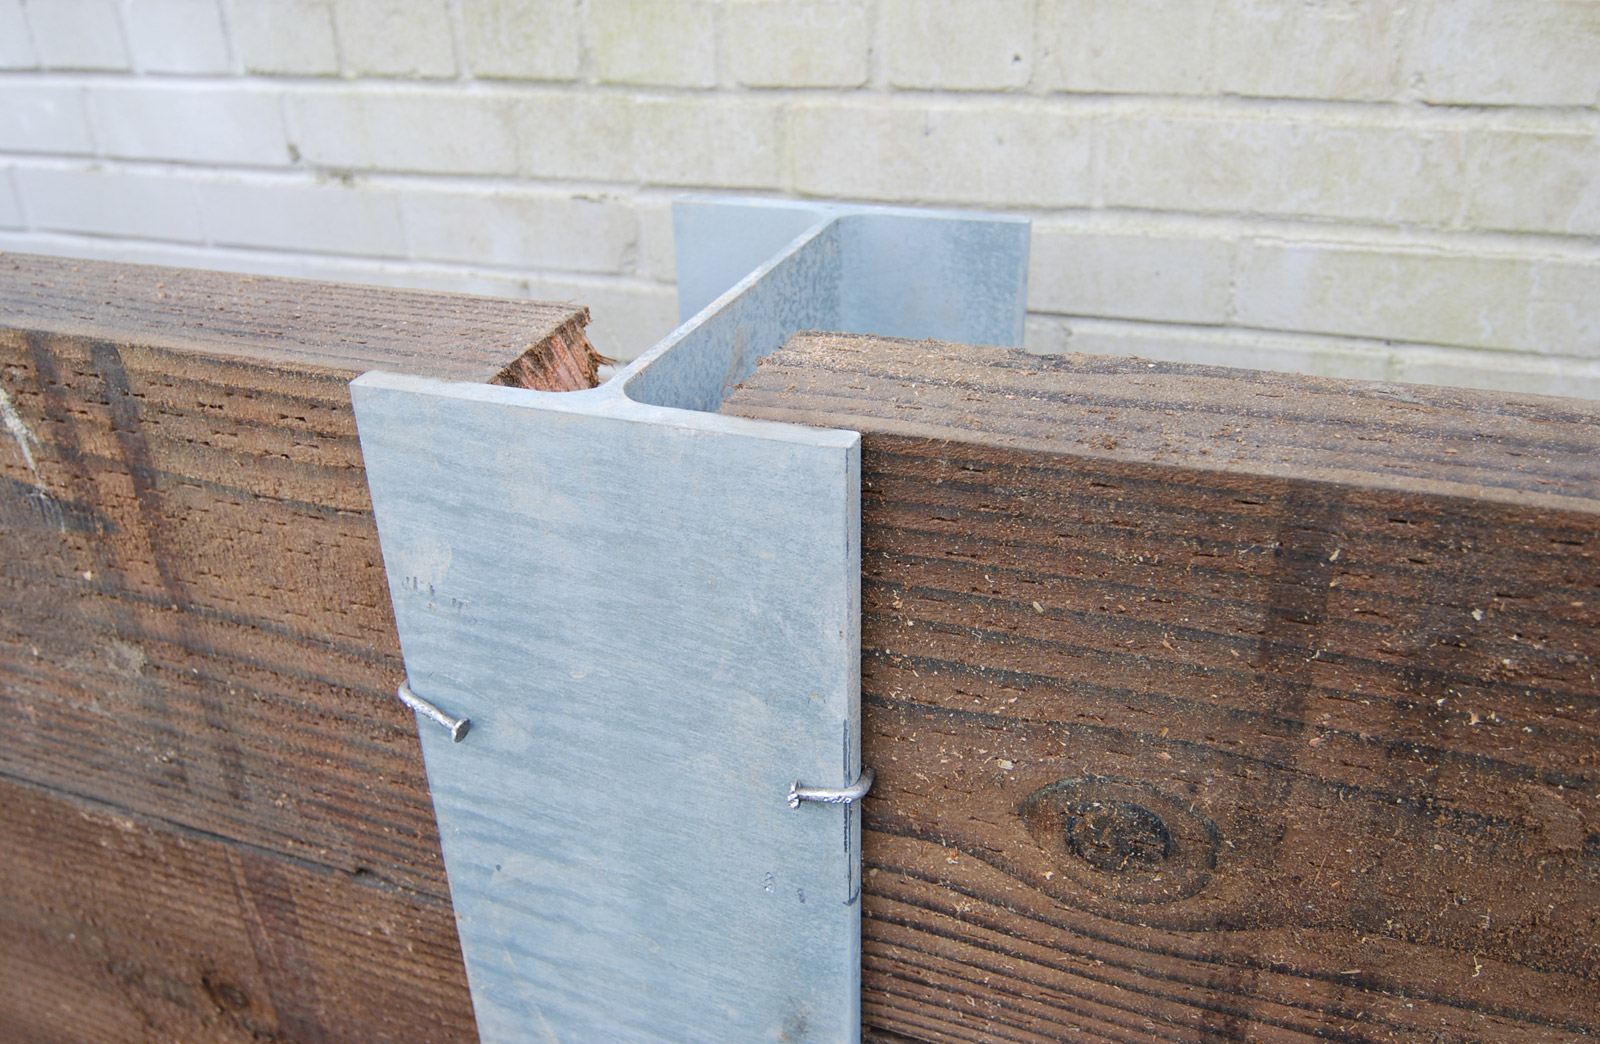
6. The top five feet of lagging is installed (often referred to as a five-foot lift). The lagging is generally made up of weather-treated 4×12 lumber, cut slightly longer than the spacing between the piles and angled into place. The height of the lift may vary from one job to the next depending on the quality of soil and the engineer’s drawings.
Each 4×12 is then temporarily fastened to the wide flange with a bent nail or other method to hold it in place.
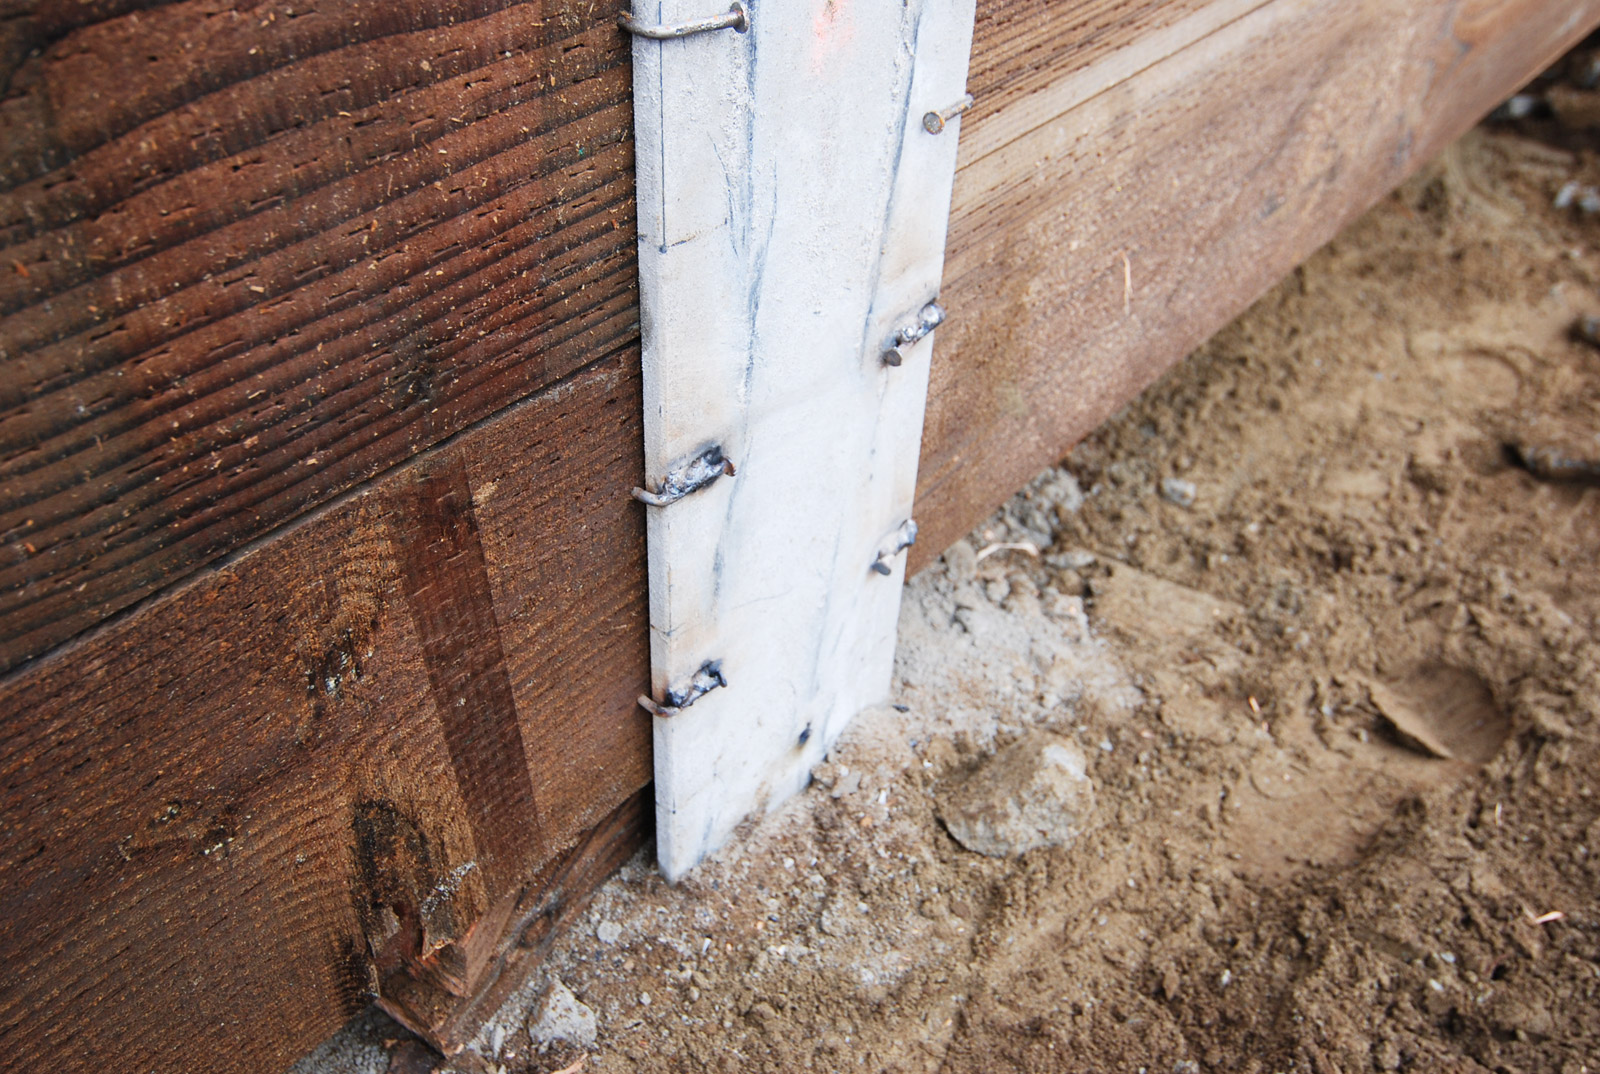
The nails of the 4×12 at the bottom of each lift are welded to the wide flange so that the 4×12 acts like a beam, temporarily supporting the lagging above.
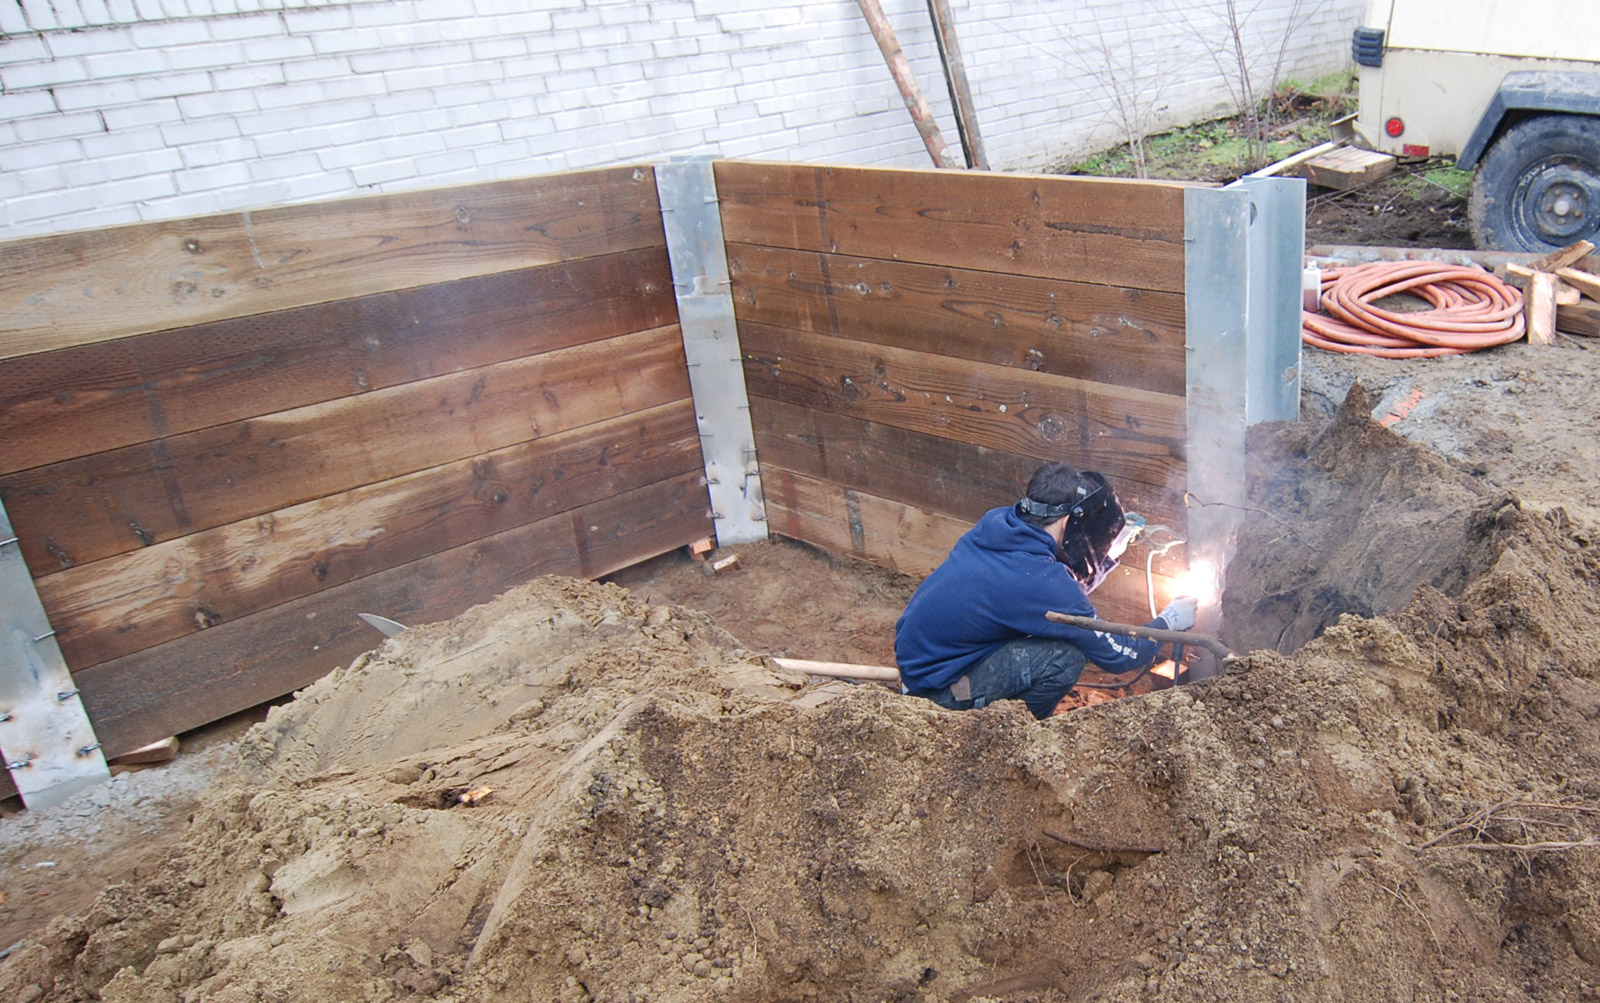
Once this five-foot lift is complete the next five feet of soil are dug out below and the process repeats until the bottom of the proposed grade is reached.
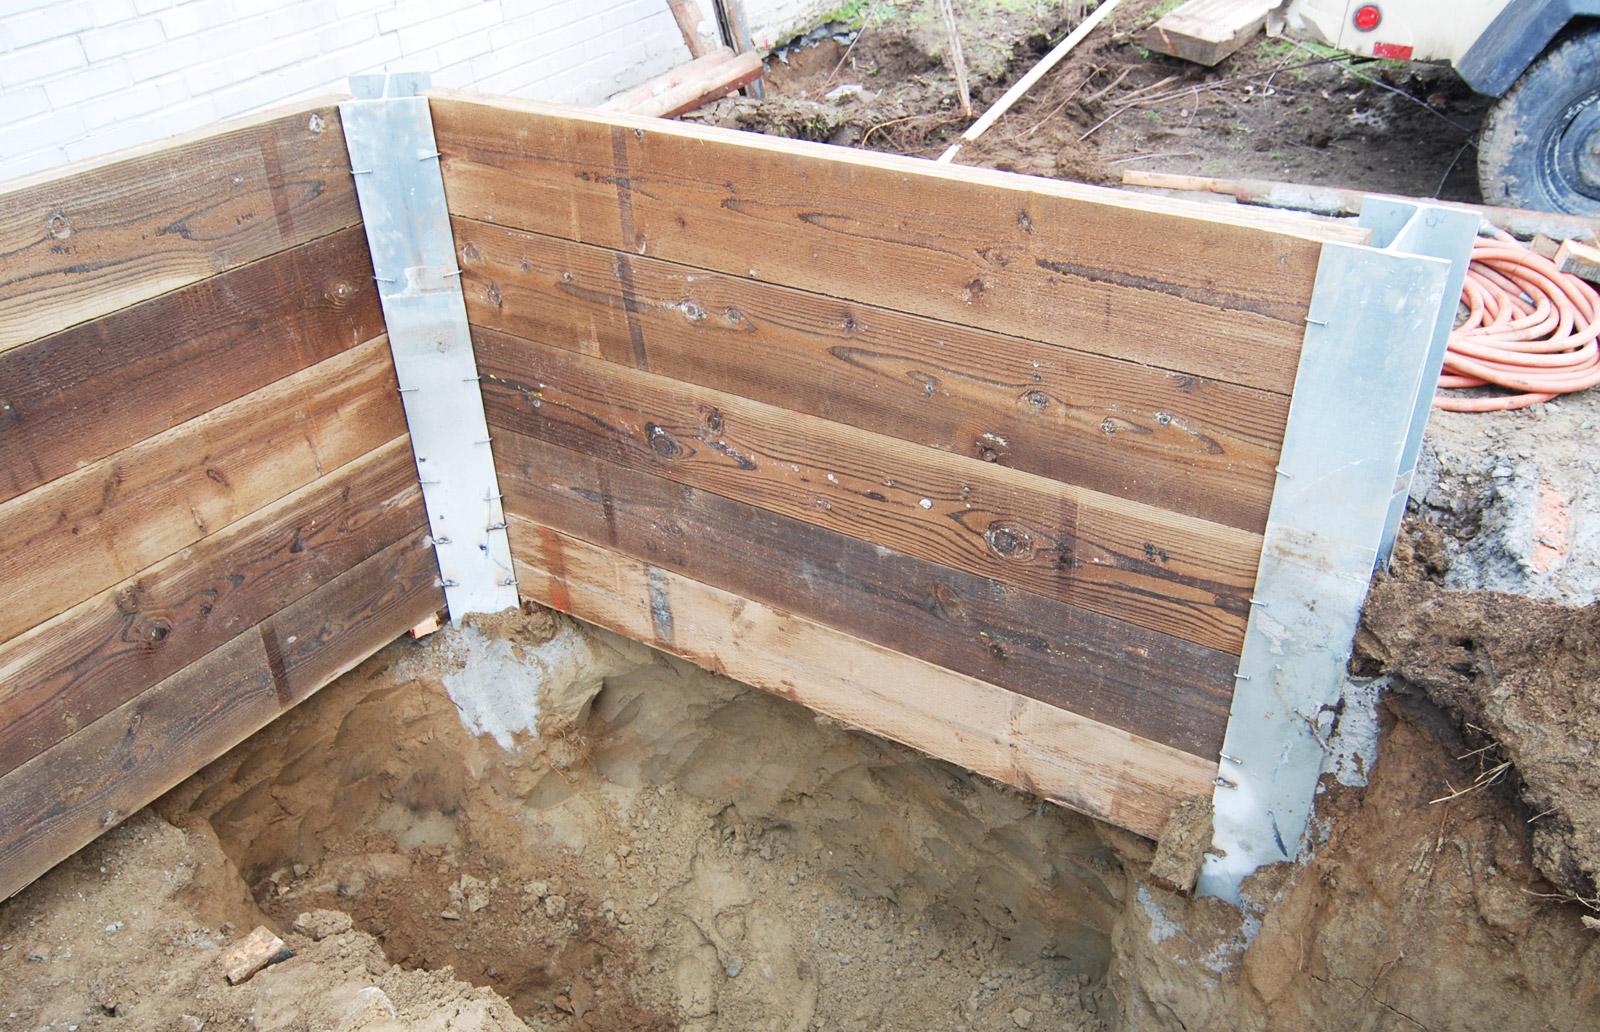
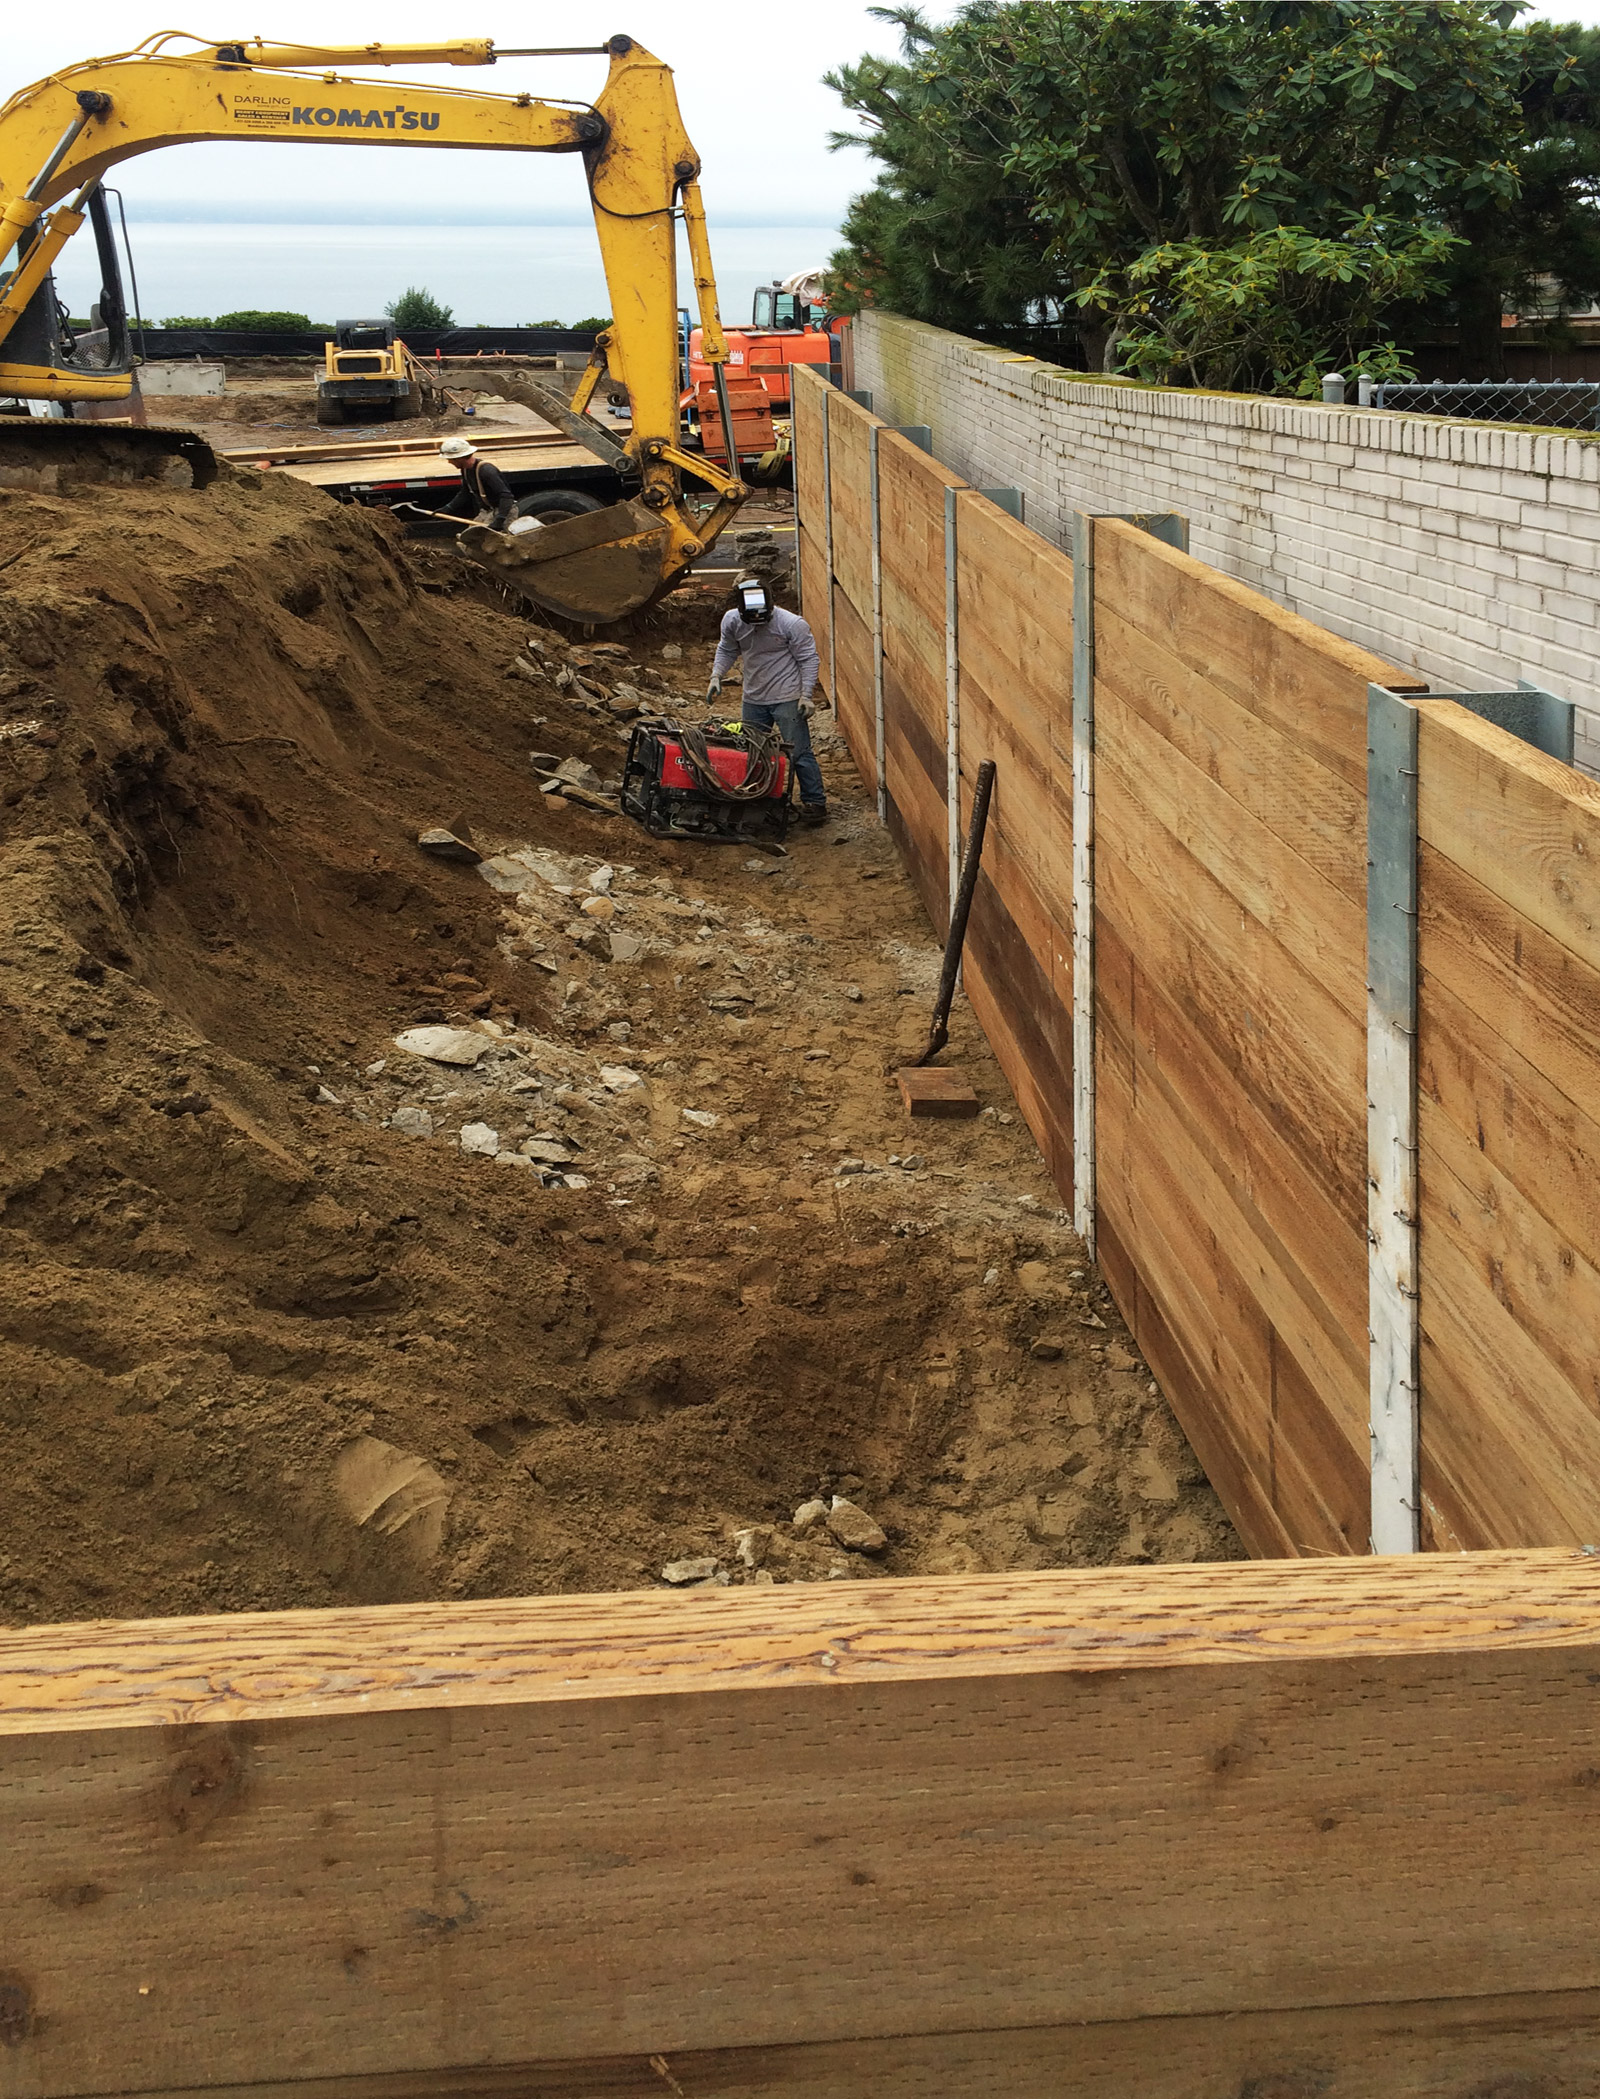
7. With the bottom lift of lagging installed the entire lagging wall can now bear directly on the grade below. The nails are removed, or ground down (where welded) and when the entire process is done correctly, the shoring has a nice, clean look.
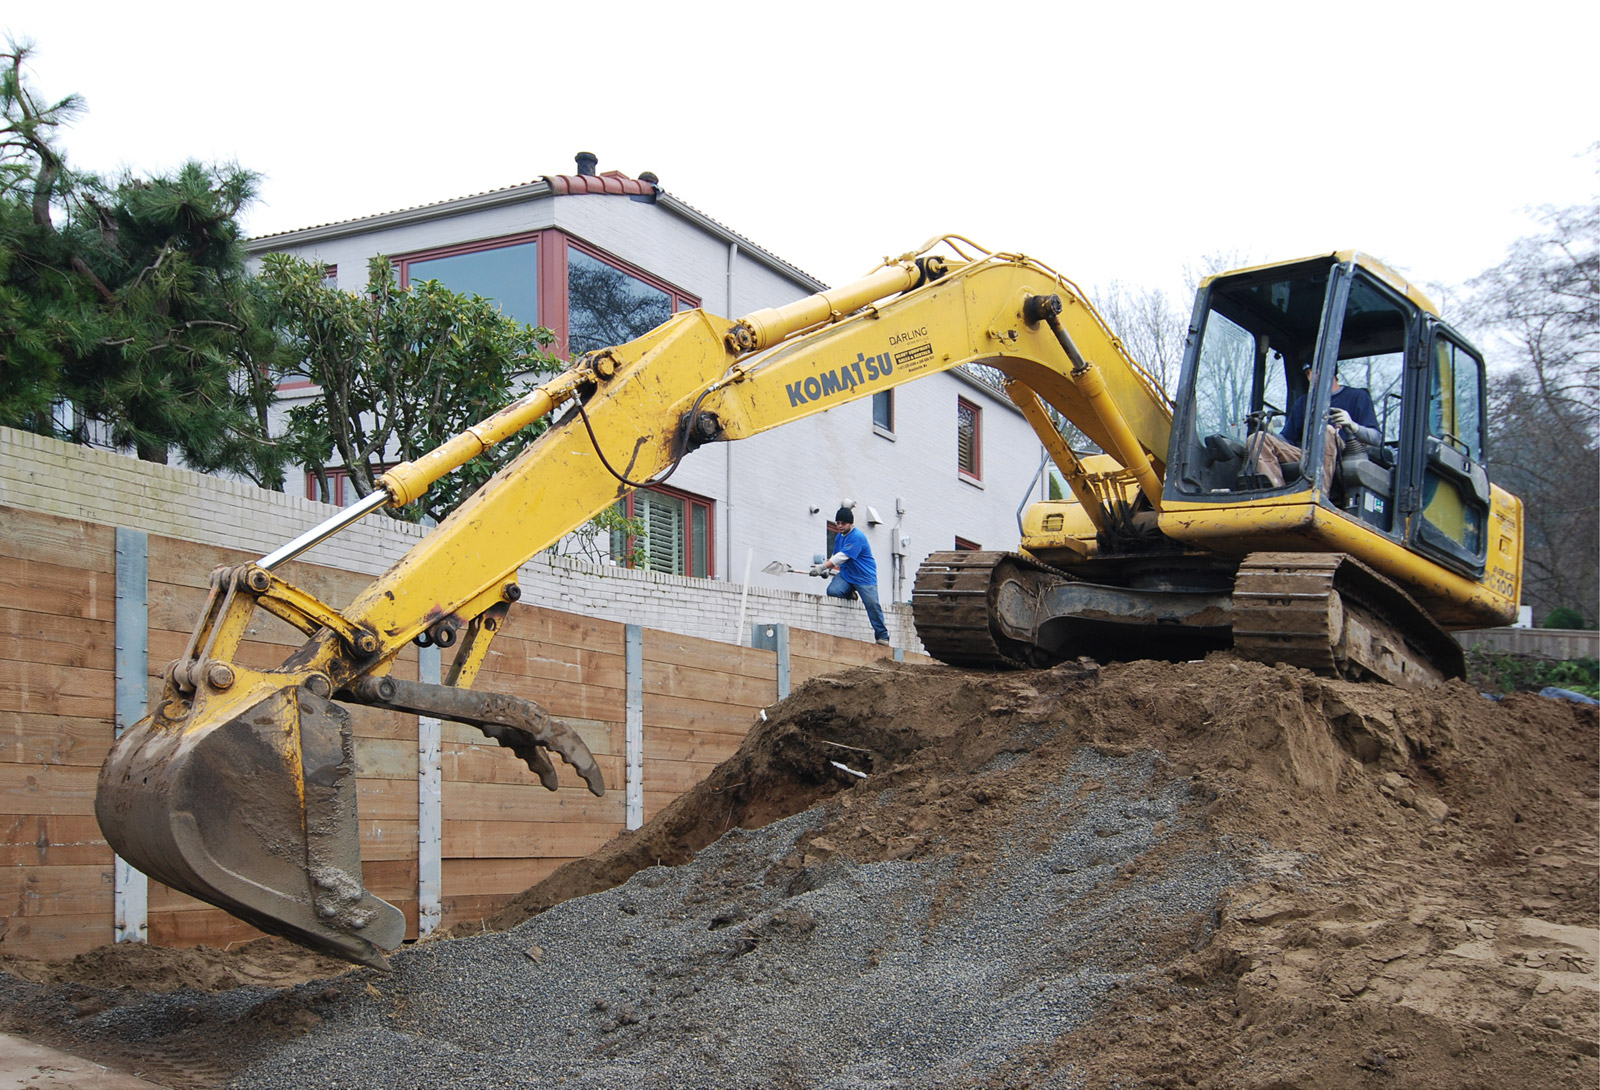
8. At the completion of the shoring install, the area behind the wall is ready for drain mat or pea gravel which provides for free-draining of future storm and groundwater. A quarter inch gap is typically left between the lagging to allow water to pass through the drainage material, then the lagging gaps, ensuring proper drainage at the neighboring property. From there, final backfill material is placed and the remaining earth at the low side of the wall is removed.
How much does shoring cost?
This can vary somewhat since there is an upfront cost for machine mobilization and getting other equipment and materials prepped and available at the jobsite. Our rule of thumb is $4000 x the number of soldier piles for the project.
How much time does it take to install shoring?
This can also vary depending on site characteristics, but it’s generally safe to assume a full day for mobilization and delivery, an install rate of five or more piles a day, and a similar install rate of one day per five runs of lagging (including careful excavation). Drainage material and backfill will then take an additional day.
What are some important considerations of shoring?
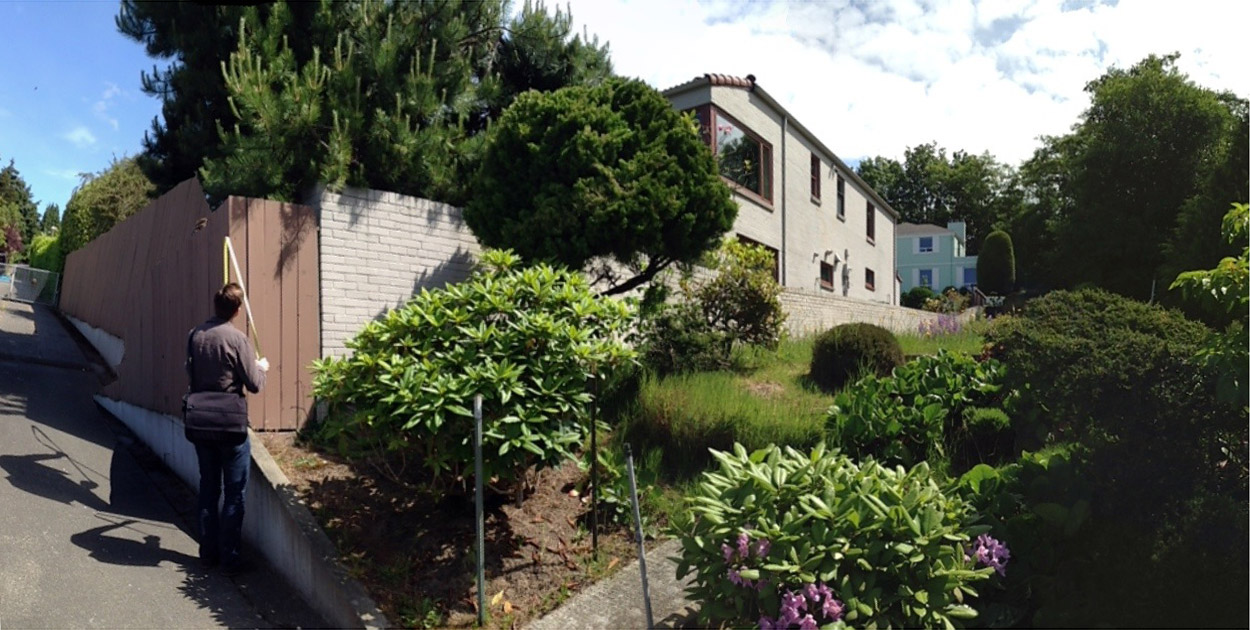
Because shoring is used in tight circumstances, it’s usually in close proximity to either a property line, another structure, or both. Property lines and structures are often accompanied by neighbors and it’s a wise I idea for someone on the design or construction team to make an introduction and explain the shoring process prior to large, intimidating machines showing up on site. It’s important to reassure the neighbors that the shoring process is being implemented to ensure the stability and safety of their land and home.
For the same reasons as above, it is highly recommended that any adjacent structures be monitored and photographed before and during the shoring process for potential movement, or more importantly, to prove that no movement occurred.
And as touched on previously, a shoring system may be required to include drainage measures. This can be as simple as leaving gaps between the lagging to let water naturally drain through the shoring wall or as complicated as installing drainage pipes and waterproof drainage mats to guide groundwater. The drainage design should be coordinated with the building department, geotechnical engineer, civil engineer, and structural engineer.
Huge Disclaimer
The information presented in this post is general, the data is rule of thumb, and photos/drawings are specific to a particular job. When designing and building a shoring system, the appropriate professionals in your area should always be consulted. In most jurisdictions, a geotechnical engineer and structural engineer are mandatory. The aim of this post is to provide a basic understanding of residential shoring systems.
Wrap up
Shoring is an impressive process to observe, and this project was a good example to document. It’s tough work that also requires smarts to pull off correctly, so we’re thankful for the hard-working team on site that makes it happen, all while putting up with our cameras and questions.
Cheers from Team BUILD