


Despite the growing popularity of rainscreen systems, we find that most people don’t know much about them and don’t understand why they are important to architecture. Like most innovative building systems it was the Europeans that first introduced the concept. One of the first examples we remember seeing is the IRCAM music school completed in Paris in the late 70’s by Renzo Piano. In the last decade we’ve noticed a growing interest and use of raincreens on buildings and houses here in the northwest. The concept of a rainscreen is to create an air gap between the siding material and the water-proof surface. This allows the structure to breathe a bit. Current building codes require structures to be sealed up so tightly that it’s causing unforeseen problems. More traditional siding systems often trap moisture between the various layers of materials. Differences in air pressure between the outside and inside of a building can actually drive air and, more dangerously, water into the building. The rainscreen system uses a water proof membrane to keep the water out, but it allows a bit of air movement – it’s like a Gore-tex wrap for your building or house. This membrane is a softer, more delicate material, it’s also sensitive to sunlight; UV rays will eventually break down the product if directly exposed. This is where the siding comes in. The siding, or skin of the building, is required for protection from physical harm like soccer balls and also to shield the membrane from sunlight. There is typically an air gap between the skin and the membrane of approximately one inch. If detailed and constructed correctly the system allows the building to breathe, allows the inside and outside air pressure to balance better and allows a tremendous variety of materials to be used as the skin. It is a more expensive system and requires more time and care for the installation but a well made rainscreen is hot, modern and functional.

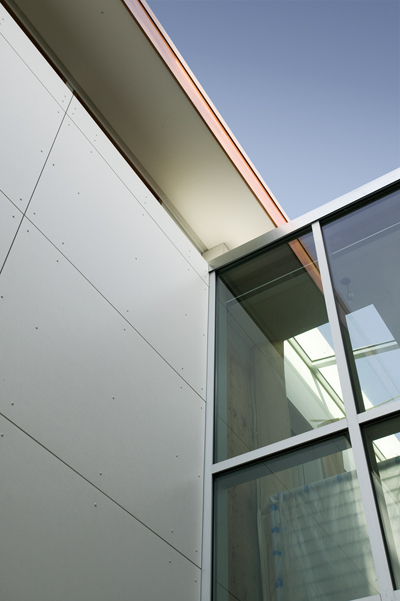
1. Panel: Panel thicknesses vary; we’ve found most of them to be 5/16” thick. Panel sizes are typically 4’ x 8’ and 4’ x 10’. Products that we’ve had success with so far are Cembonit by CBF, Hardie-Panel, Swiss Pearl, Fincolorply, and Cor-ten steel.
2. Fastener: Typically we use a #8 wood screw with a gasketed hex head. Some panel types require specific fasteners. It’s also possible to flush mount flat head screws if the panels are properly pre-drilled, and if you have a lot of free-time. The fastener geometry is typically 12 to 24 inches on center in each direction. It’s very important to line the fasteners up on a grid as the fastener pattern becomes part of the finished look of the rainscreen system.
3. Vertical Runners: Trex is a great product for this application because it doesn’t move axially and it doesn’t rot. The dimensions of the runners entirely depend on the specifications required of the panel product – we tend to use 3/4” x 3/4” strips more often than anything else. Cedar or pressure treated lumber can also be used, be cautious of the expansion and contraction of these products.
4. Air Space: The dimension of air space typically ranges between ¾” to 1-1/2” depending on the panel product specifications
5. Membrane: This membrane is basically like Gore-tex for your house – it keeps the water out but lets air through (it lets your house breathe). There are many different brands, we like VaproShield because of the products function, durability and that they just started making it in black so that the membrane disappears in the shadows.
6. Flashing: The flashing we use at window wraps (like the one above) is typically a peel & stick application. It is flexible to deal with all sorts of different situations and angles.
7. Sheathing: You can either use ½” plywood and install flat blocking at all of the panel joints or use ¾” plywood behind all panels – we recommend the ¾” as it is MUCH less work. In either case you’ll want to use CDX plywood – don’t use that OSB crap here.
8. Framing: Typically 2×6 framing at exterior walls but this could vary depending on the situation.
9. Reveal: Typically ¼” but this varies with the panel product and desired finish look.
Okay, let’s get to some examples around the Seattle area:
Seattle Orthopedic Center at 2409 N 45th St
The project seems to use the Fincolorply system, or something very close to it. A very well crafted building that we recommend checking out. It displays two-different panel types.
Architect: Collins Woerman
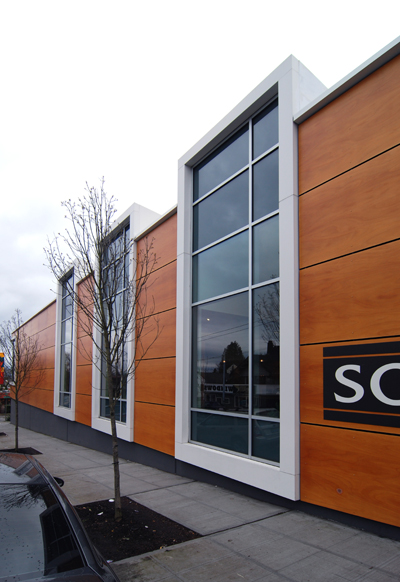
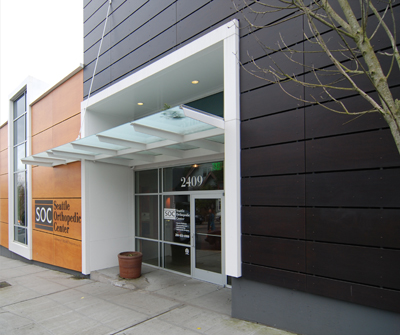
[Photos by BUILD llc]
The William H. Foege Building at NE Pacific Str & 15th Ave NE
The panels seem to be a fired clay, almost brick-like in look and texture. The building is a very impressive display of the rainscreen system
Architect: Anshen + Allen

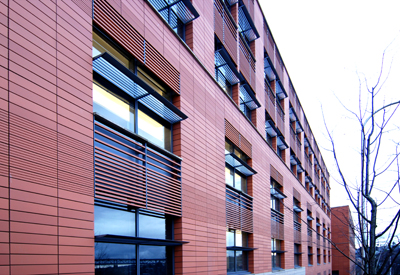
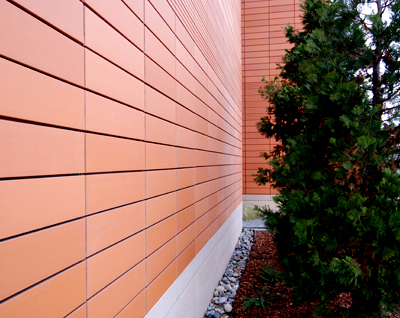
[Photos by BUILD llc]
Medina Residence near Seattle
The residence uses the Swiss Pearl system and is designed with the precision of a cabinet at the exterior. The panel system continues inside to certain areas of the interior.
Architect: BUILD llc

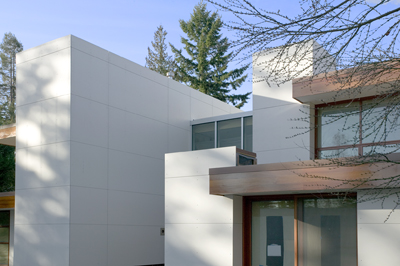
[Photos by Swiss Pearl]
Camano Cabin on Camano Island
The residence uses steel cor-ten panels as its rainscreen. The panels develop a layer of rust which continues to weather over time but protects the inner layers of the panel.
Architect: BUILD llc
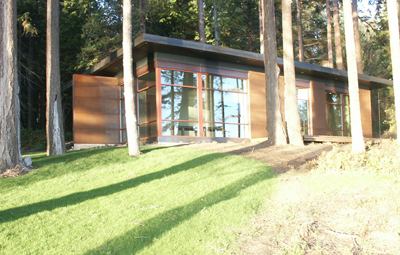
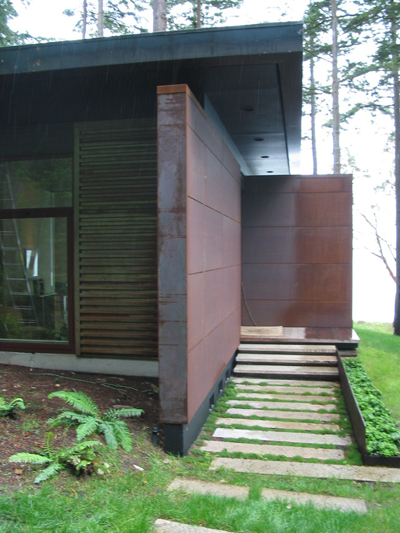

[Photos by BUILD llc]
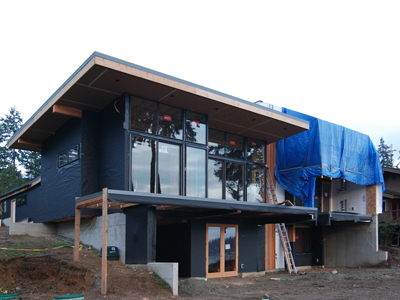
Dr. Marc Ferrin Residence on Bainbridge Island
The residence has just been wrapped with the membrane and will soon be receiving a skin of Cembonit rainscreen.
Architect: BUILD llc

[Photos by BUILD llc]
It’s taken us several years and many jobs to gather the resources and knowledge about these rainscreen systems. So why do we take the time & effort to post this info online for anyone to use and distribute for free? Because the battle against ugly, senseless architecture is a tough one and we need all the help we can get. Cheers